

☝️ For a detailed guide on how to disassemble this smartphone, check out this link: How to Disassemble Samsung Galaxy A12 (SM-A125)
❓ Common Issues with This Model:
The Samsung Galaxy A12 features a very thin motherboard and a fragile, flexible body that bends and dents easily. As a result, even minor physical impacts can cause the motherboard to deform, leading to a variety of typical malfunctions.
One such issue is the absence of display (including backlight).
This is often caused by a fragile connector, which should be replaced first. Other common problems include broken contacts under the controller, damaged traces under the processor, or internal layer breaks within the motherboard.
The phone we received had already been serviced at another repair shop, and all metal shields had been removed.


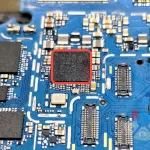
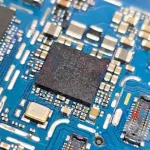
1️⃣ Secure the motherboard on the workbench and carefully remove the MT6357CR power manager using a soldering station.
⚠️ Important Note:
Be extremely cautious during this step! On the opposite side of the board is the processor, which is covered with compound and can easily overheat. Overheating could damage the processor, requiring additional rework and potentially rendering it unusable. 😒

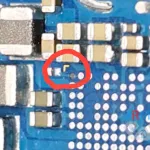
2️⃣ After removing the controller, use a desoldering braid to clean up the remaining solder and remove any flux residue.
🔍 Inspect the contacts under the controller using a microscope. You’ll notice a missing corner contact, which is a common issue in this model.


This is where breaks often occur. Fortunately, repairing it is relatively straightforward because the contact runs along the top layer, and there’s an accessible external point for soldering.

3️⃣ Restore the contact by connecting it to the nearest point using thin copper wire. Secure the connection with UV-curable solder mask for durability.

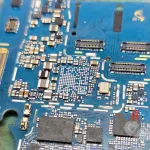
4️⃣ Apply new solder balls to the controller using solder paste and a stencil.

5️⃣ Reinstall the controller onto the motherboard using the soldering station.

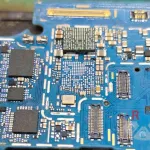
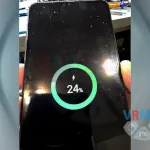
Reassemble the phone and test the results. The screen is now functioning perfectly! Now, all that’s left is to verify the functionality of the remaining features and fully reassemble the device. 😂

If you have a question, ask us, and we will try to answer in as much detail as possible. If this article was helpful for you, please rate it.