Teardown difficulty:
Moderate
Duration:
9 min

Recommended tools

Disassembly/Repair of the mobile device Nokia 7.1 TA-1095 with each step description and the required set of tools.


Specialist in content creation, distribution and content management.


How to disassemble Nokia 7.1 TA-1095, Step 1/1 How to disassemble Nokia 7.1 TA-1095, Step 1/2

Step 1.

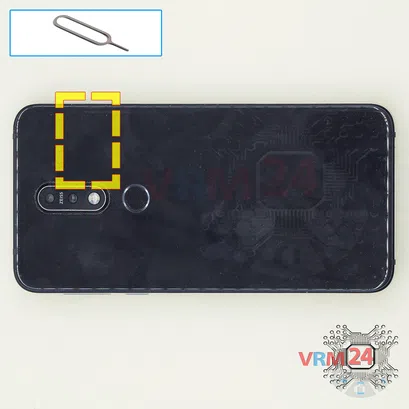
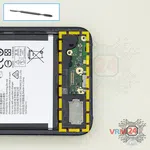
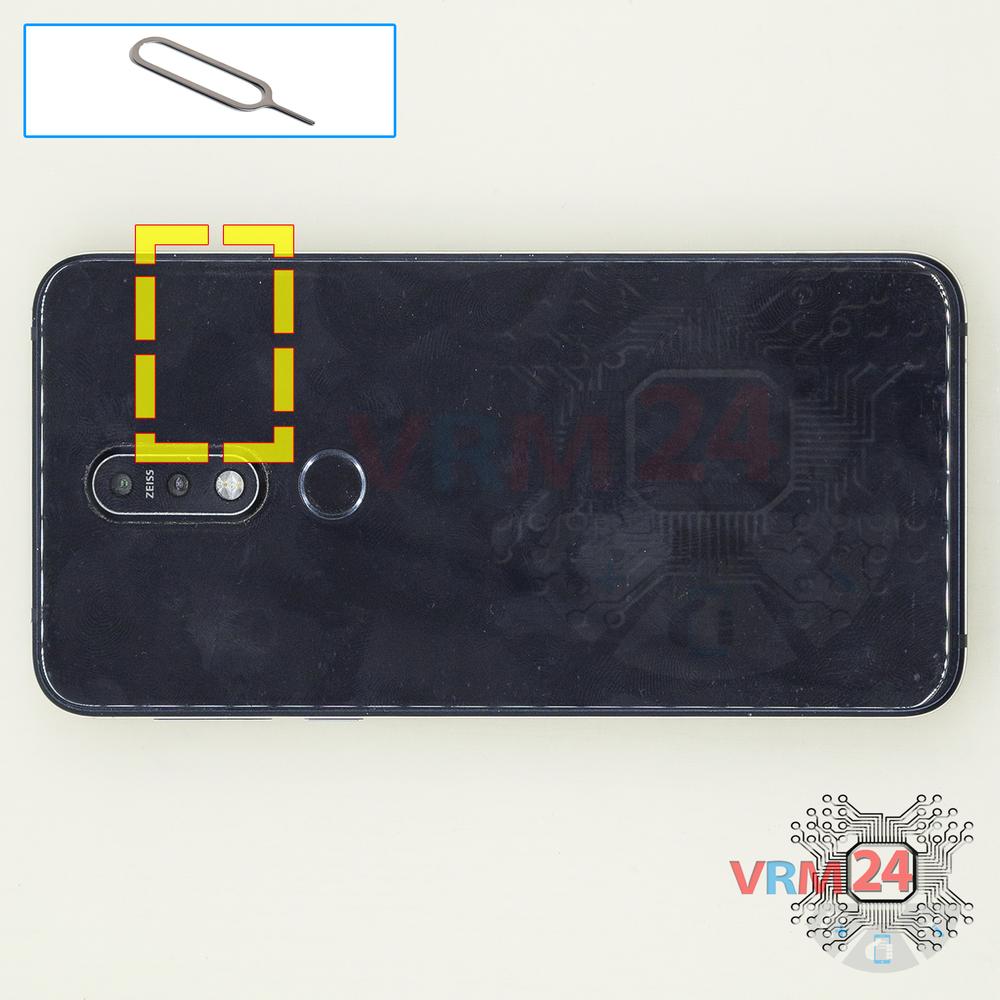
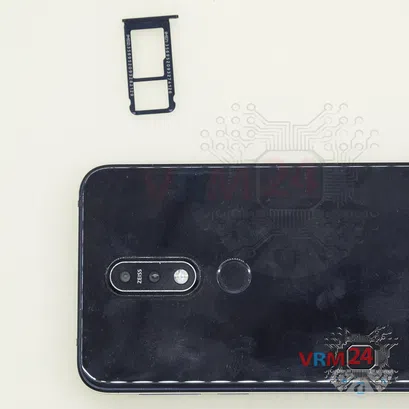
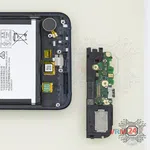
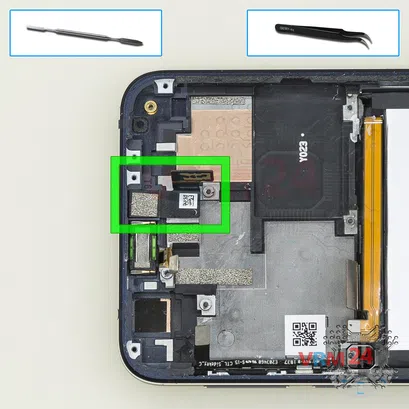
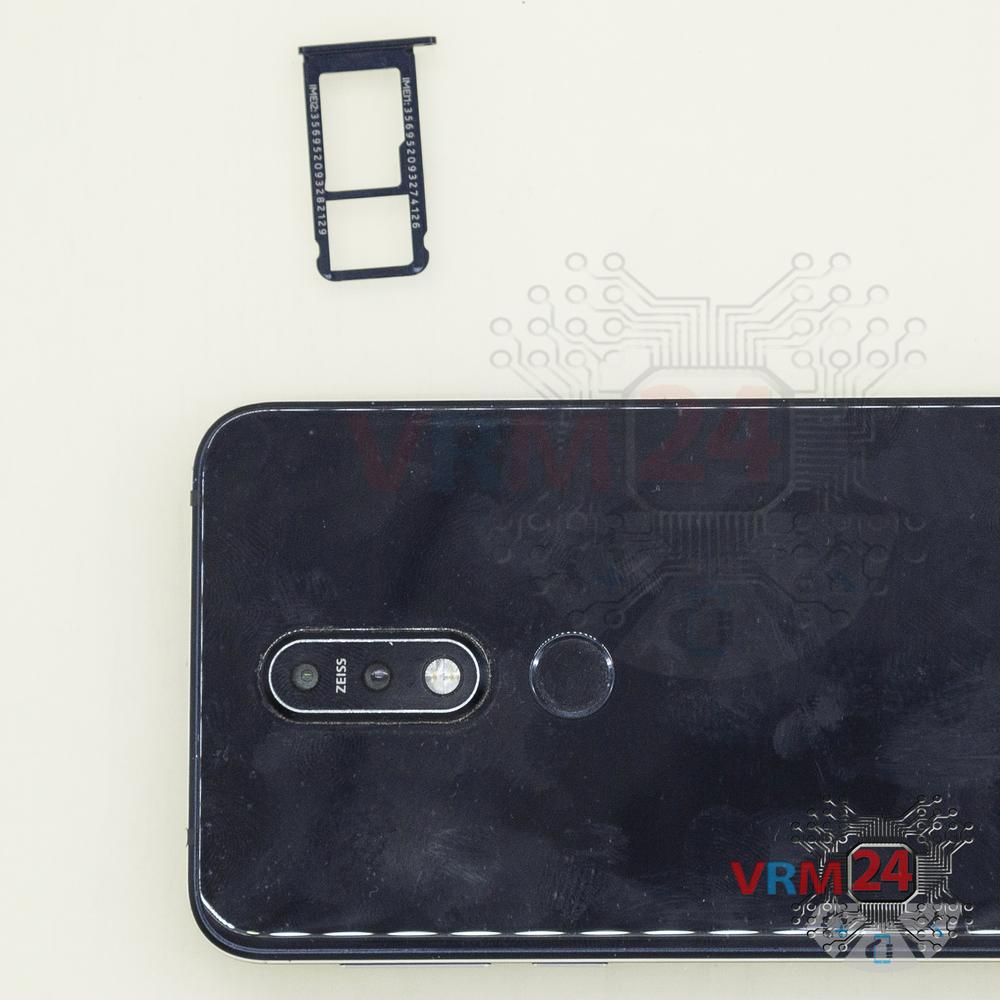
Using the key tool, open the SIM and Micro SD cards tray and remove it.

⚠️ Warning!

Do not push too hard this may cause damage.


How to disassemble Nokia 7.1 TA-1095, Step 2/1 How to disassemble Nokia 7.1 TA-1095, Step 2/2

Step 2.

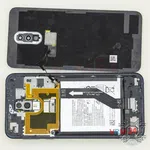
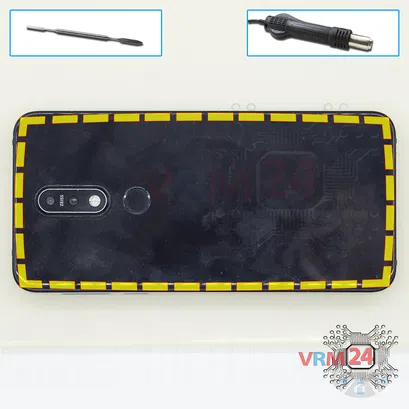
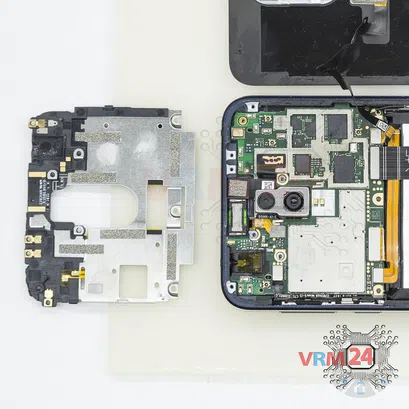
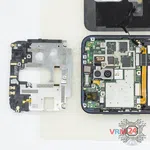
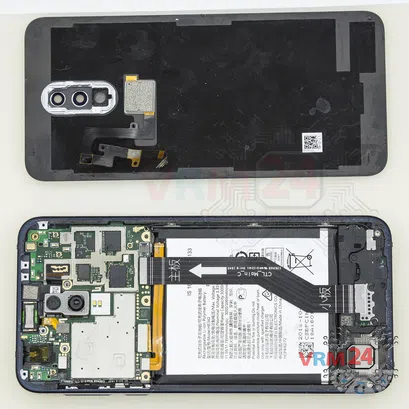
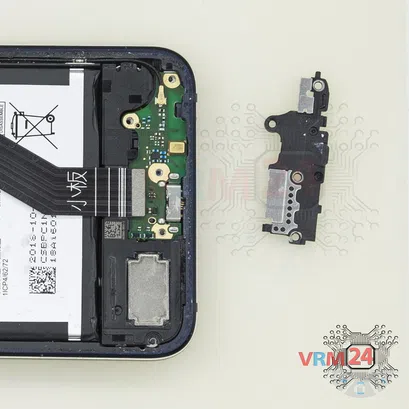
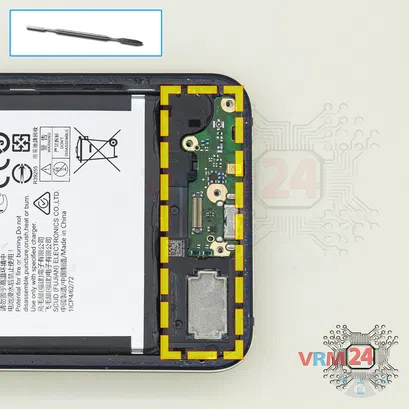
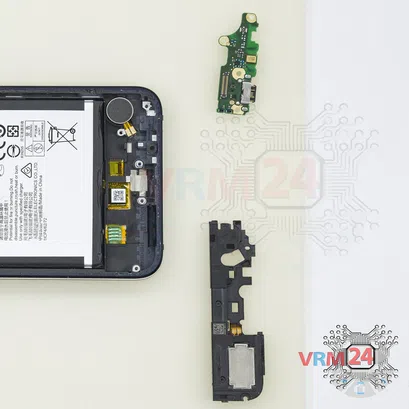
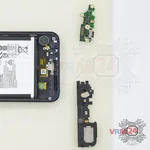
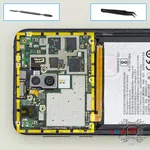
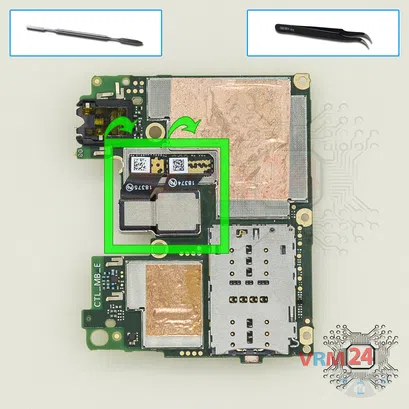
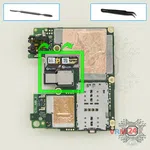
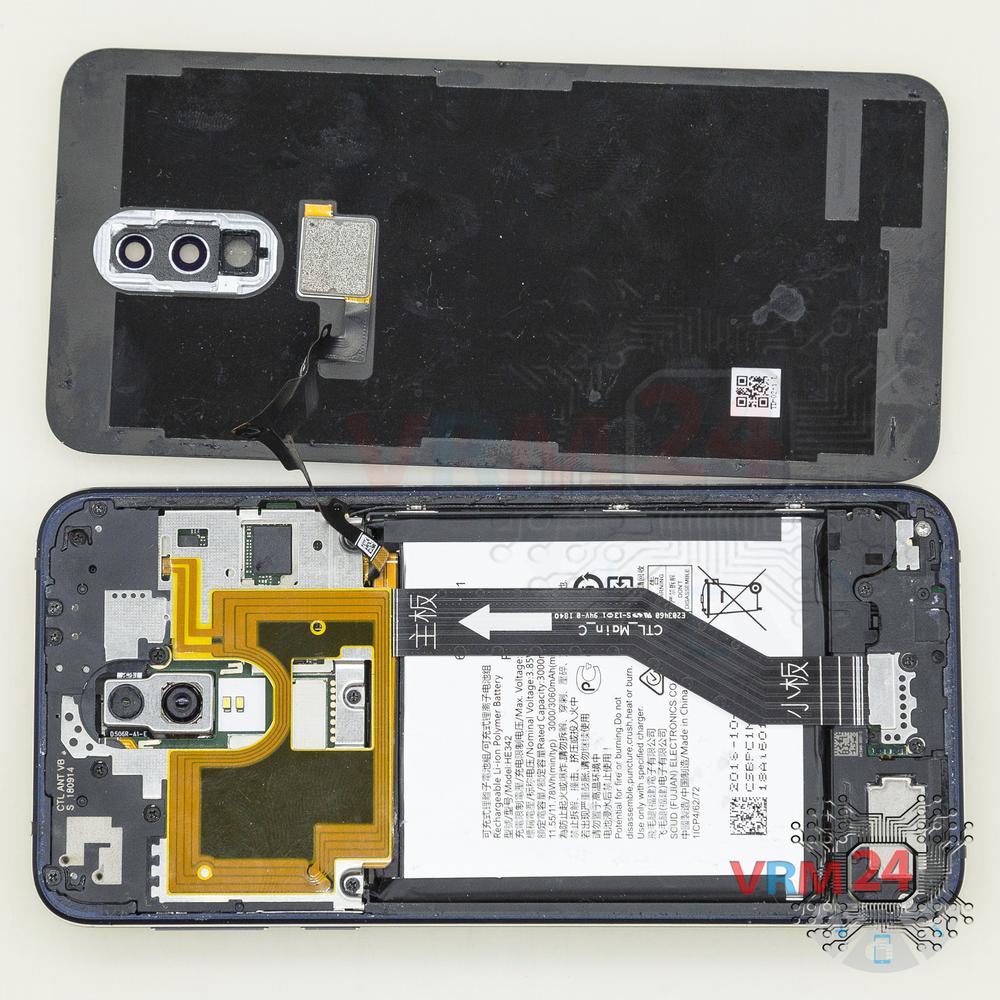
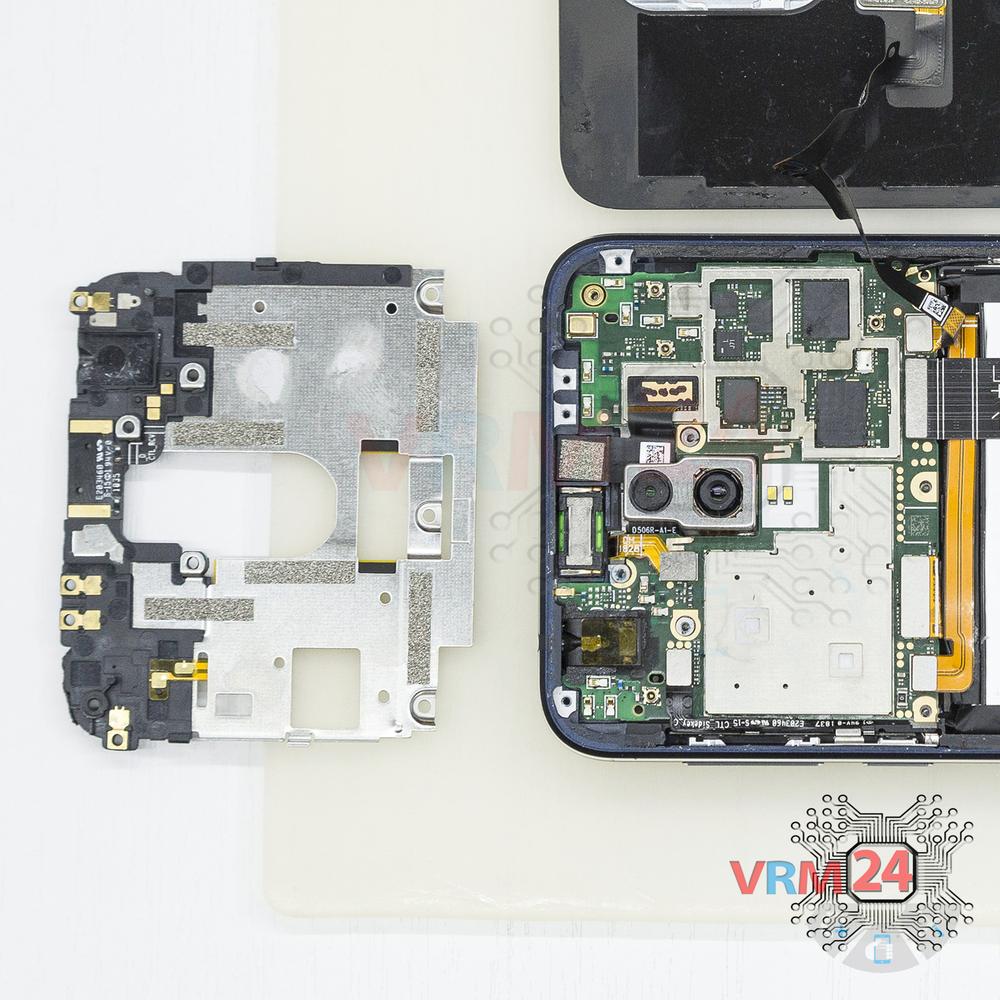
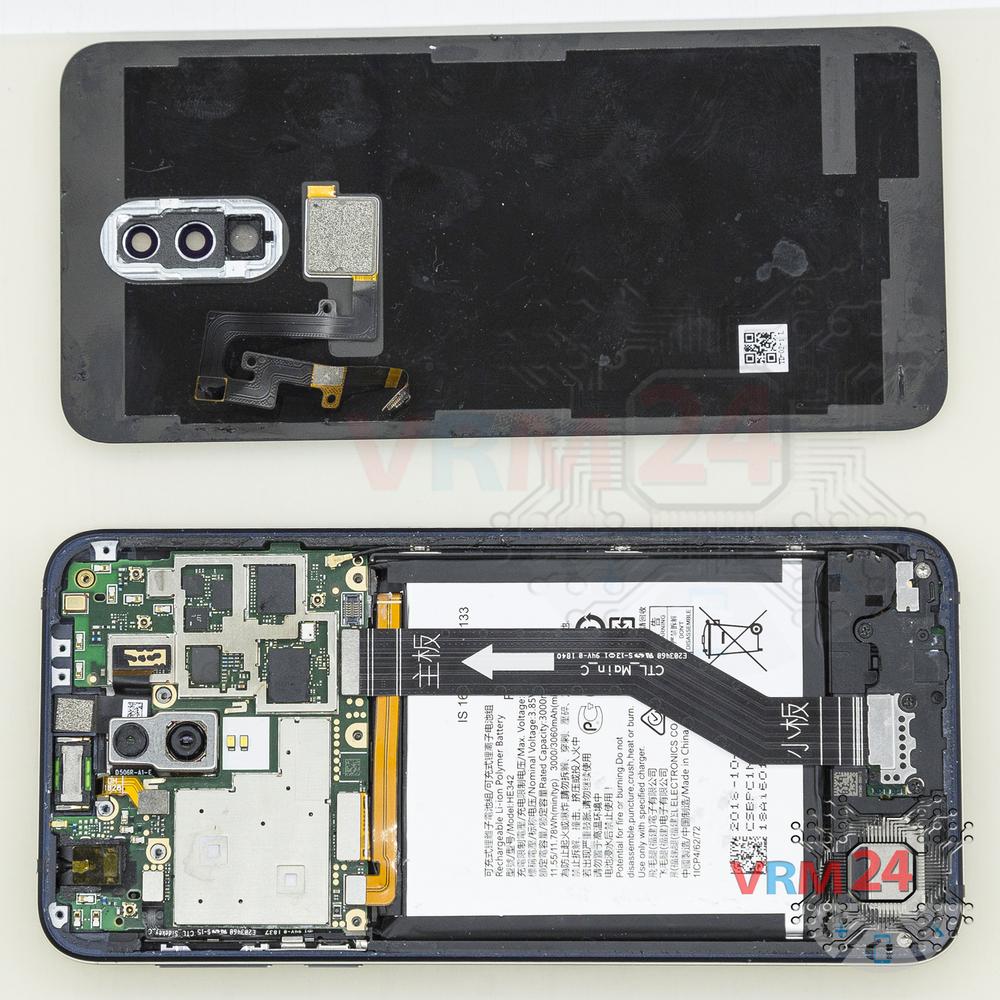
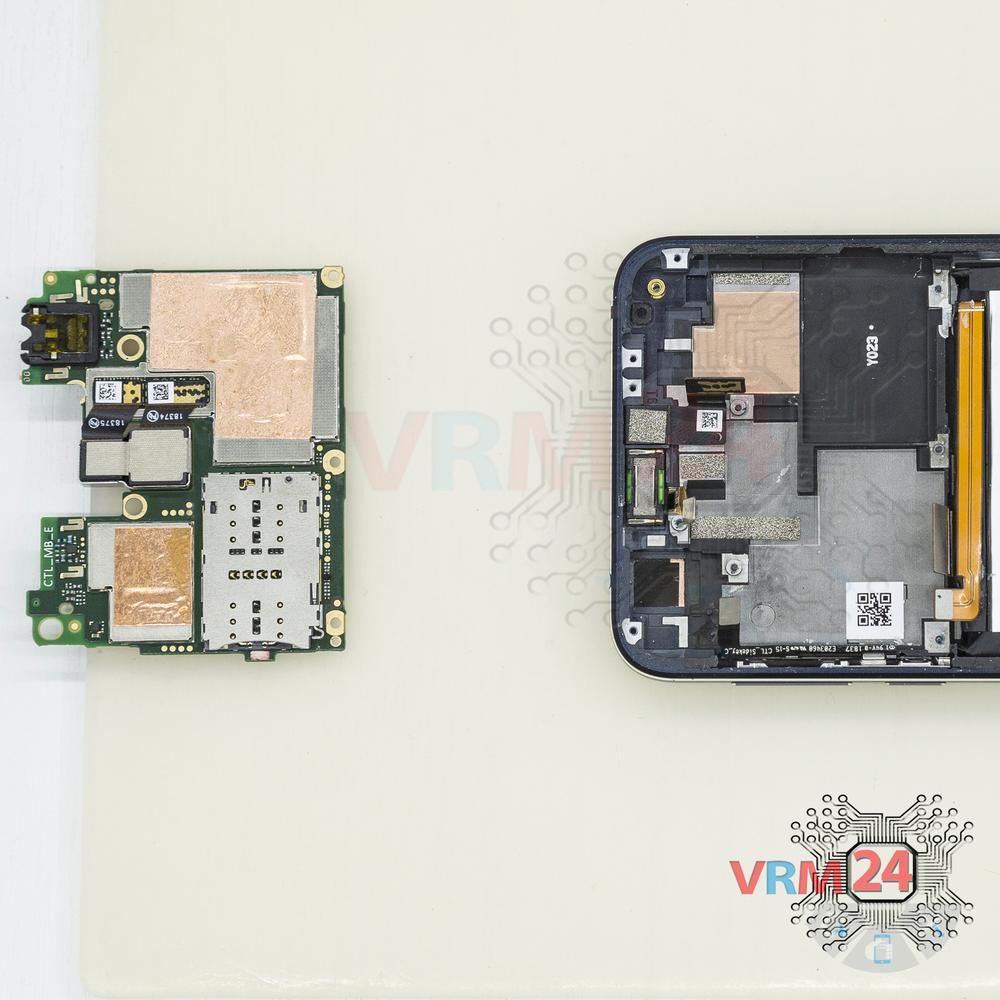
Open the back cover.

⚠️ Warning!

For careful separation, we recommend using a heat gun. At the same time, it is necessary to heat carefully in order, not to damage the surface of the device.


How to disassemble Nokia 7.1 TA-1095, Step 3/1 How to disassemble Nokia 7.1 TA-1095, Step 3/2

Step 3.

Using a screwdriver (Phillips 1.5 mm PH000), unscrew 11 bolts.


How to disassemble Nokia 7.1 TA-1095, Step 4/1 How to disassemble Nokia 7.1 TA-1095, Step 4/2

Step 4.

Open the cover hiding and holding connectors.


How to disassemble Nokia 7.1 TA-1095, Step 5/1 How to disassemble Nokia 7.1 TA-1095, Step 5/2

Step 5.

Pry up the fingerprint sensor connector and remove the cover.


How to disassemble Nokia 7.1 TA-1095, Step 6/1 How to disassemble Nokia 7.1 TA-1095, Step 6/2

Step 6.

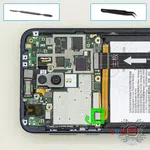
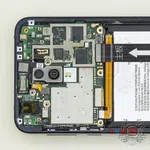
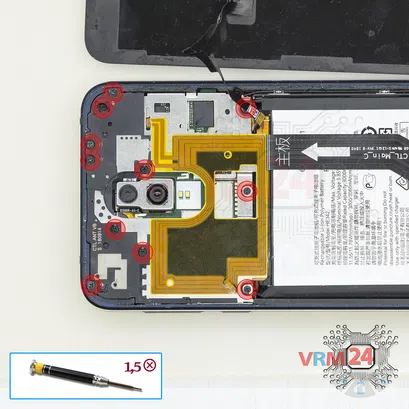
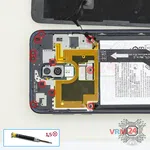
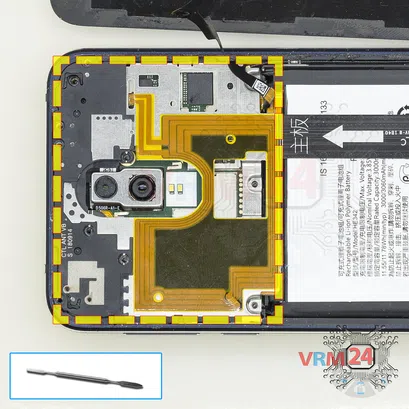
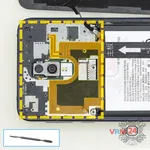
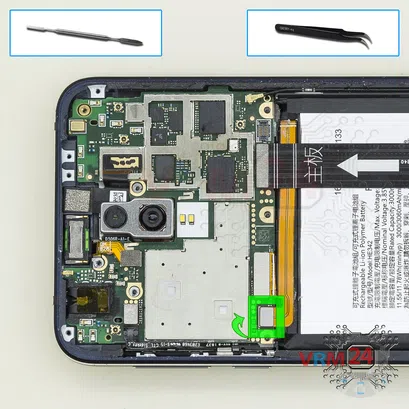
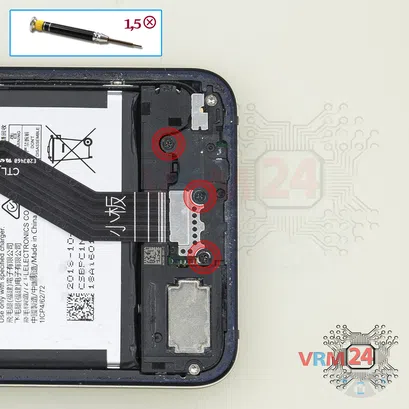
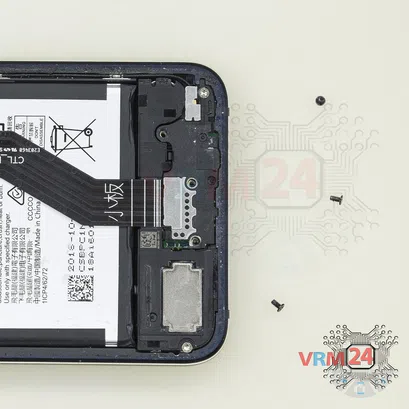
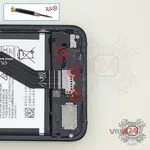
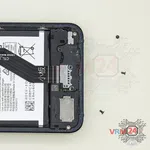
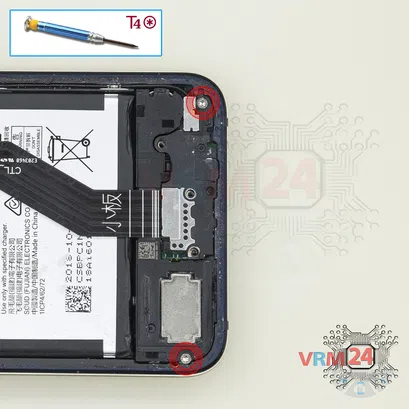
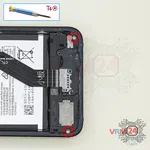
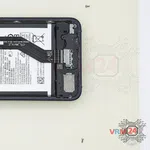
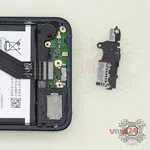
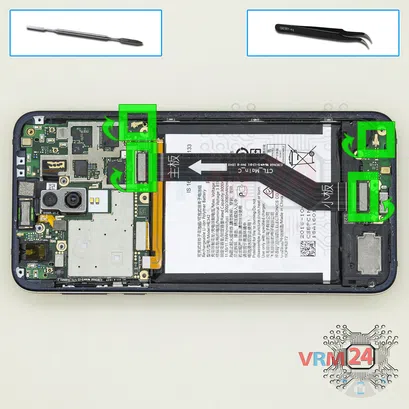
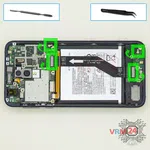
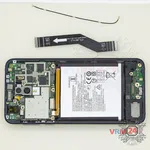
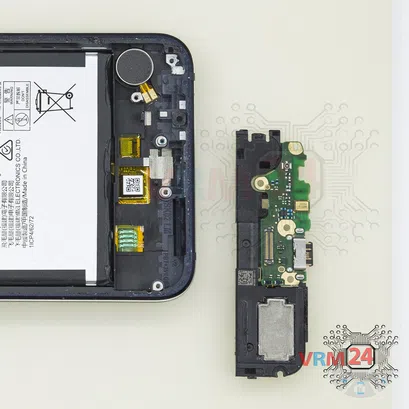
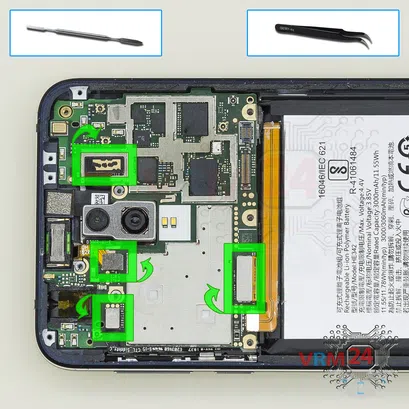
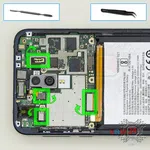
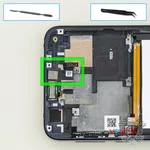
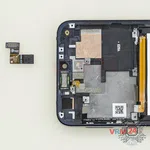
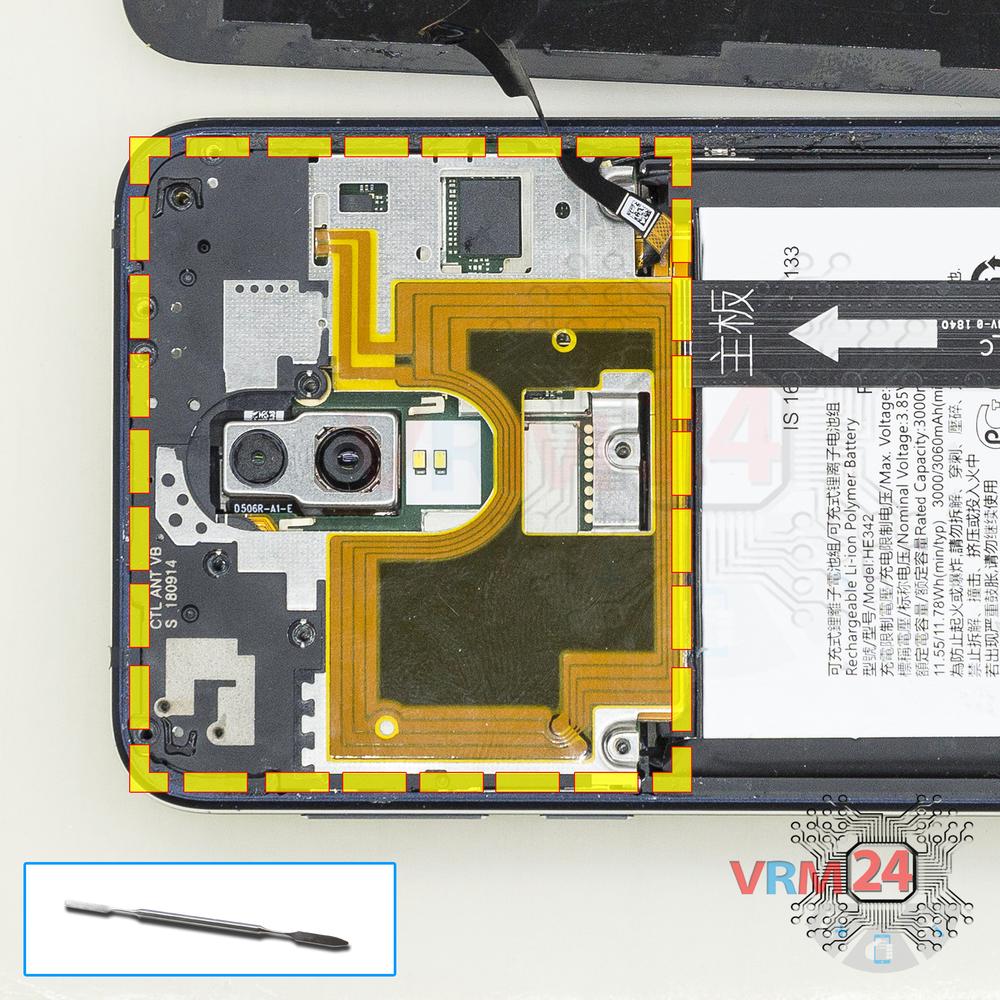
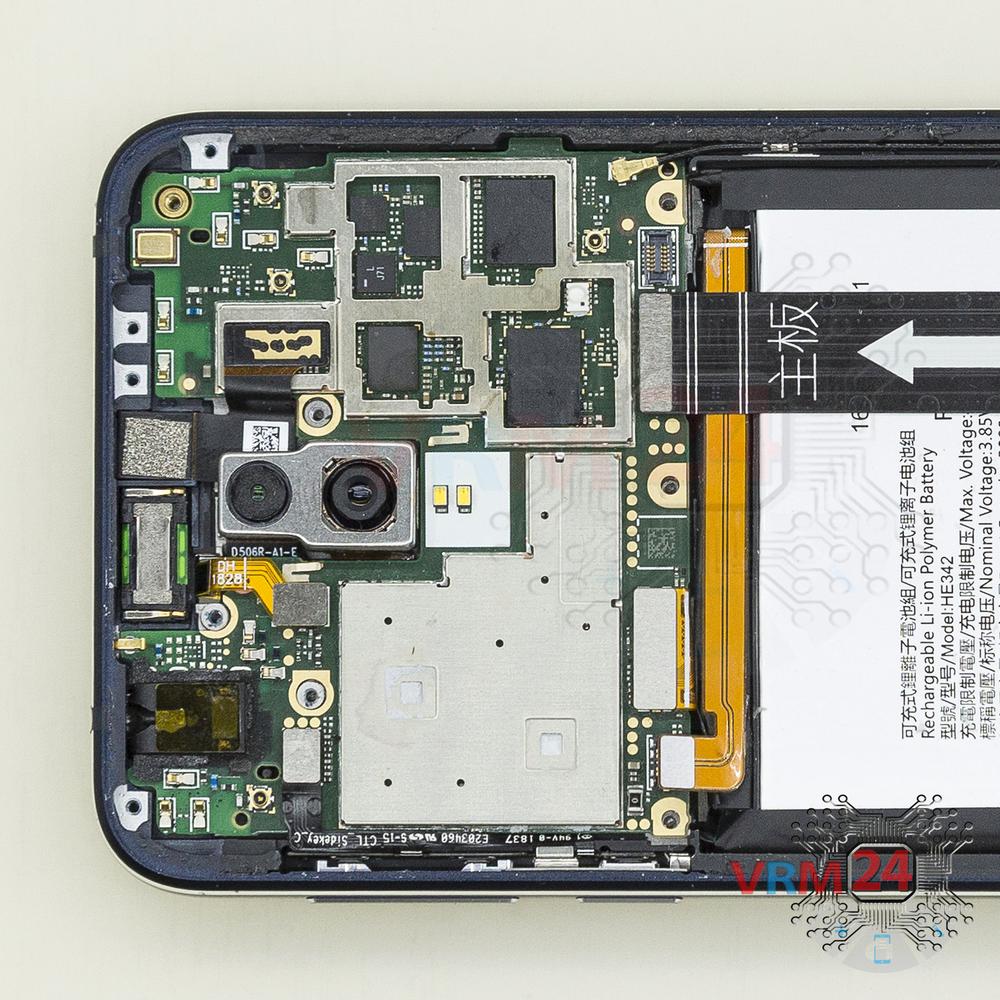
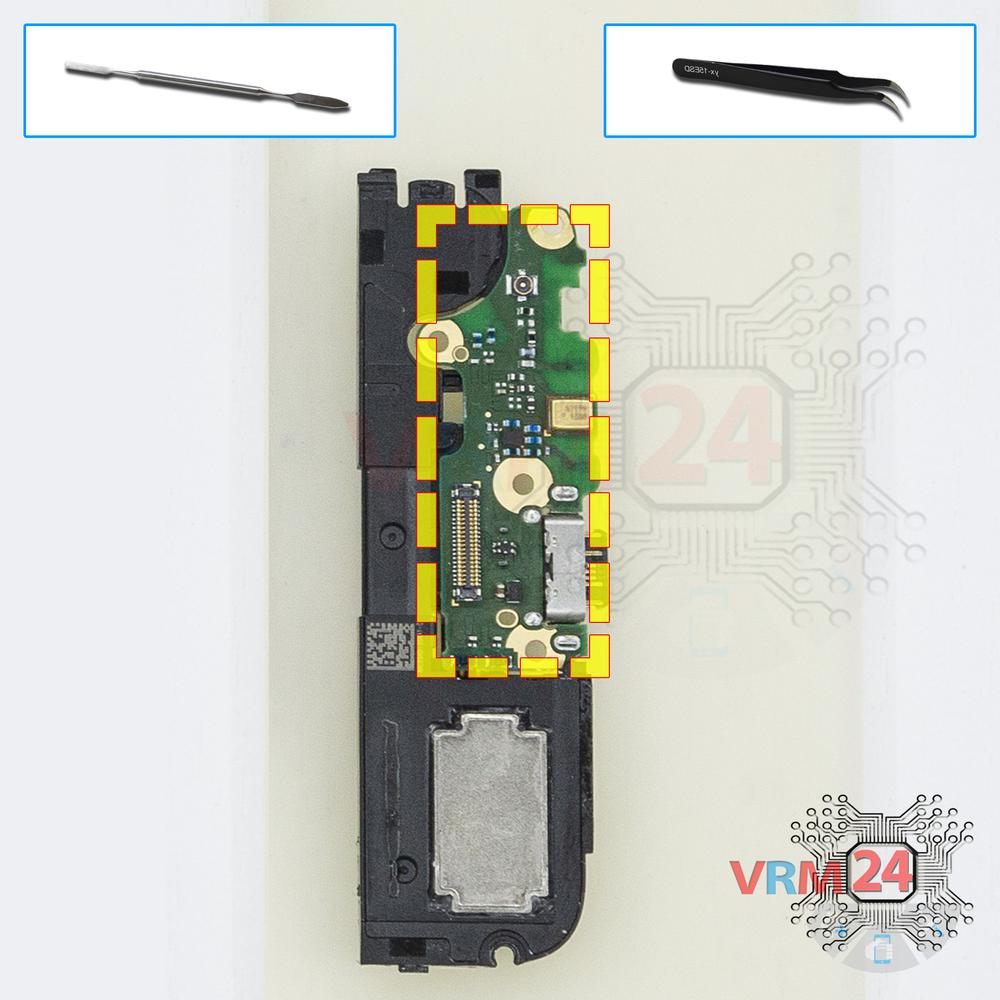
Disconnect the battery connector. The battery model of Nokia 7.1 is HE342.

⚠️ Warning!

We strongly recommend disconnecting the connector to avoid a possible short circuit during disassembly.


How to disassemble Nokia 7.1 TA-1095, Step 7/1 How to disassemble Nokia 7.1 TA-1095, Step 7/2

Step 7.

Using a screwdriver (Phillips 1.5 mm PH000), unscrew 3 short bolts.


How to disassemble Nokia 7.1 TA-1095, Step 8/1 How to disassemble Nokia 7.1 TA-1095, Step 8/2

Step 8.

Using a screwdriver (hex T4), unscrew 2 bolts.


How to disassemble Nokia 7.1 TA-1095, Step 9/1 How to disassemble Nokia 7.1 TA-1095, Step 9/2

Step 9.

Open the cover hiding the daughterboard.


How to disassemble Nokia 7.1 TA-1095, Step 10/1 How to disassemble Nokia 7.1 TA-1095, Step 10/2

Step 10.

Disconnect connectors and remove the inter-board and coaxial cables.


How to disassemble Nokia 7.1 TA-1095, Step 11/1 How to disassemble Nokia 7.1 TA-1095, Step 11/2

Step 11.

Pry and remove the buzzer (loudspeaker) and daughterboard assembly. 


How to disassemble Nokia 7.1 TA-1095, Step 12/1 How to disassemble Nokia 7.1 TA-1095, Step 12/2

Step 12.

Remove the daughterboard, also known as sub-board.


How to disassemble Nokia 7.1 TA-1095, Step 13/1

Step 13.

Disconnect connectors on the PCB.


How to disassemble Nokia 7.1 TA-1095, Step 14/1 How to disassemble Nokia 7.1 TA-1095, Step 14/2

Step 14.

Remove the PCB.


How to disassemble Nokia 7.1 TA-1095, Step 15/1 How to disassemble Nokia 7.1 TA-1095, Step 15/2

Step 15.

Remove the front (selfie) camera.


How to disassemble Nokia 7.1 TA-1095, Step 16/1 How to disassemble Nokia 7.1 TA-1095, Step 16/2

Step 16.

Disconnect connectors on the PCB, and remove two rear cameras assembly.

Detailed disassembly instructions of Nokia 7.1 TA-1095 in the video, made by our mobile repair & service center:

If you have a question, ask us, and we will try to answer in as much detail as possible. If this article was helpful for you, please rate it.


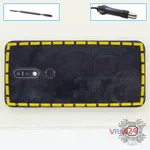
Disassembling\Repair has medium complexity and takes about 9 minutes in time.
Our manual is suitable for all models Nokia 7.1 TA-1095 released for markets in different countries.


Back to the list
˄˅

Advertisement

˃˂

Advertisement