

⚠️️ Before disassembling, do not forget to turn your phone off.
Teardown difficulty:
Moderate
Moderate
Recommended tools


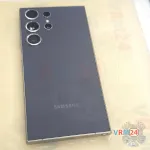
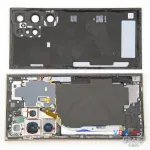
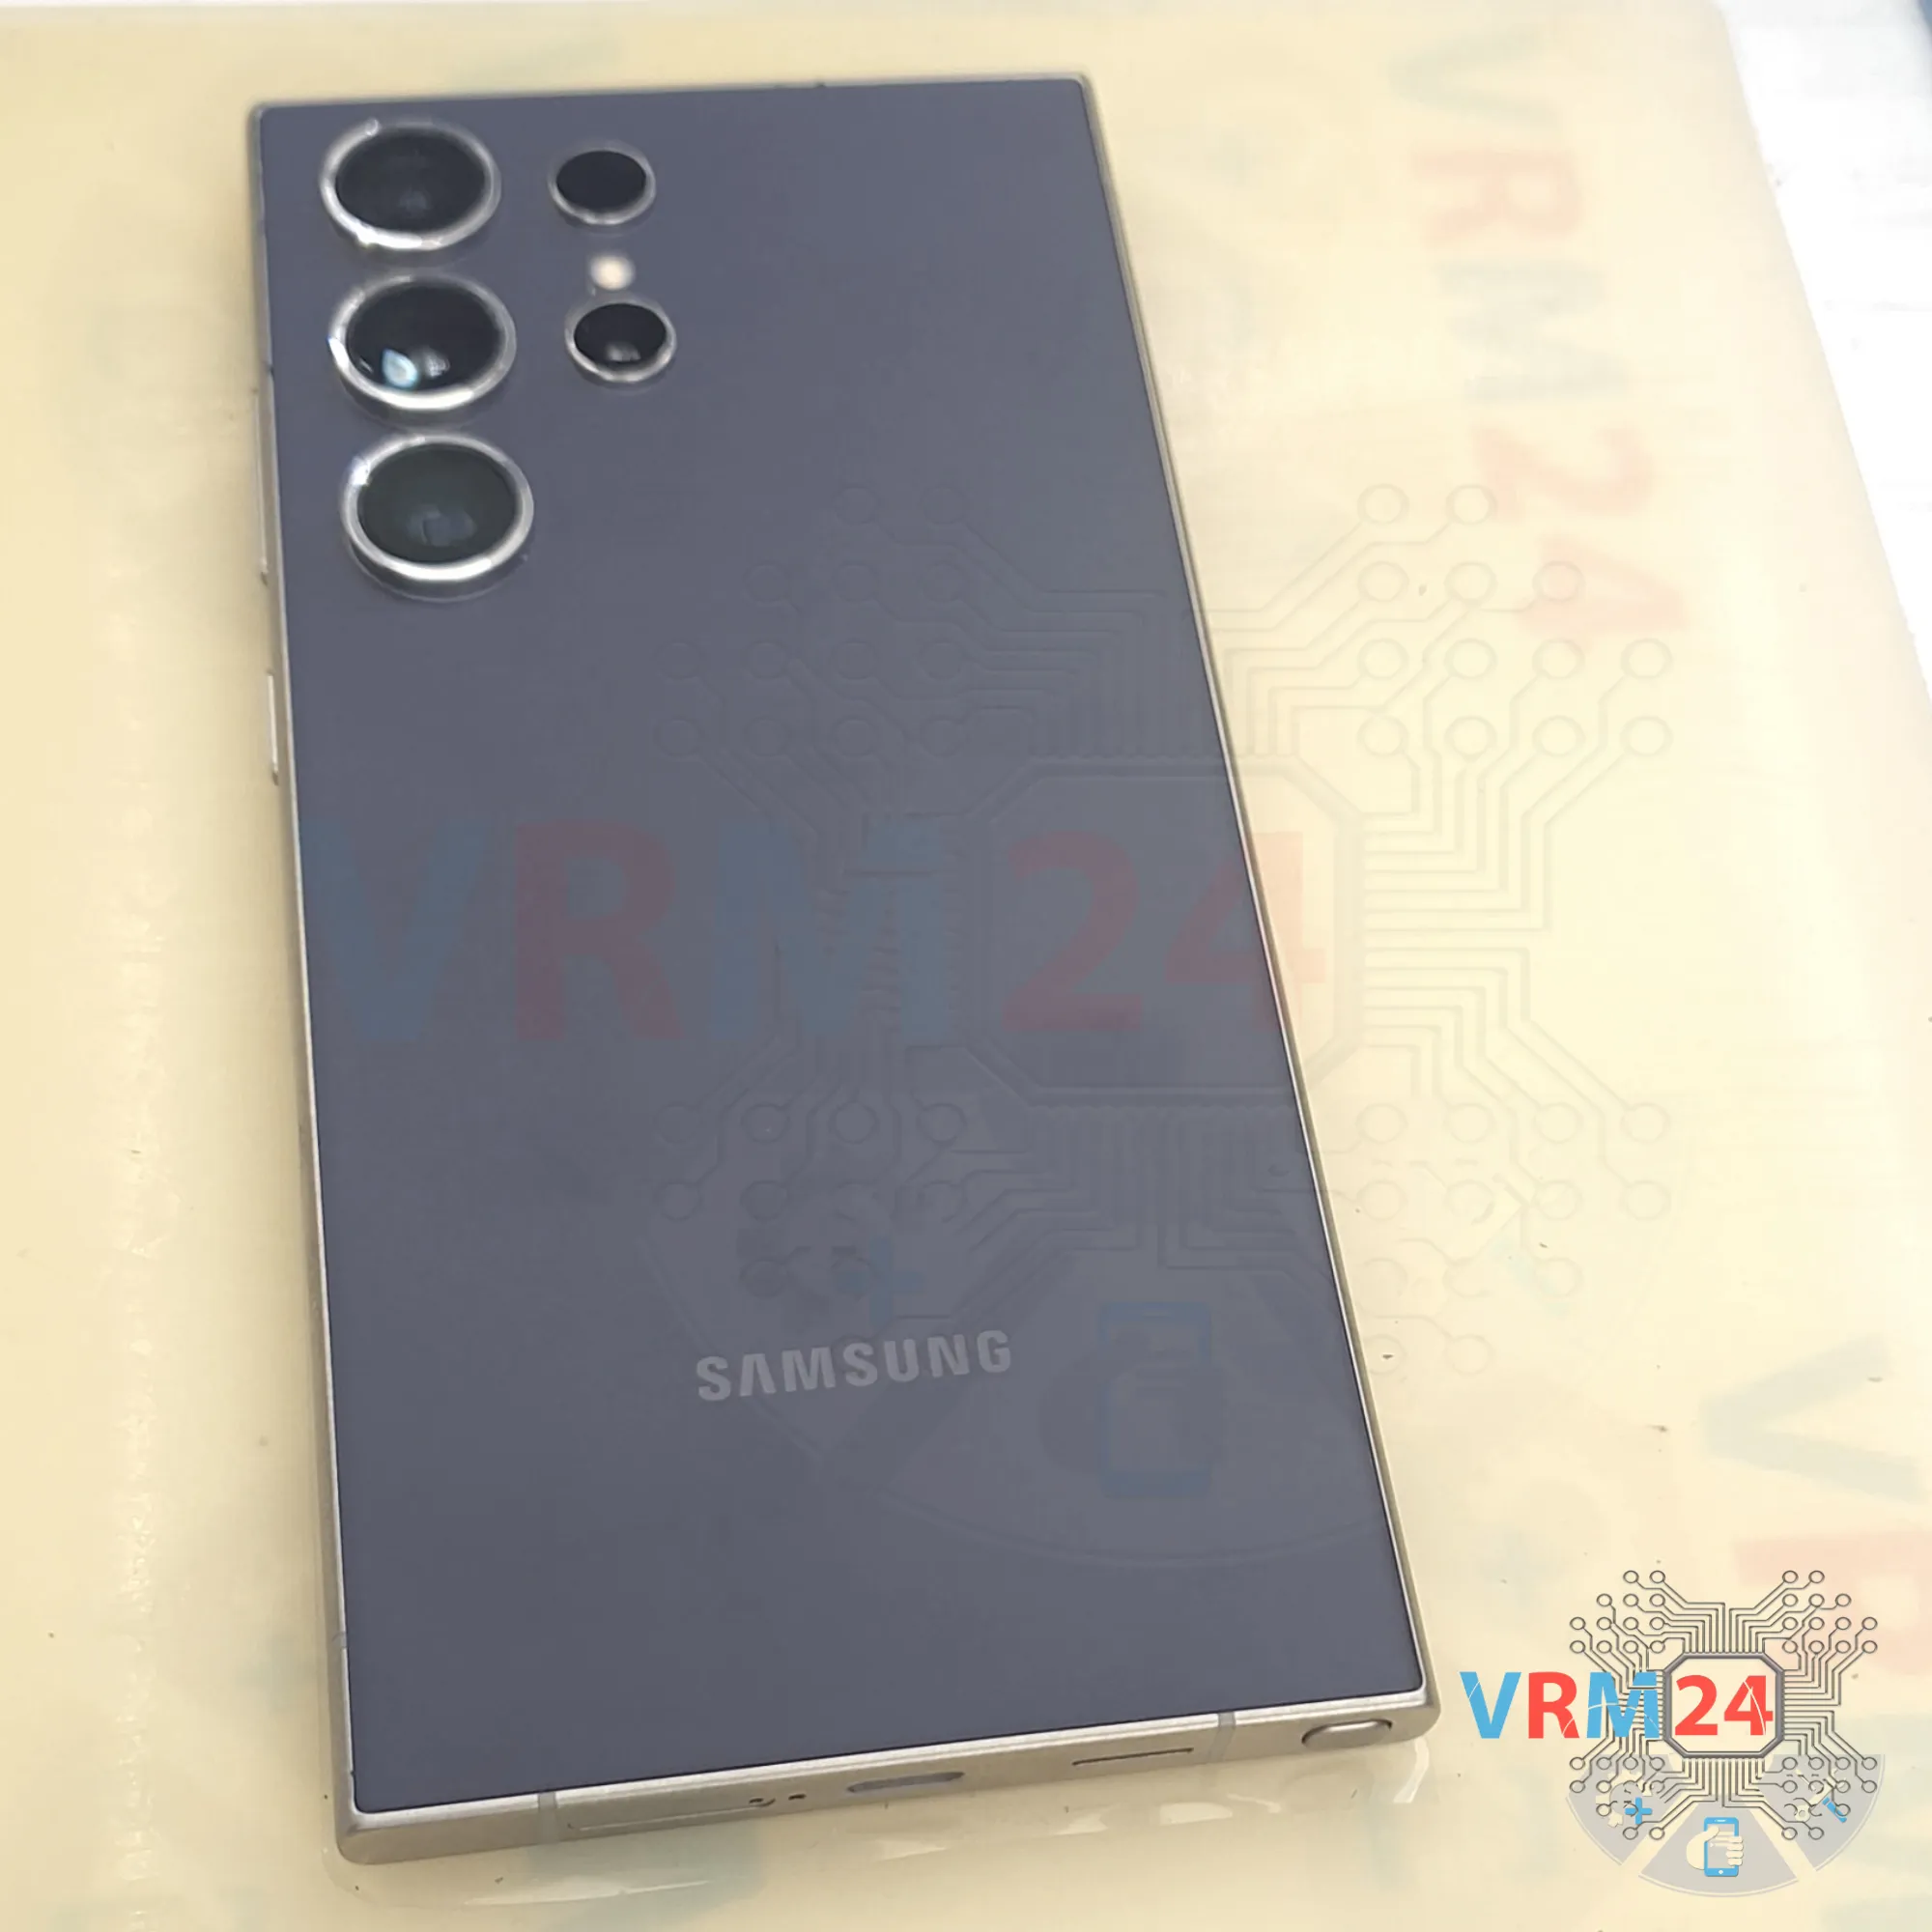
Disassembly/Repair of the mobile device Samsung Galaxy S24 Ultra SM-S928 (Samsung Galaxy S24 Ultra 5G SM-S928B, SM-S928B/DS, SM-S928U, SM-S928U1, SM-S928W, SM-S928N, SM-S9280, SM-S928E, SM-S928E/DS) with each step description and the required set of tools.

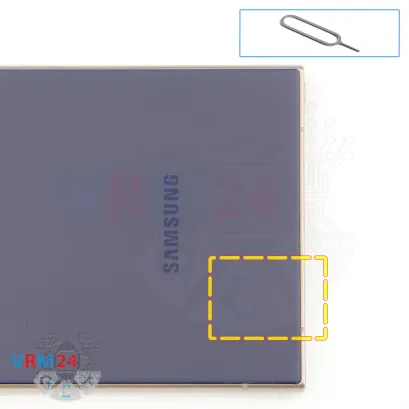

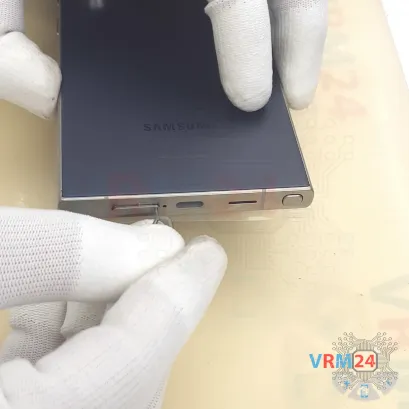


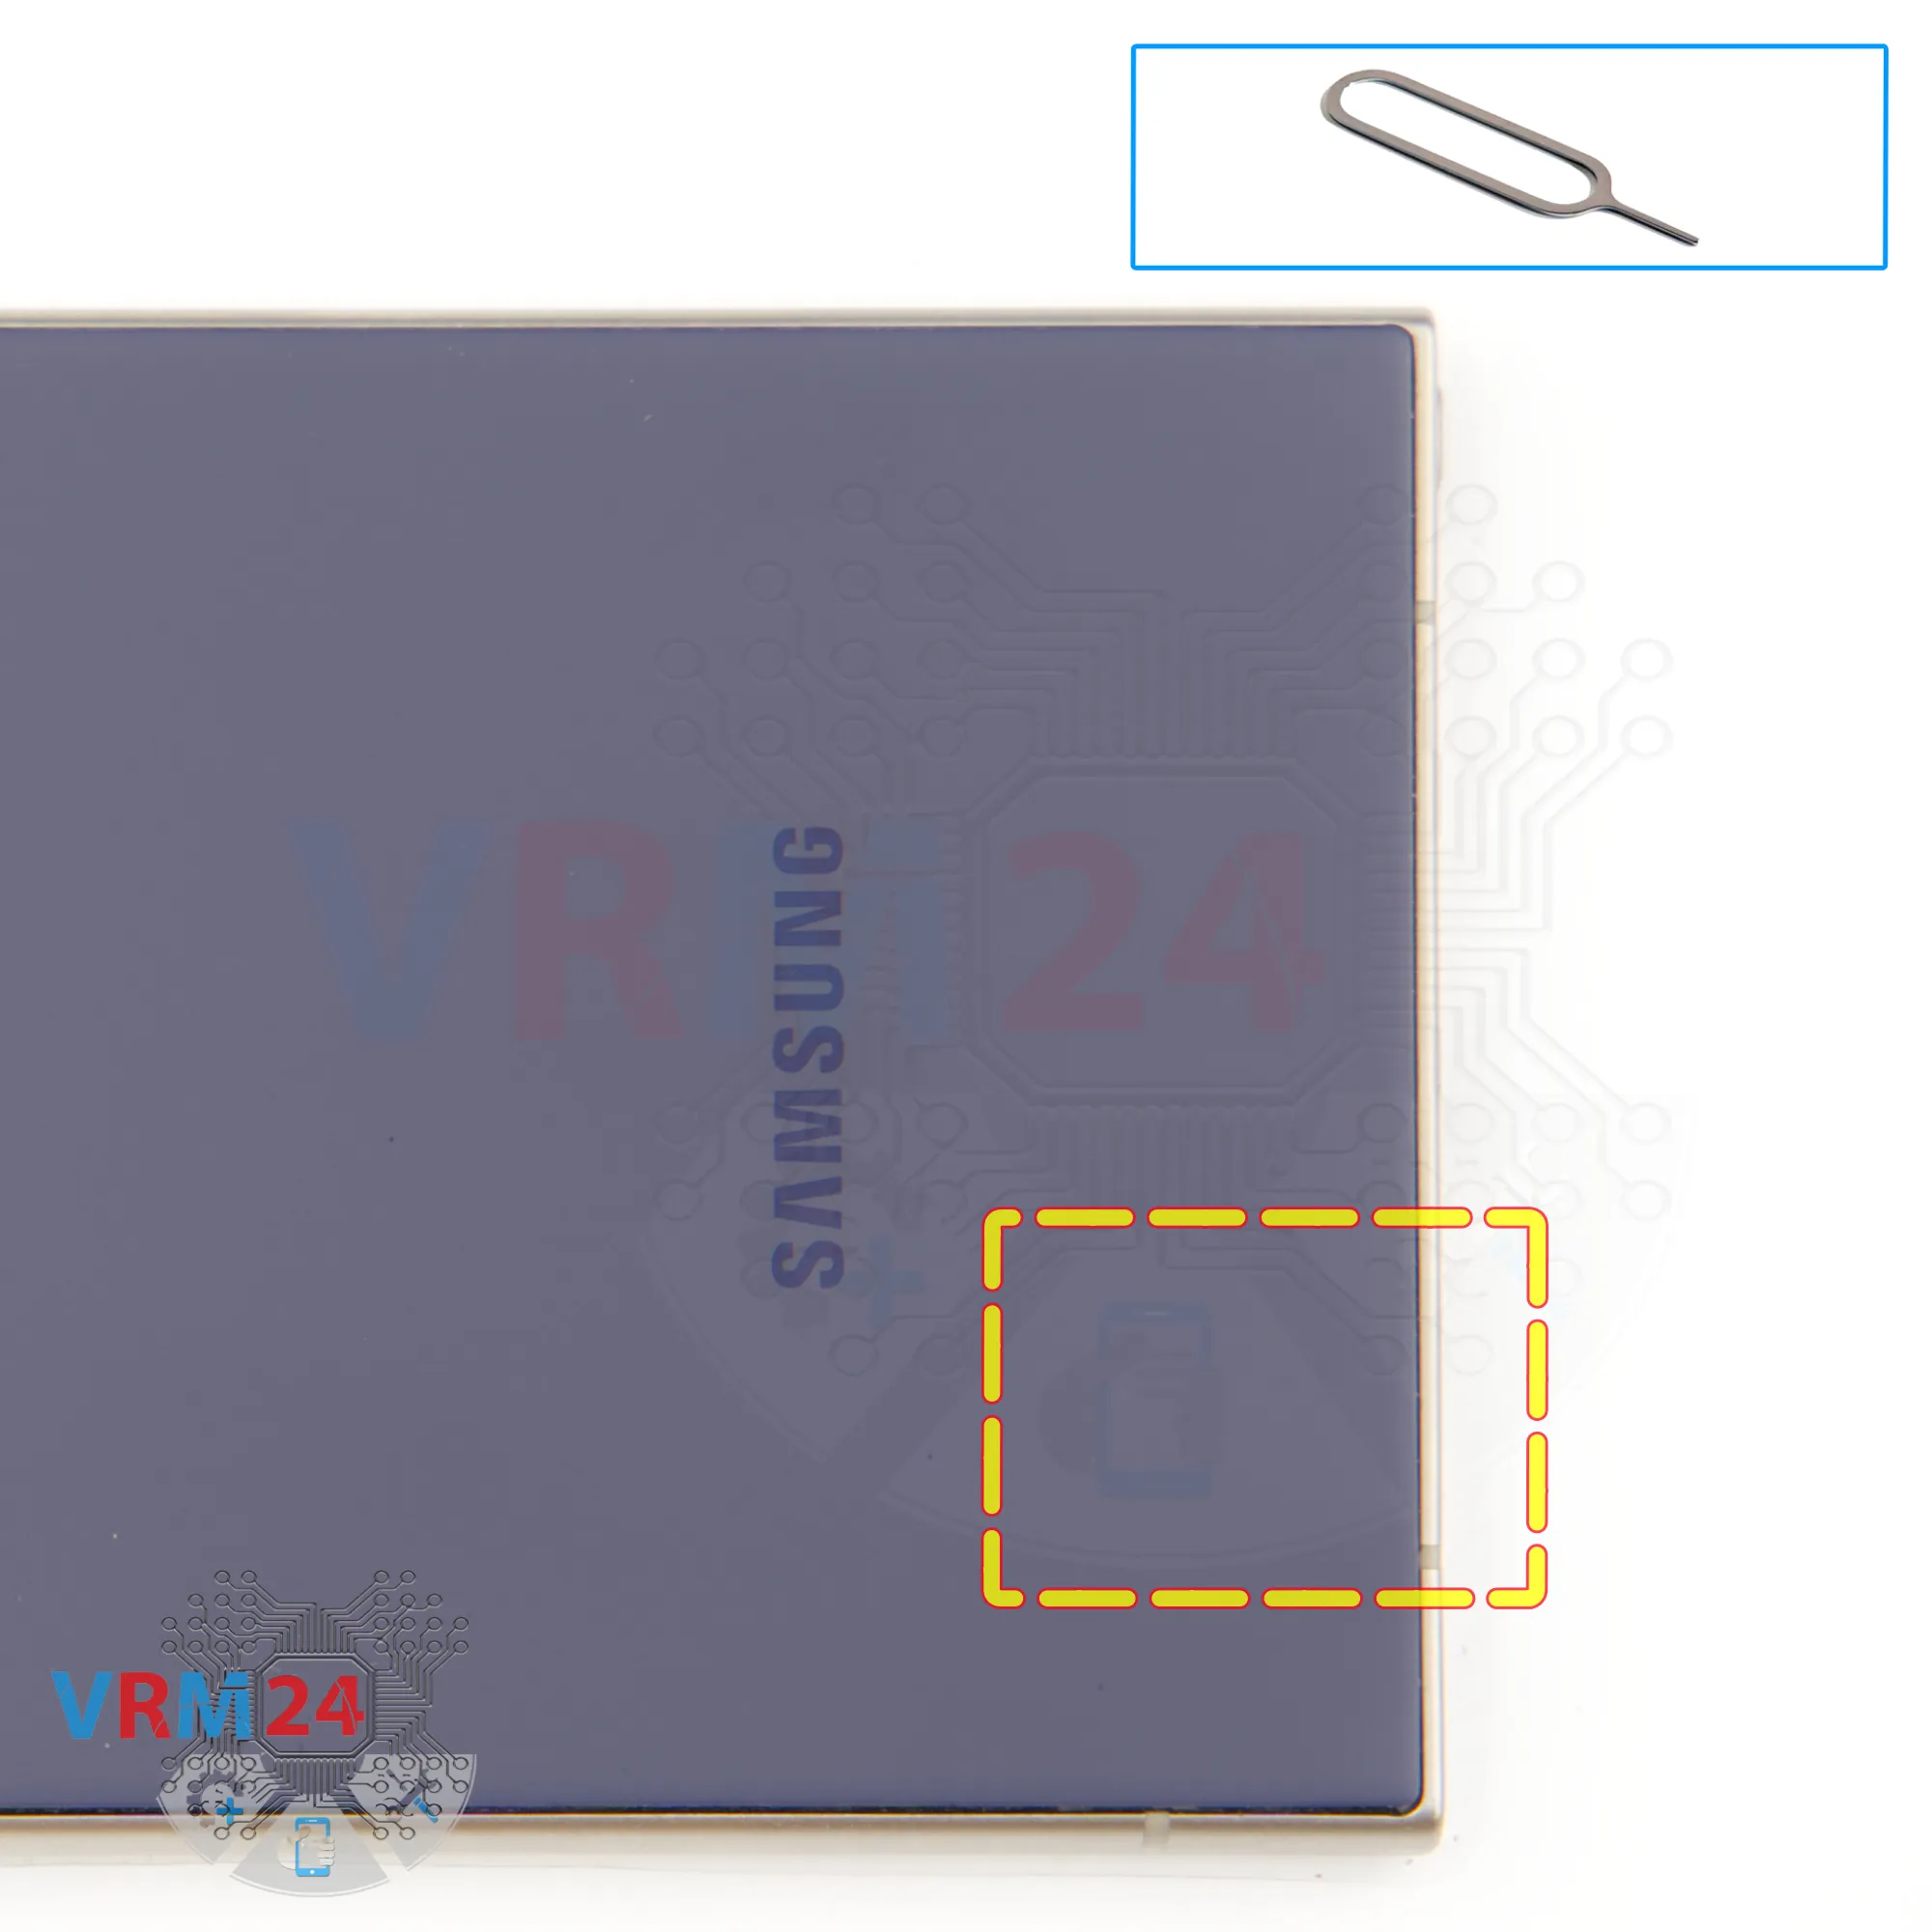
Step 2. Remove the tray
First, we need to remove the SIM card tray. For that, we use a SIM eject tool. Insert it into the small hole and gently push to release the tray.
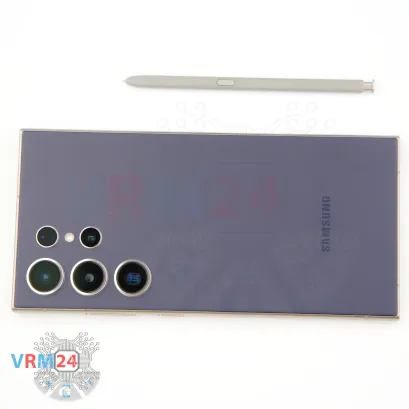

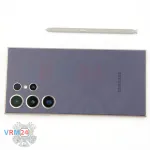
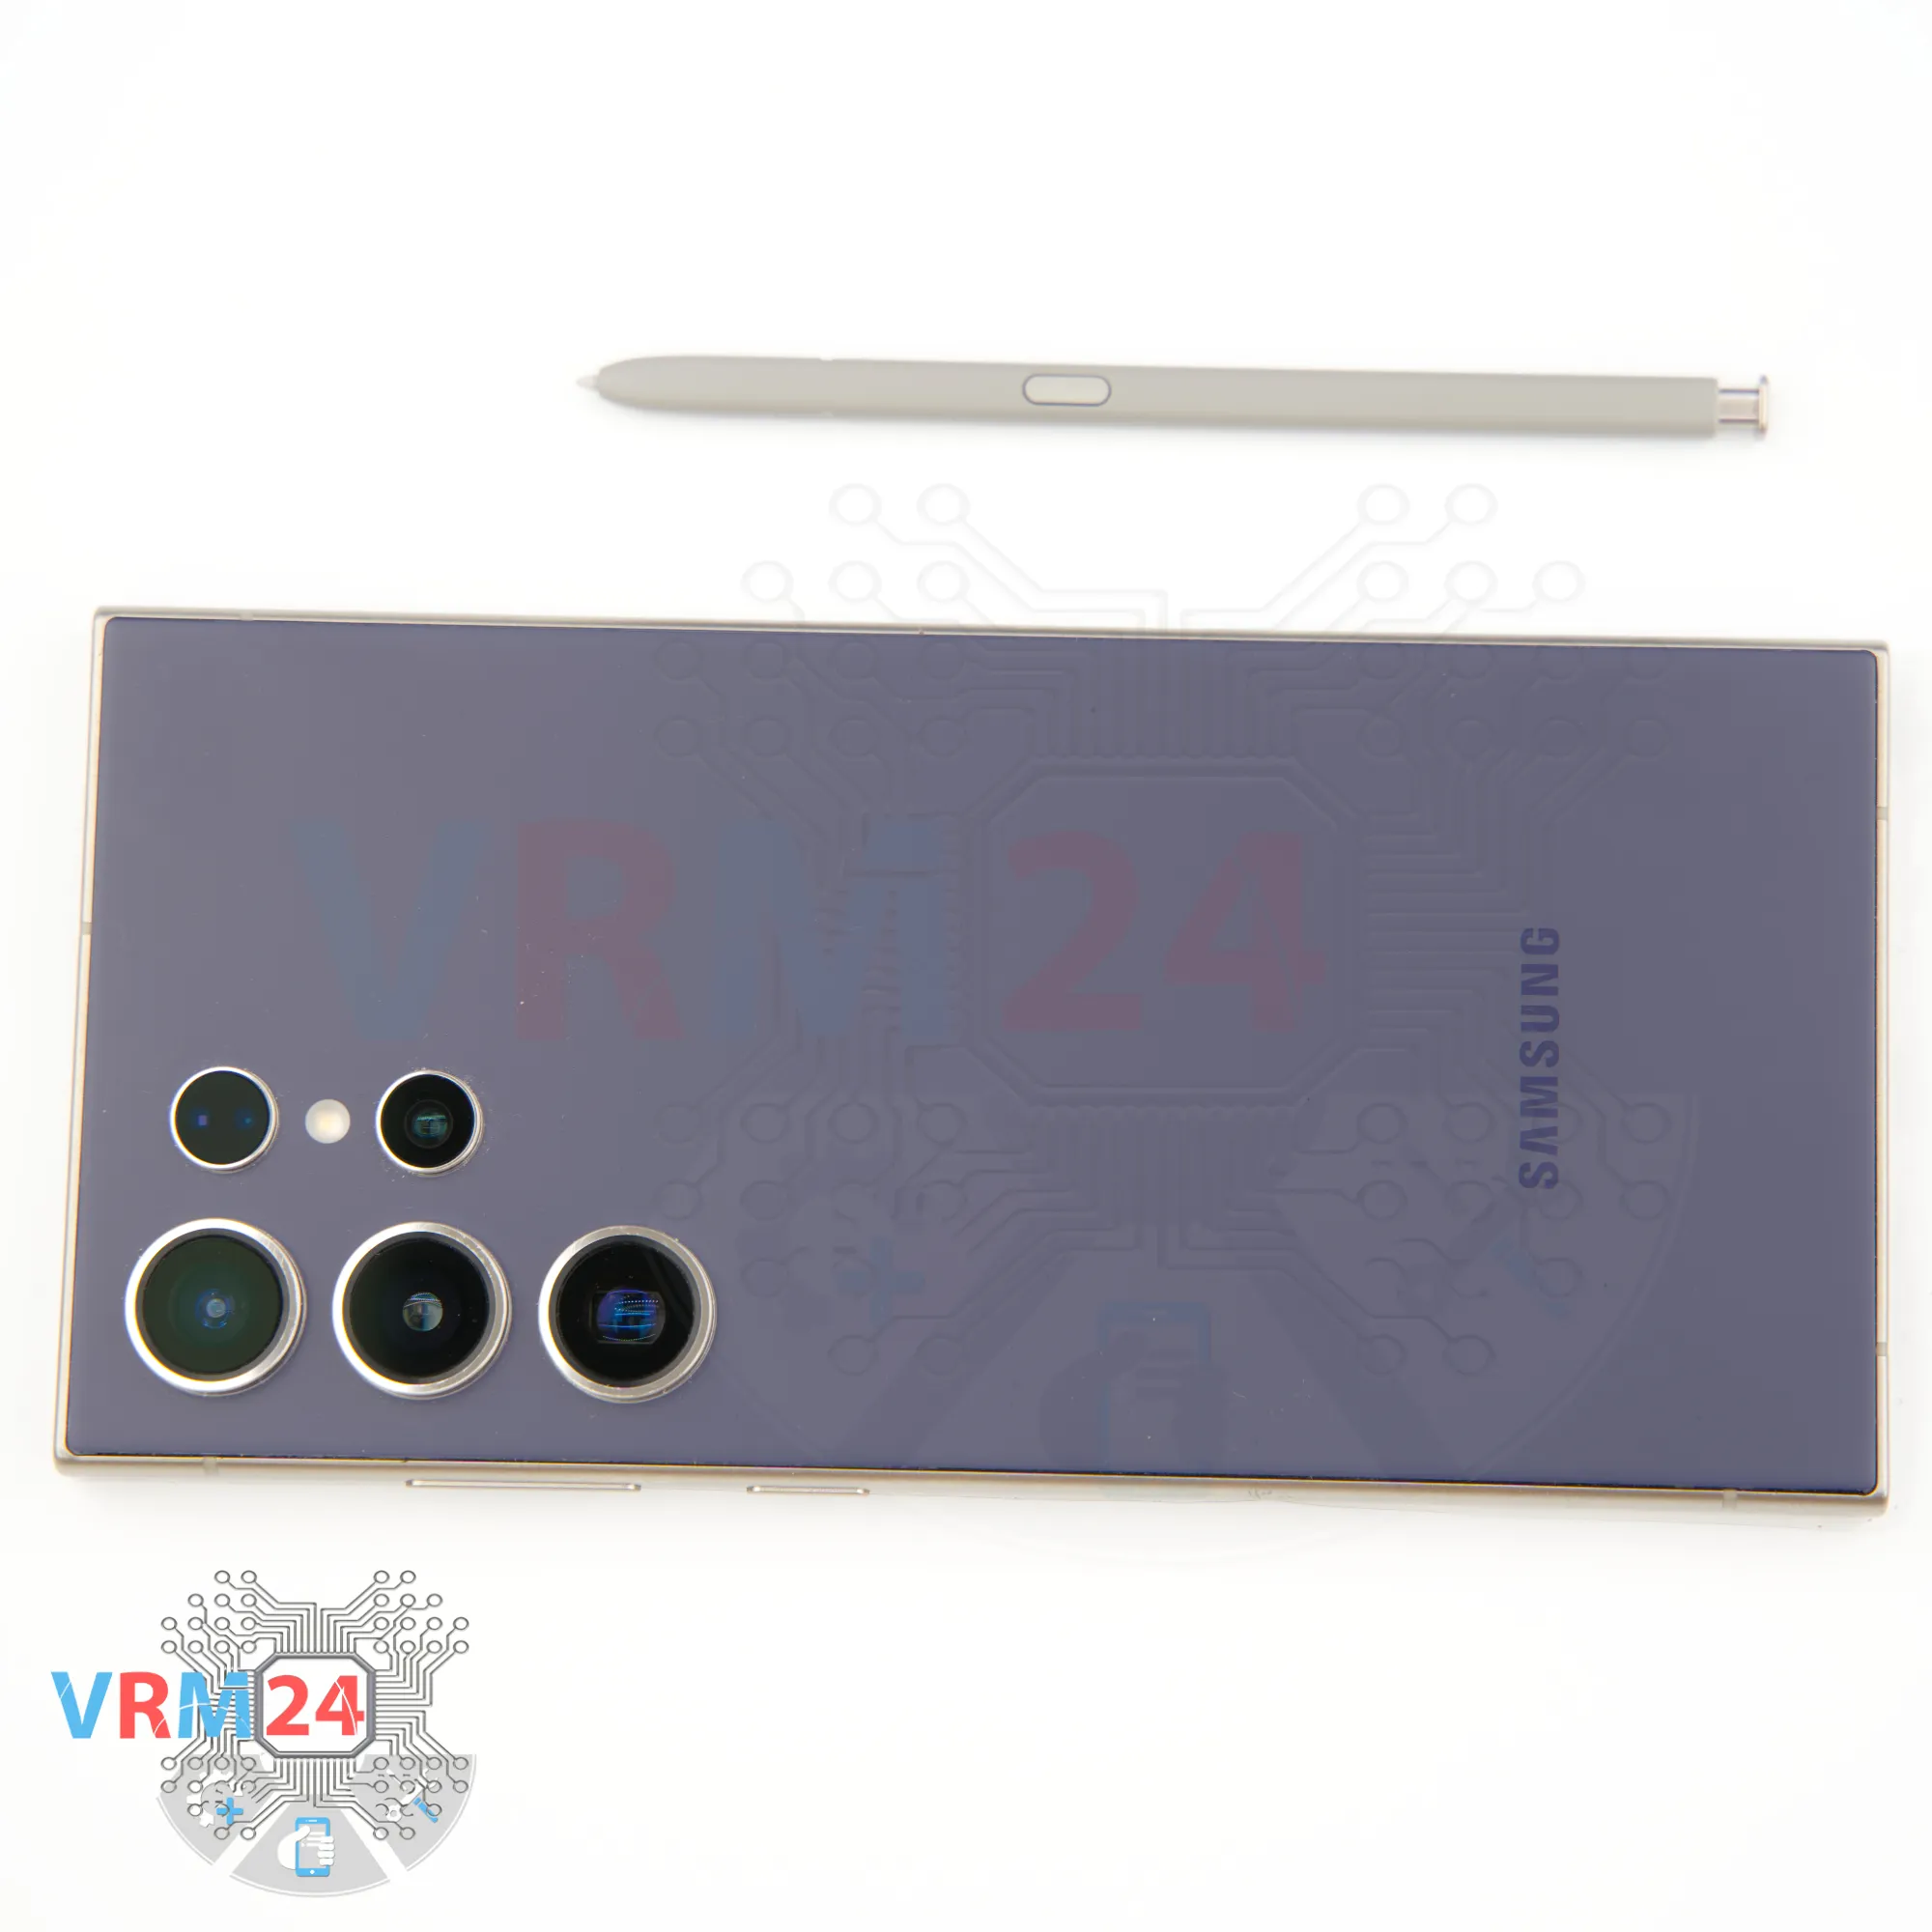
Step 3. Remove the stylus pen
Next, let’s take out the S Pen (stylus) so it doesn’t get in the way. Just set it aside for now.


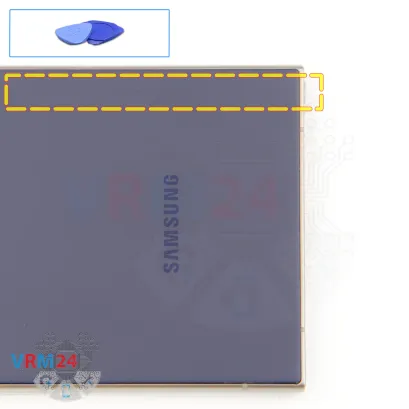
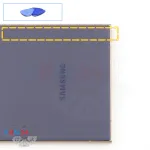
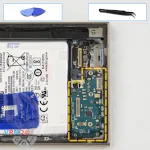
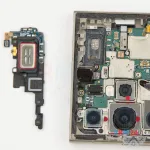
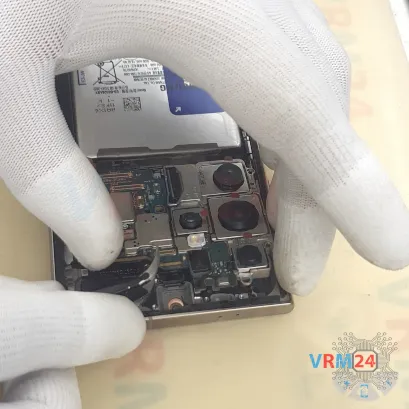
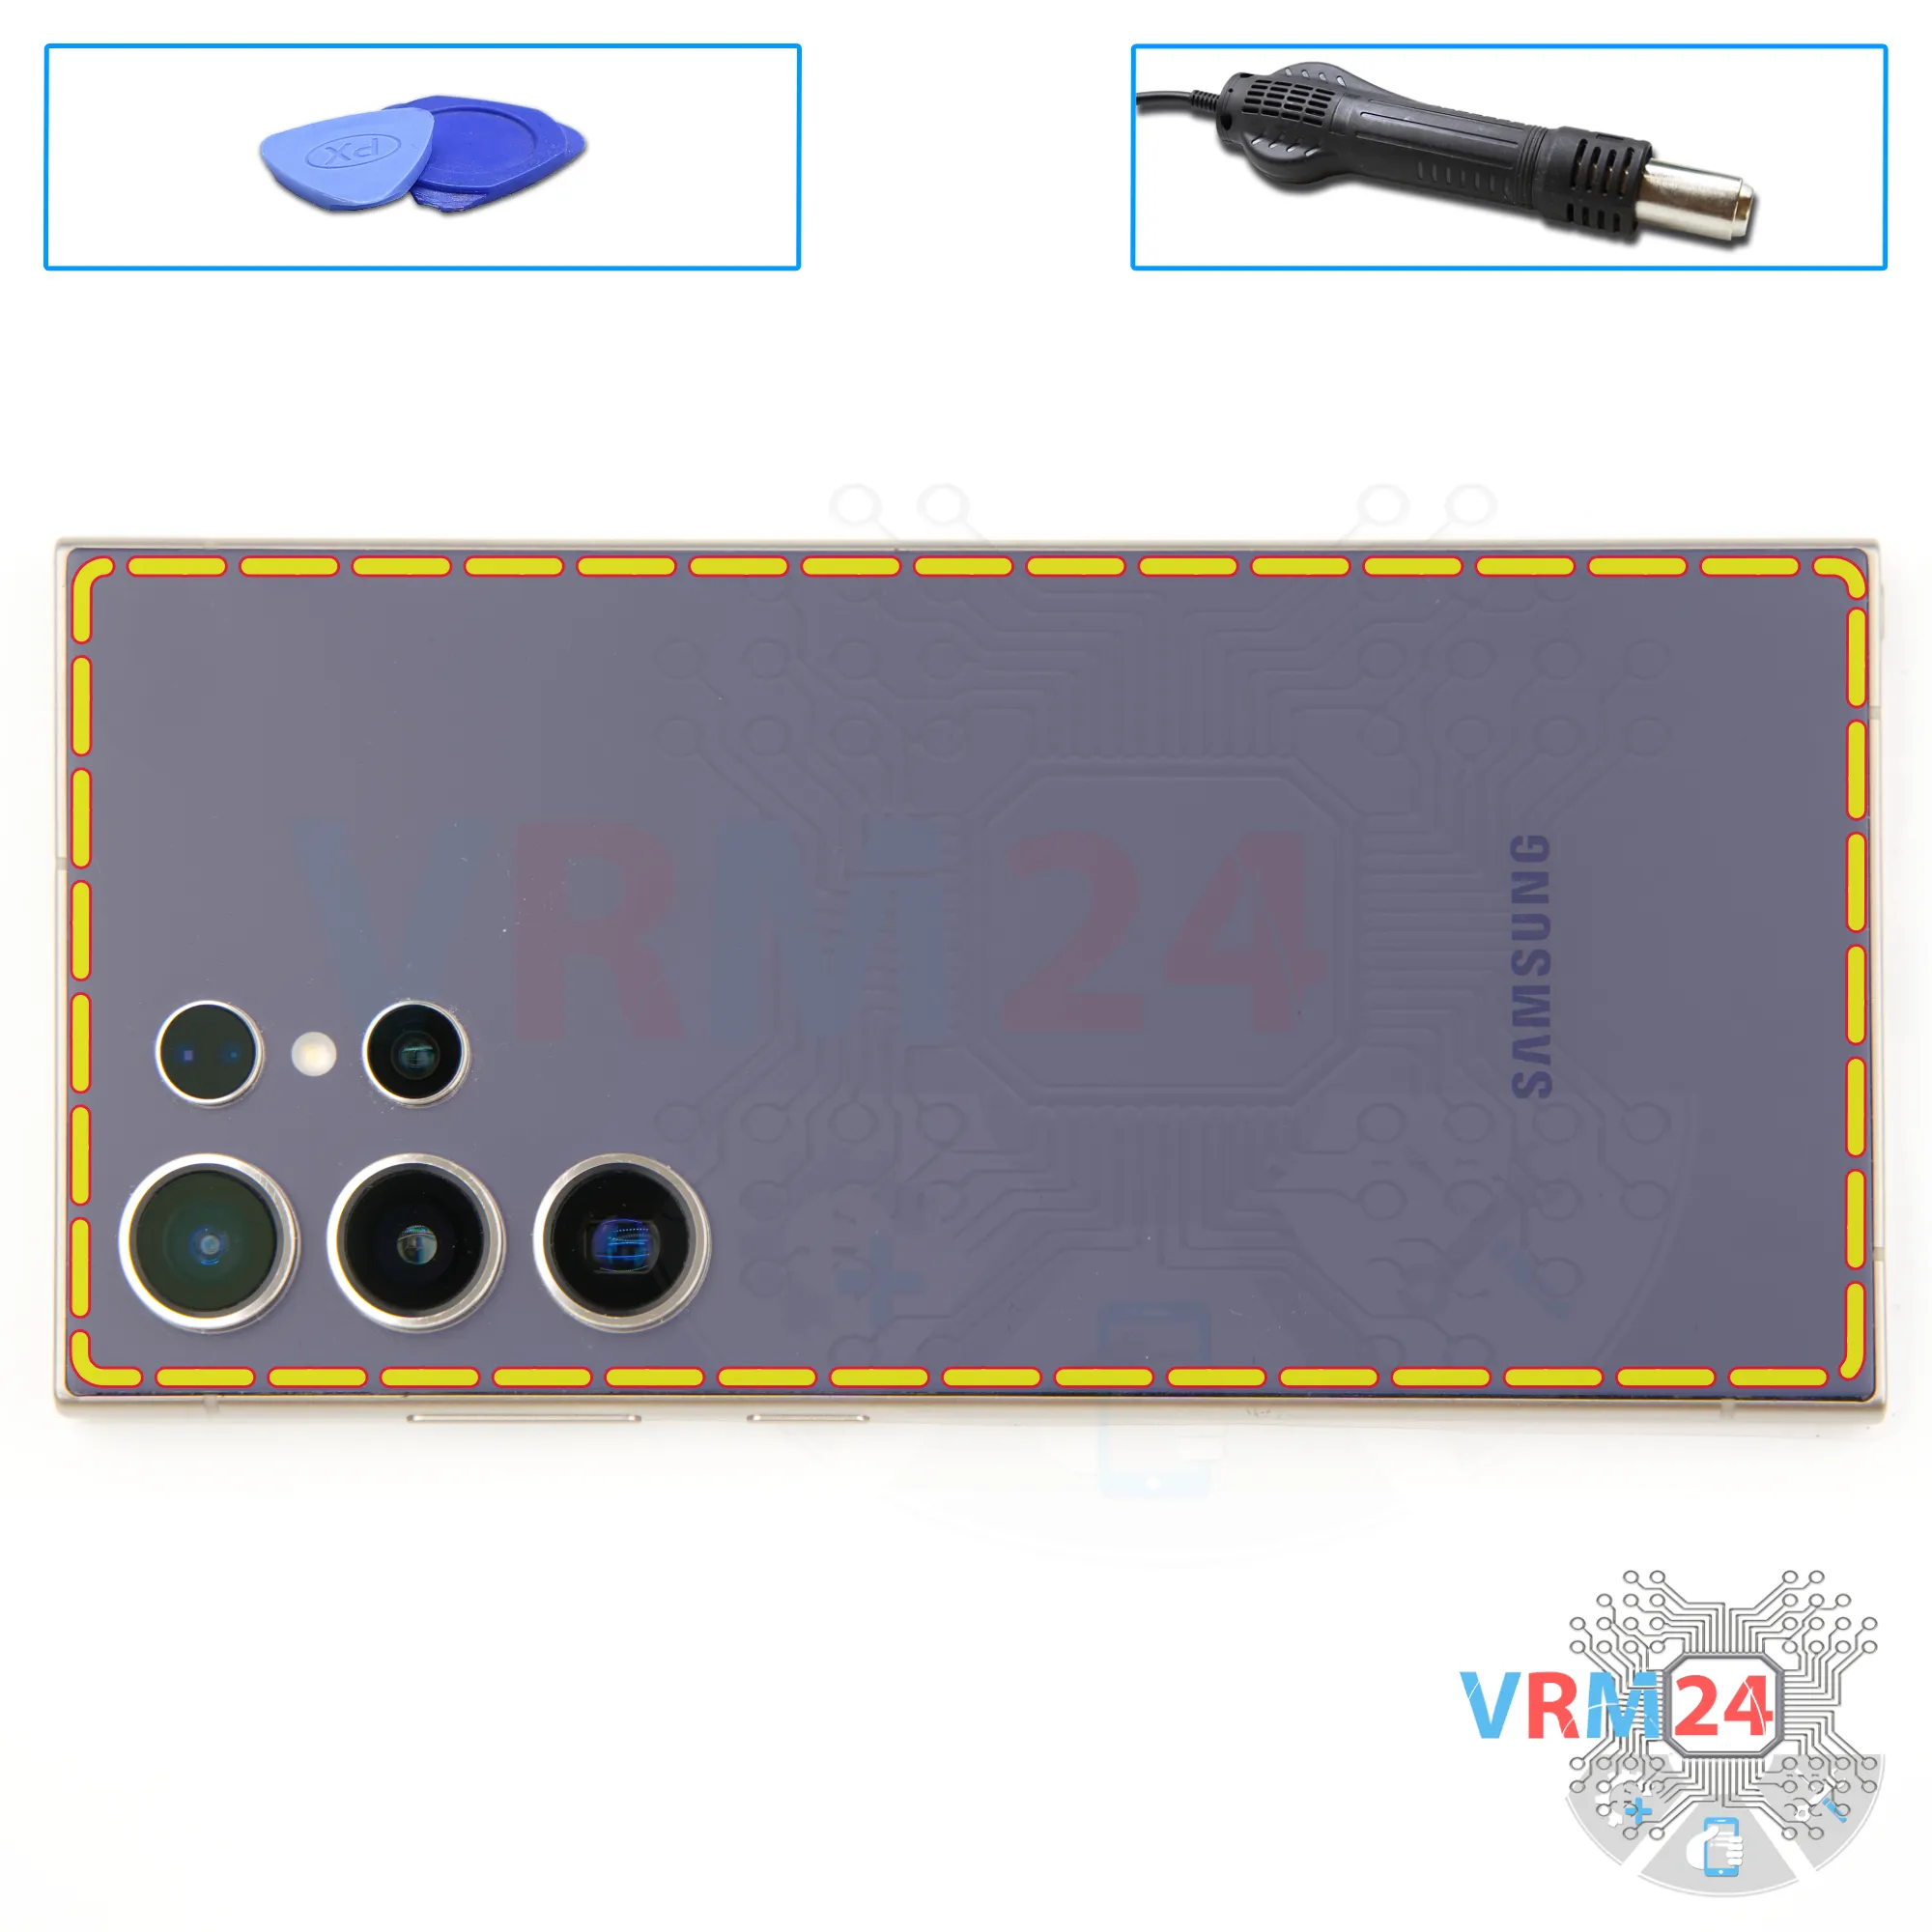
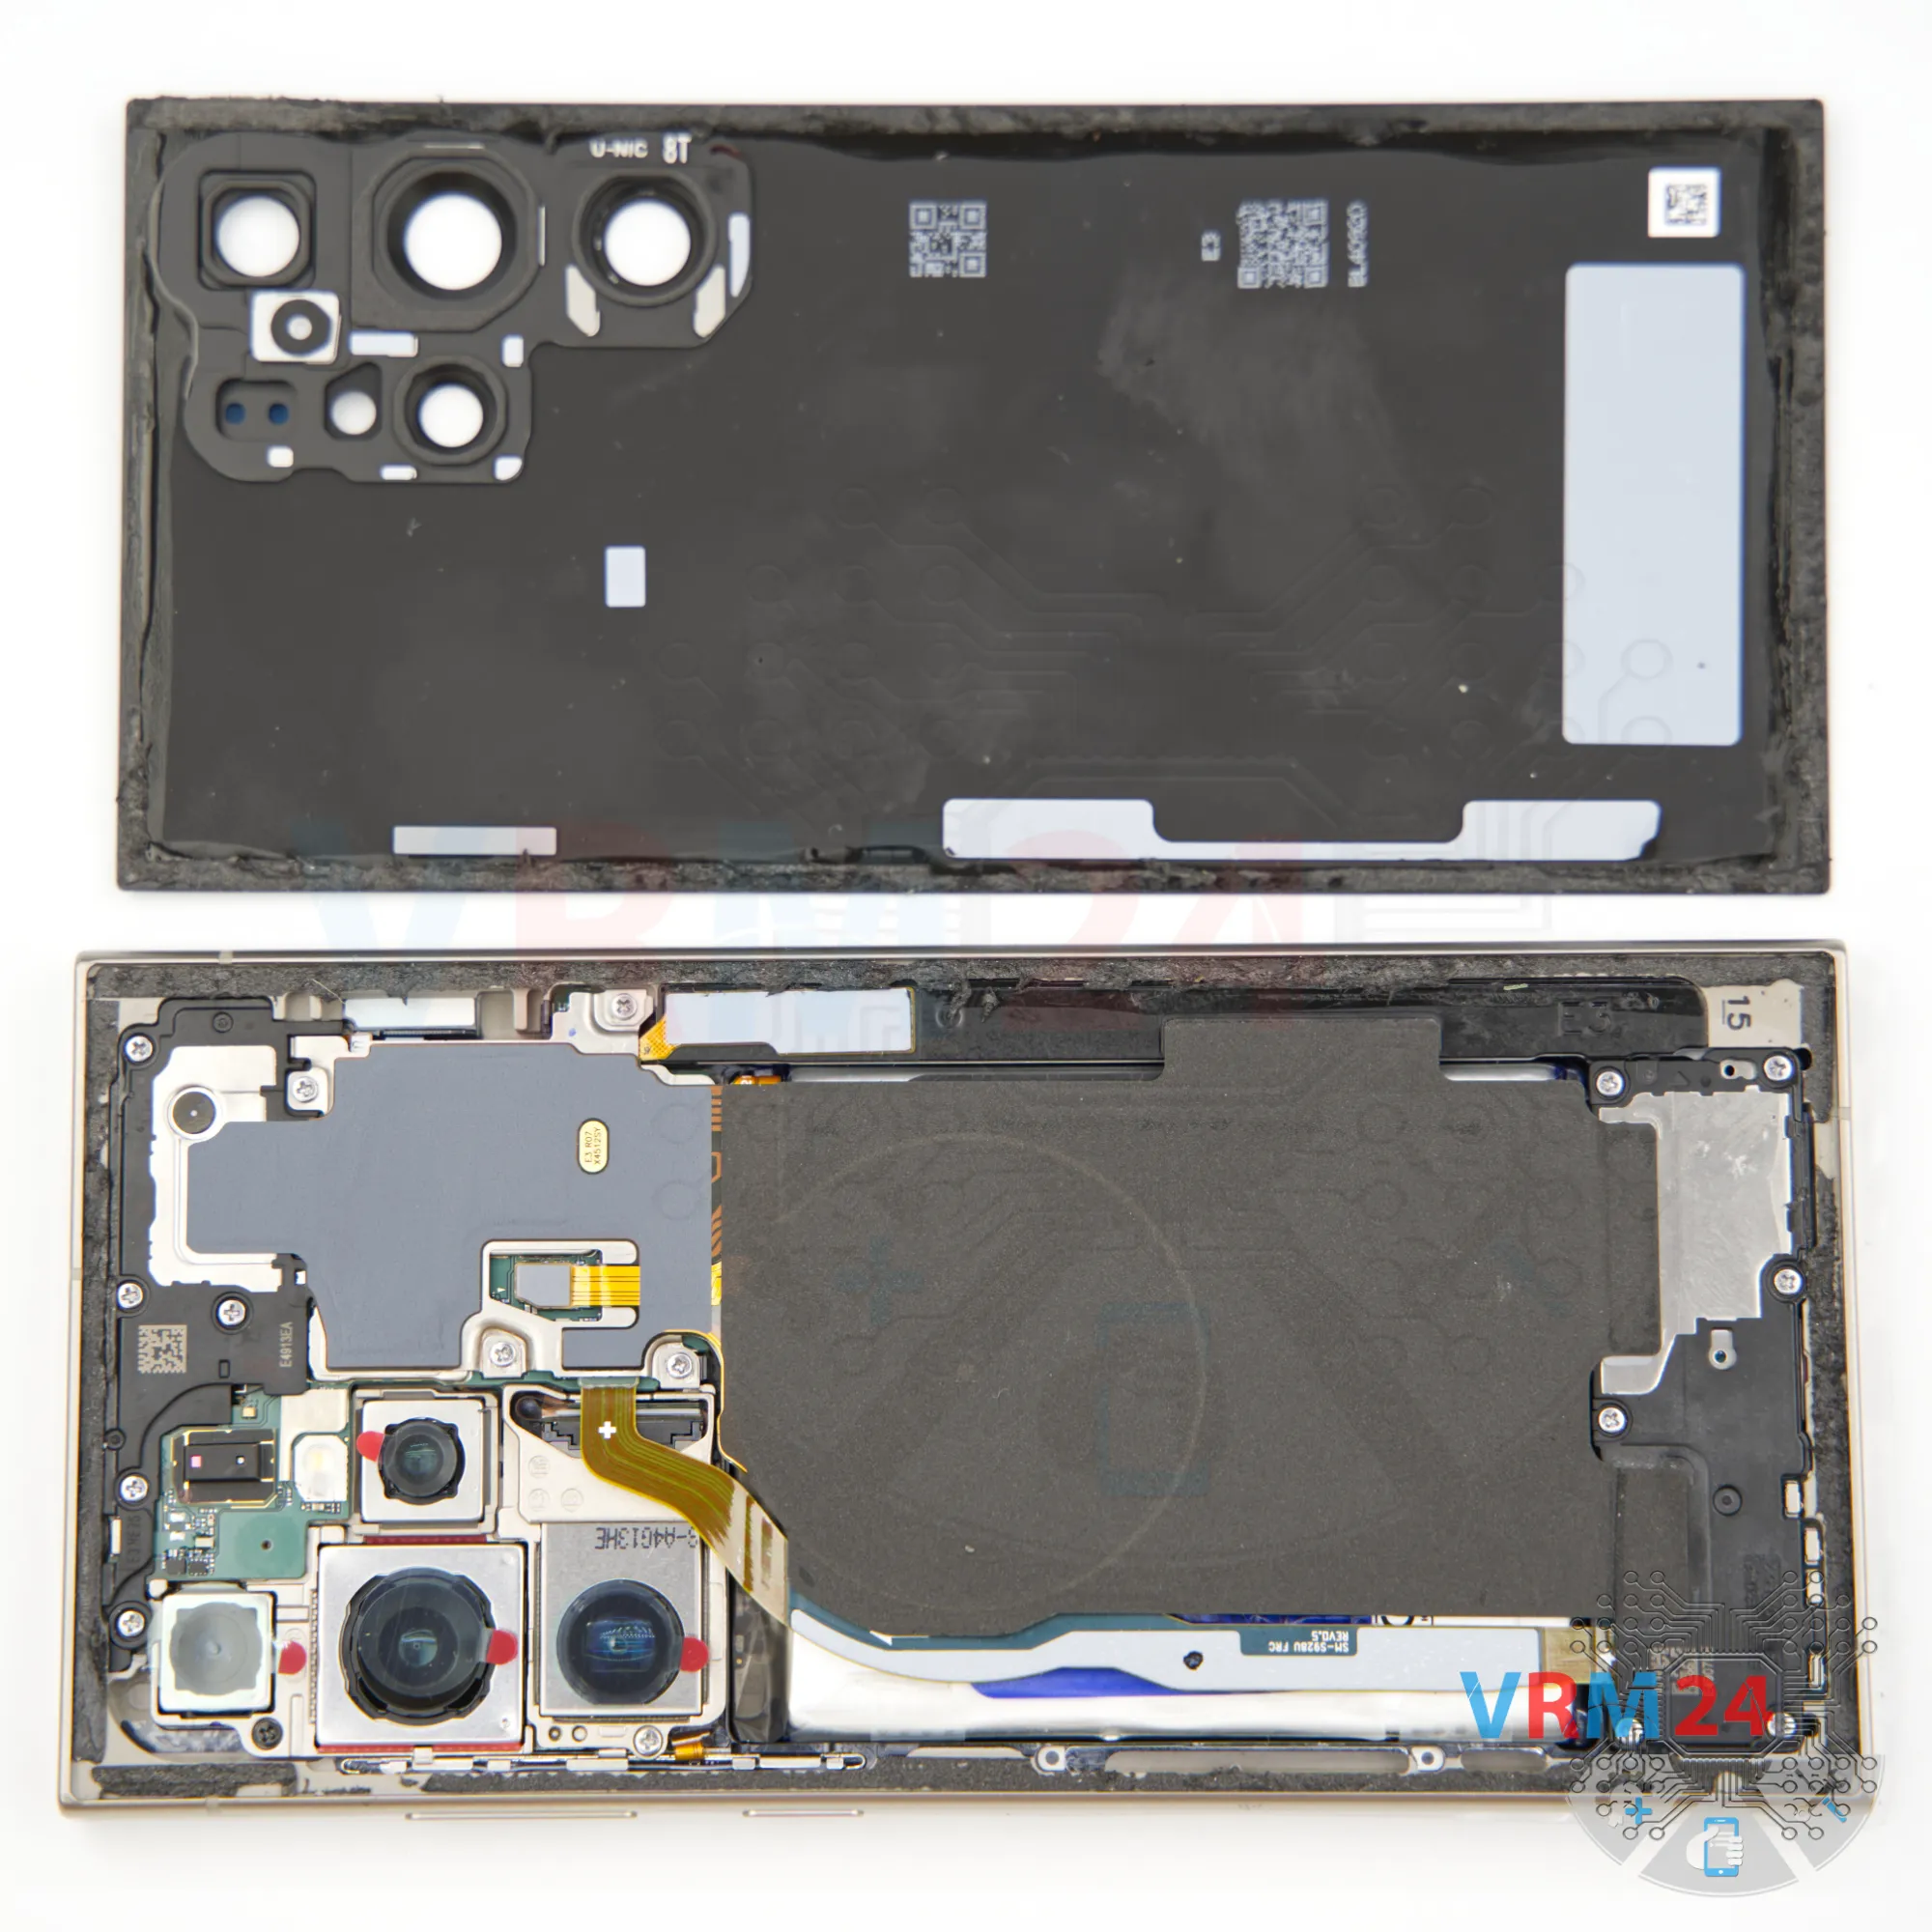
Step 4. Open the back cover
Before we begin any further, it’s very important to protect the display. We’re going to cover it with a thick protective film since the screen is quite expensive.
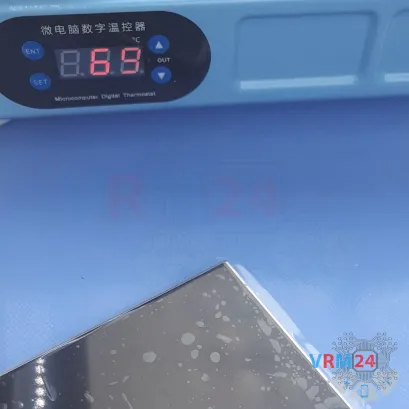
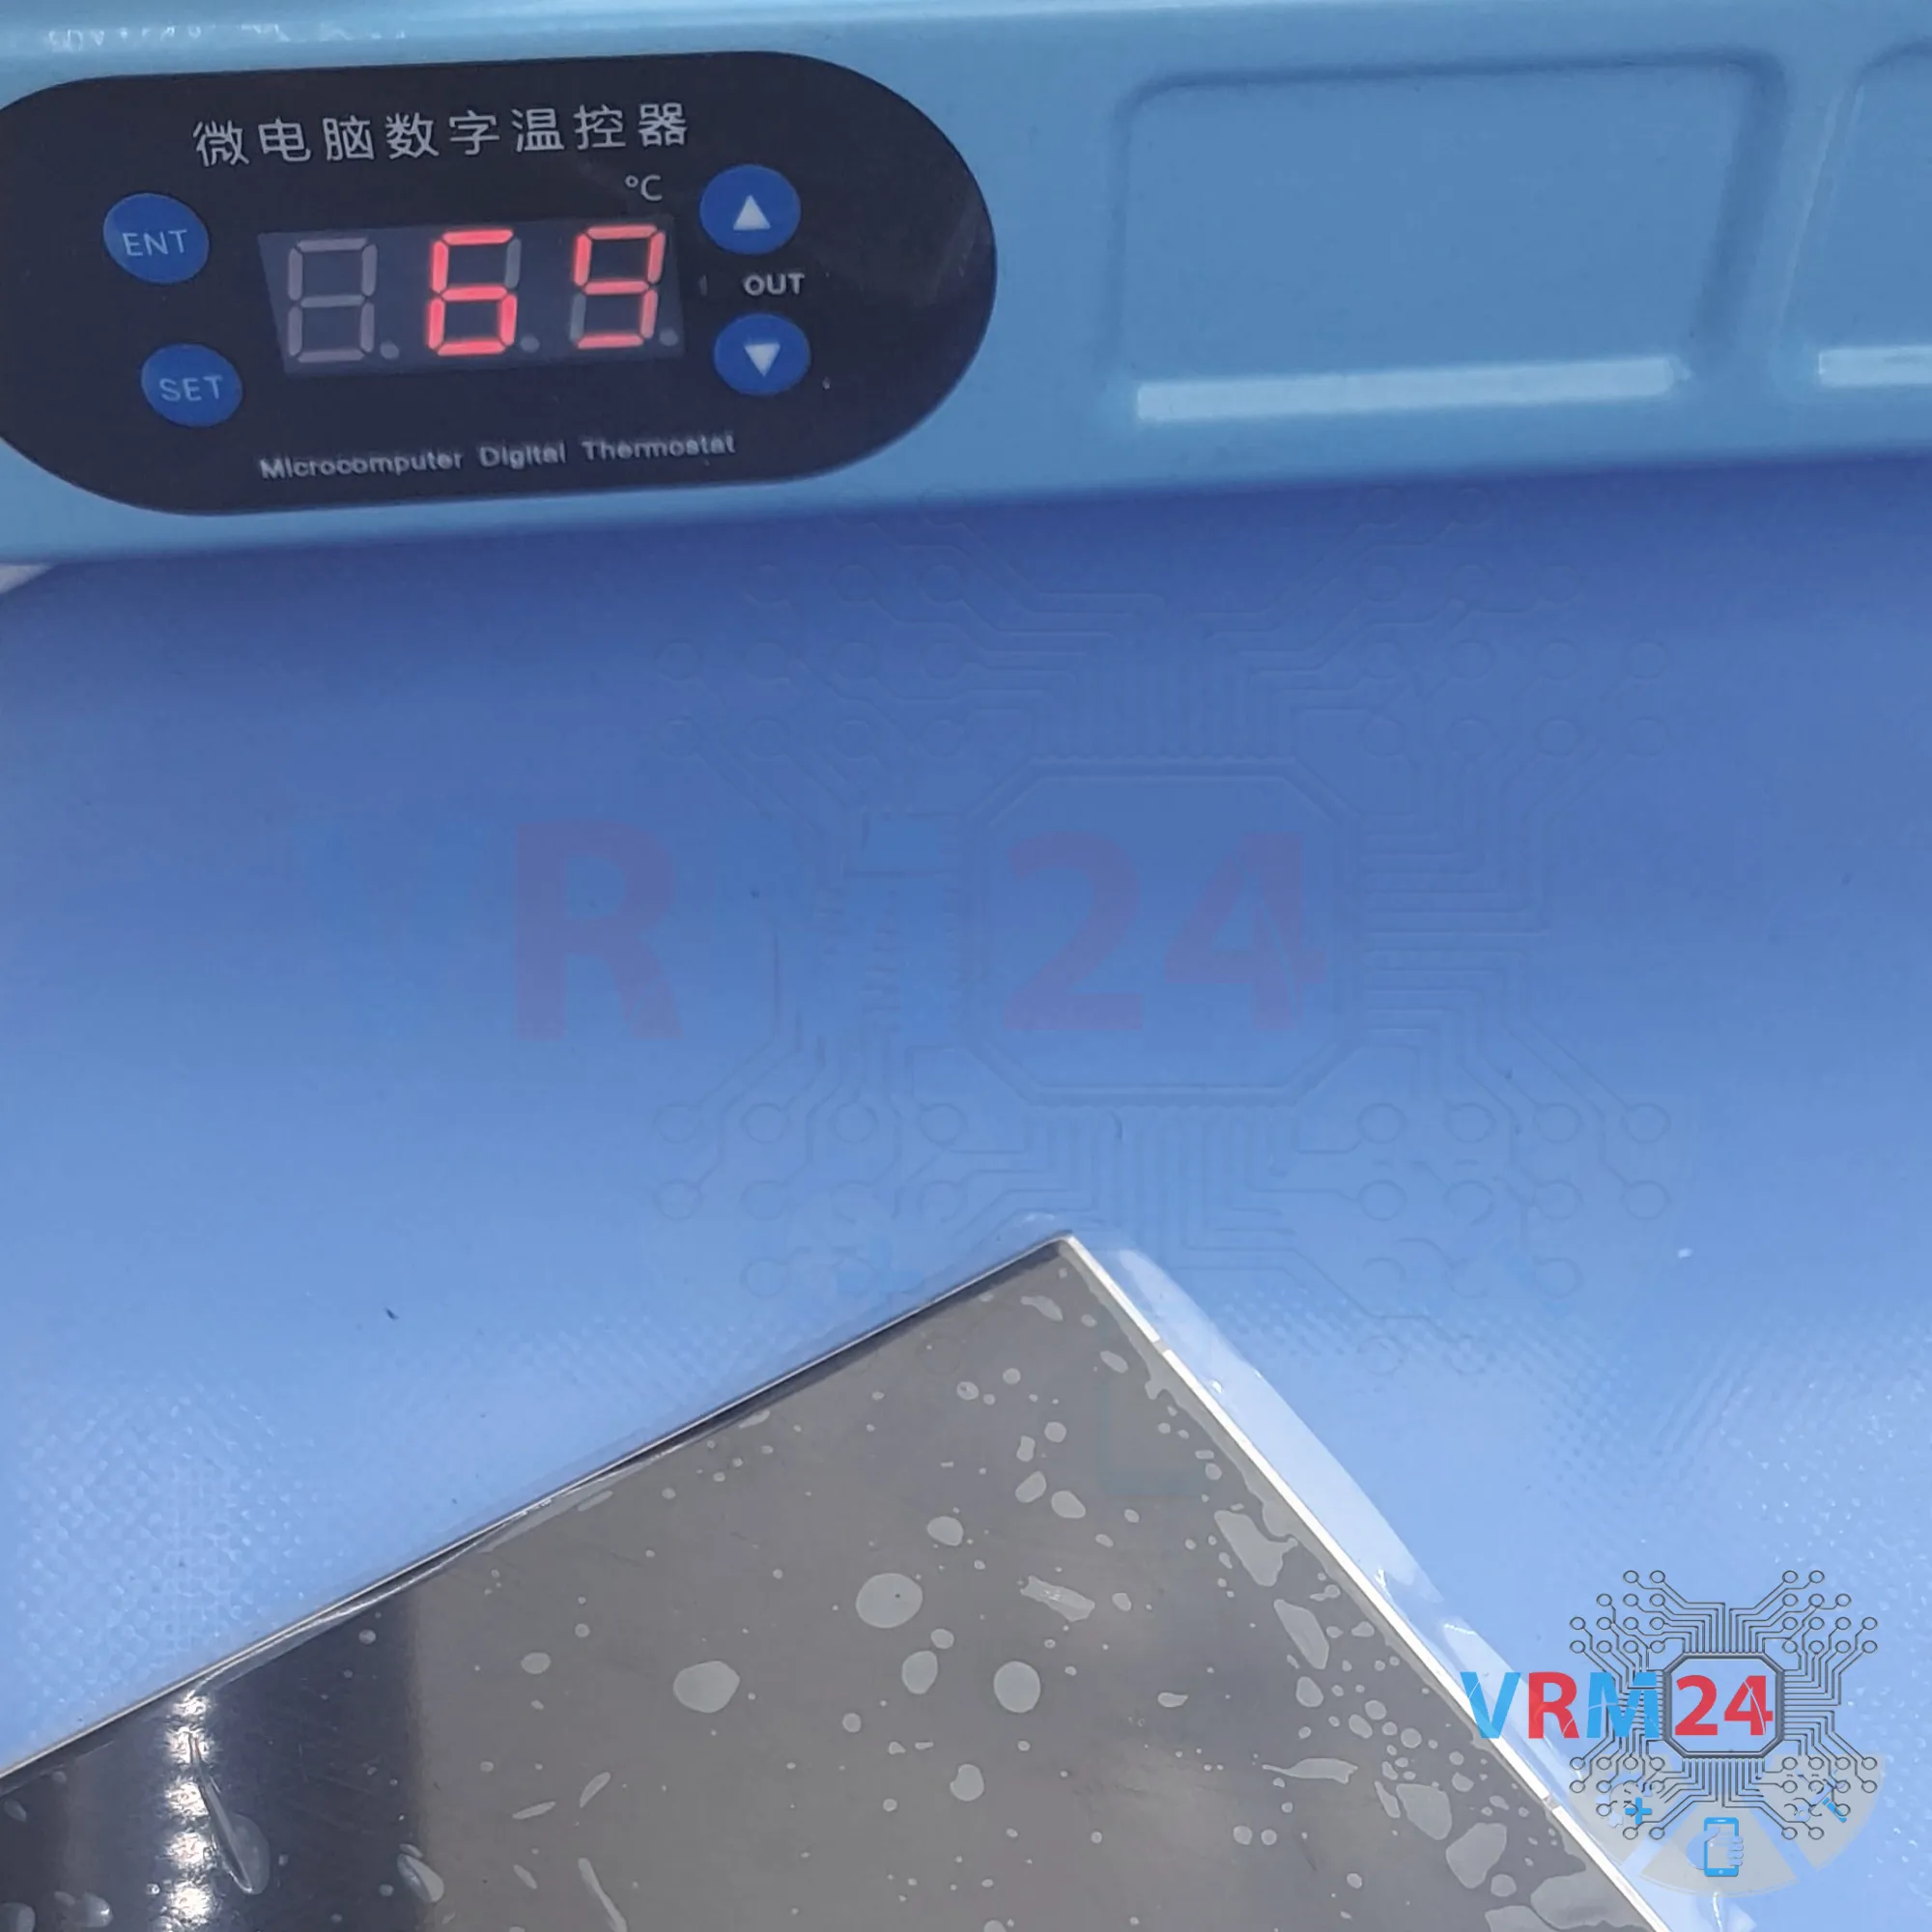
Now we move on to heating up the back cover. We’re using a heating mat for this, but a heat gun or hair dryer works too. Heat the device to around 70°C (about 160°F).
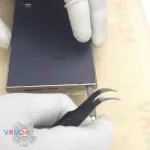
After about 10 minutes of heating, we can start removing the back cover.
The back cover is made of glass, so we need to be extra careful here. We’ll insert a thin plastic film or card into the gap between the back cover and the frame, then gently work it along the edge to separate the adhesive.
As always, be especially cautious around the camera area to avoid damaging the lenses.
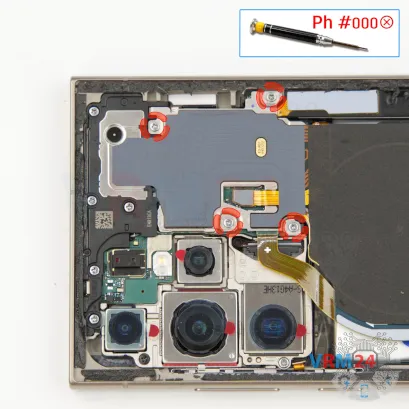

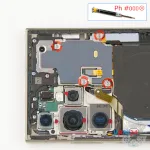


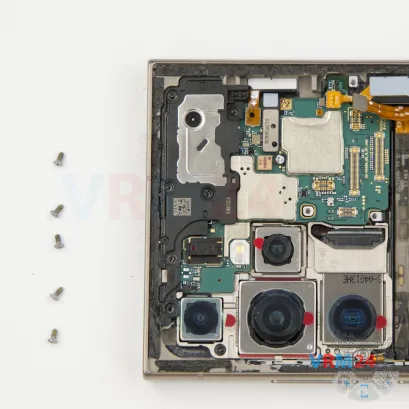
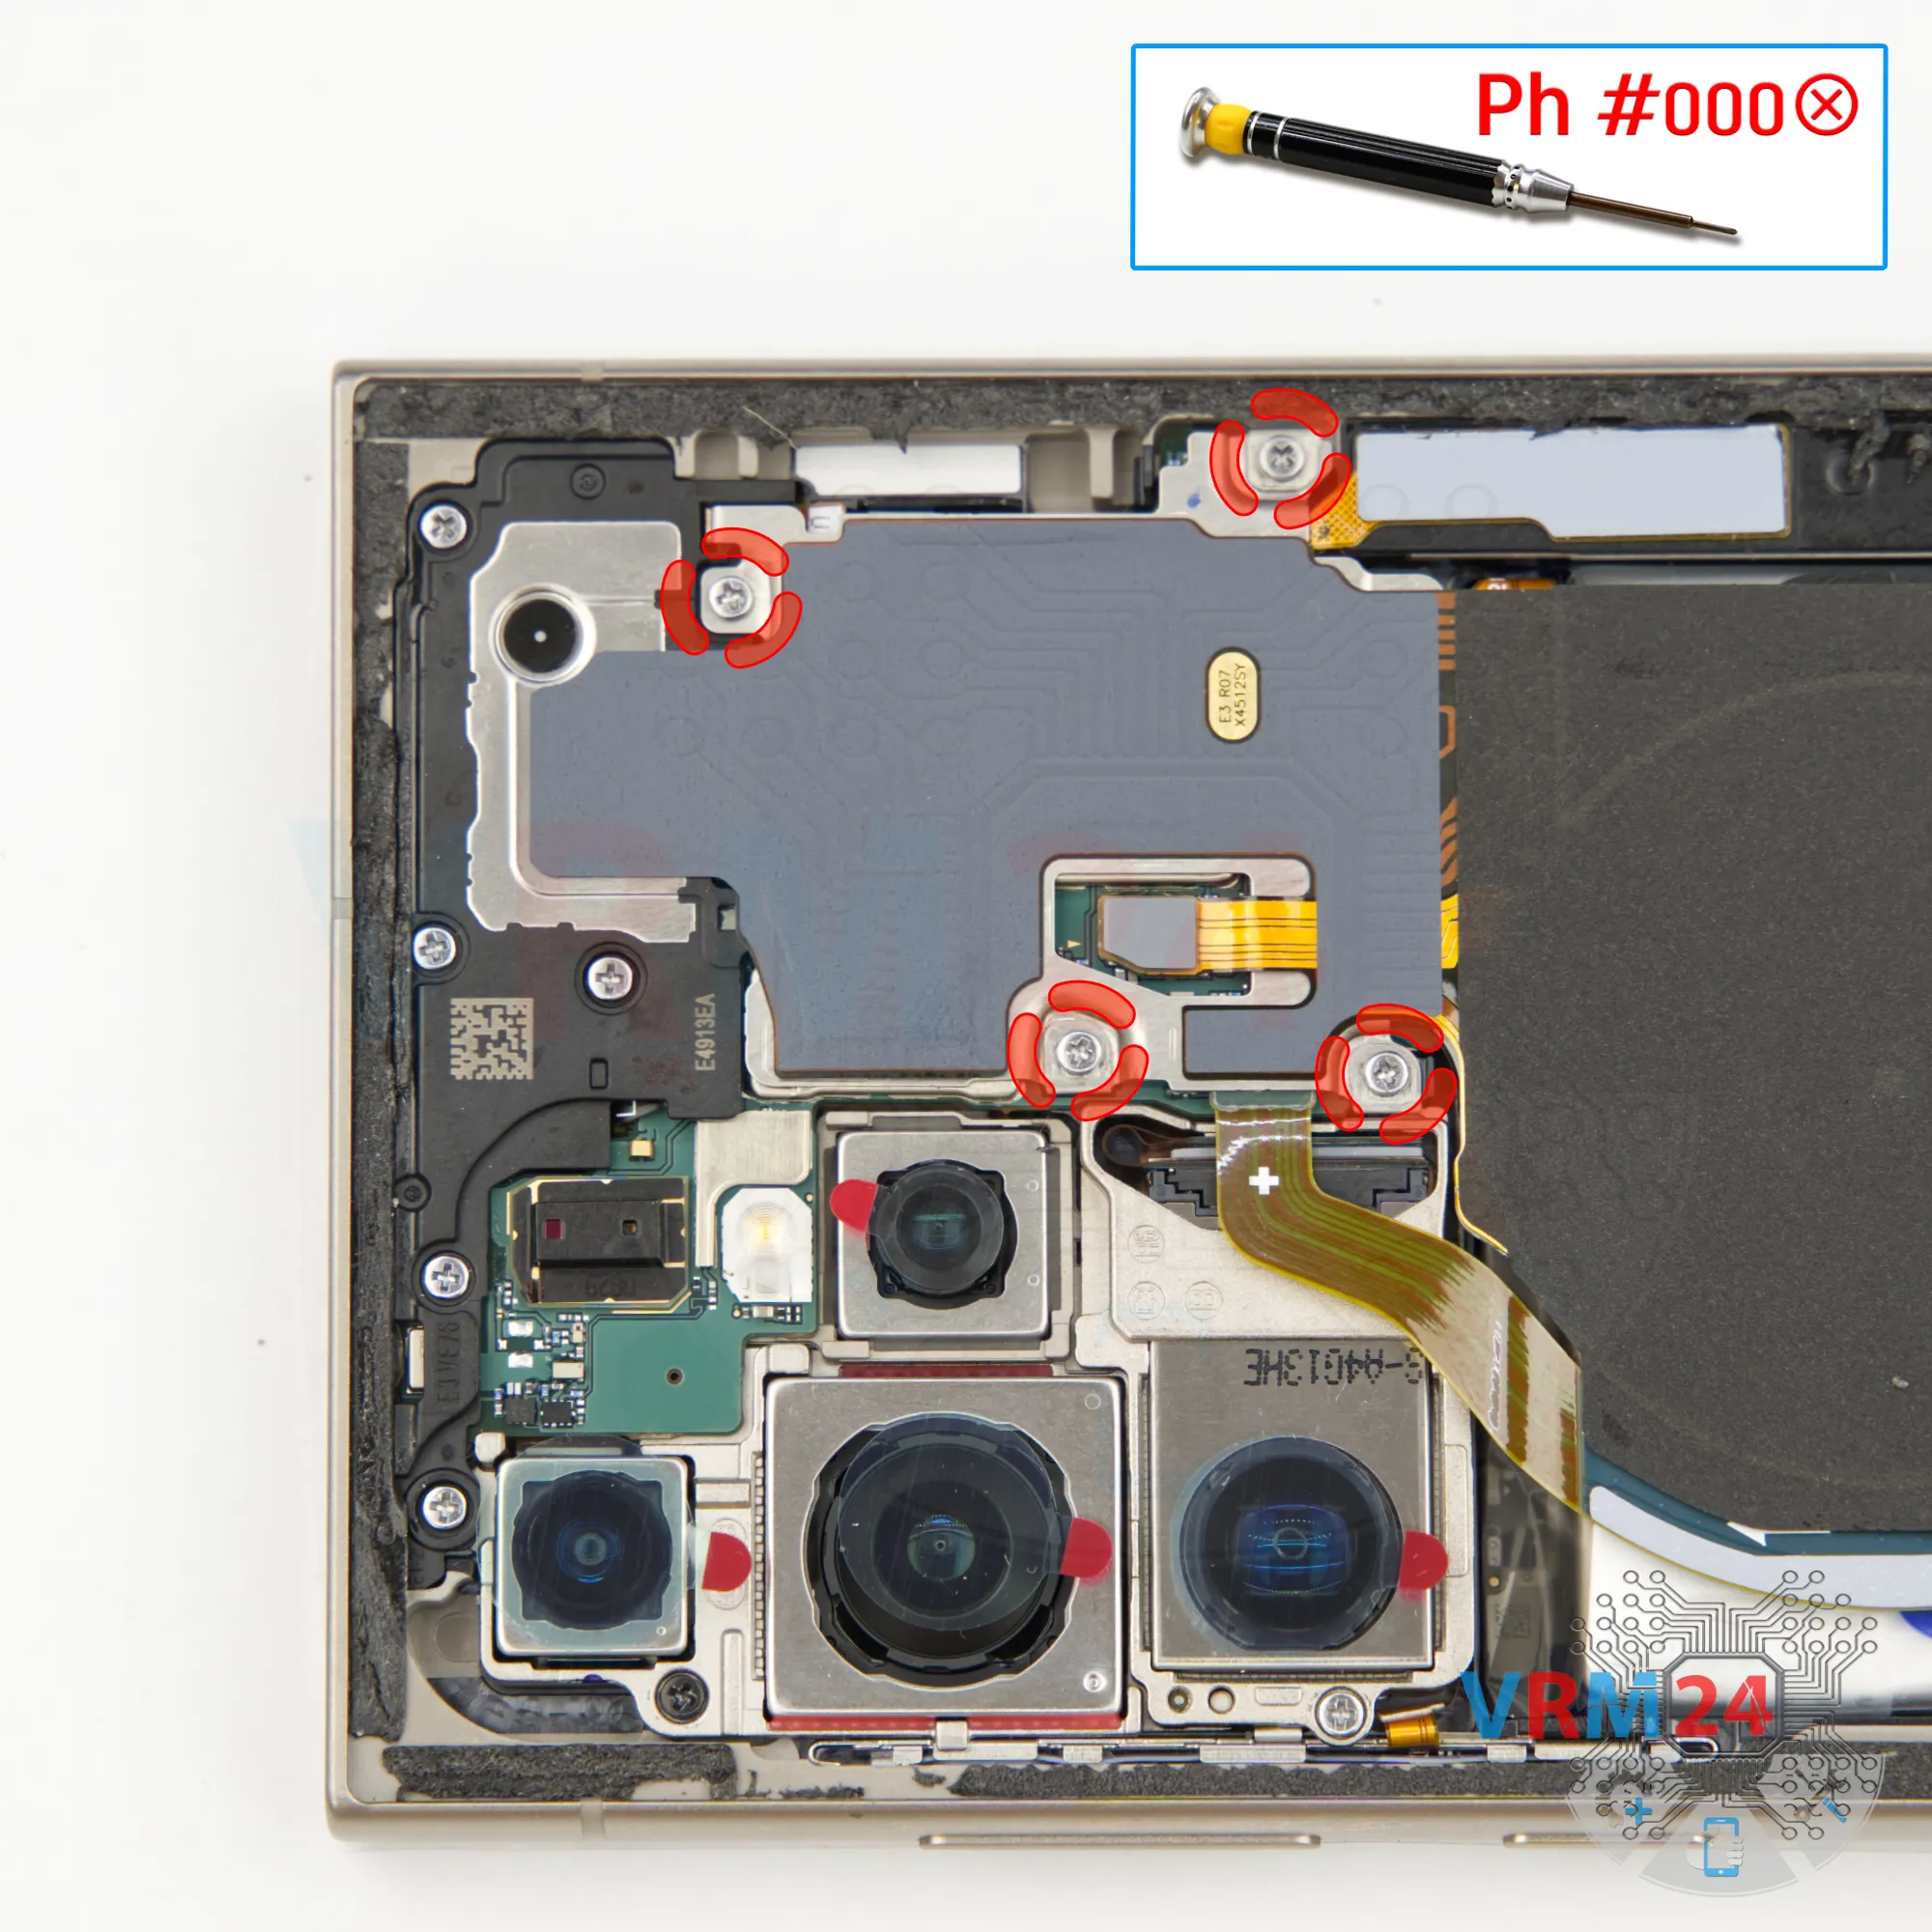
Step 5. Unscrew the screws
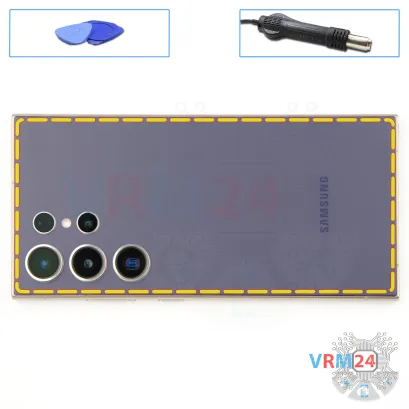
Next, we need to protect the camera lenses. We’ll use a special protective film.
Important note: the film should be applied to the camera rim around the lenses, not directly on the lenses themselves.
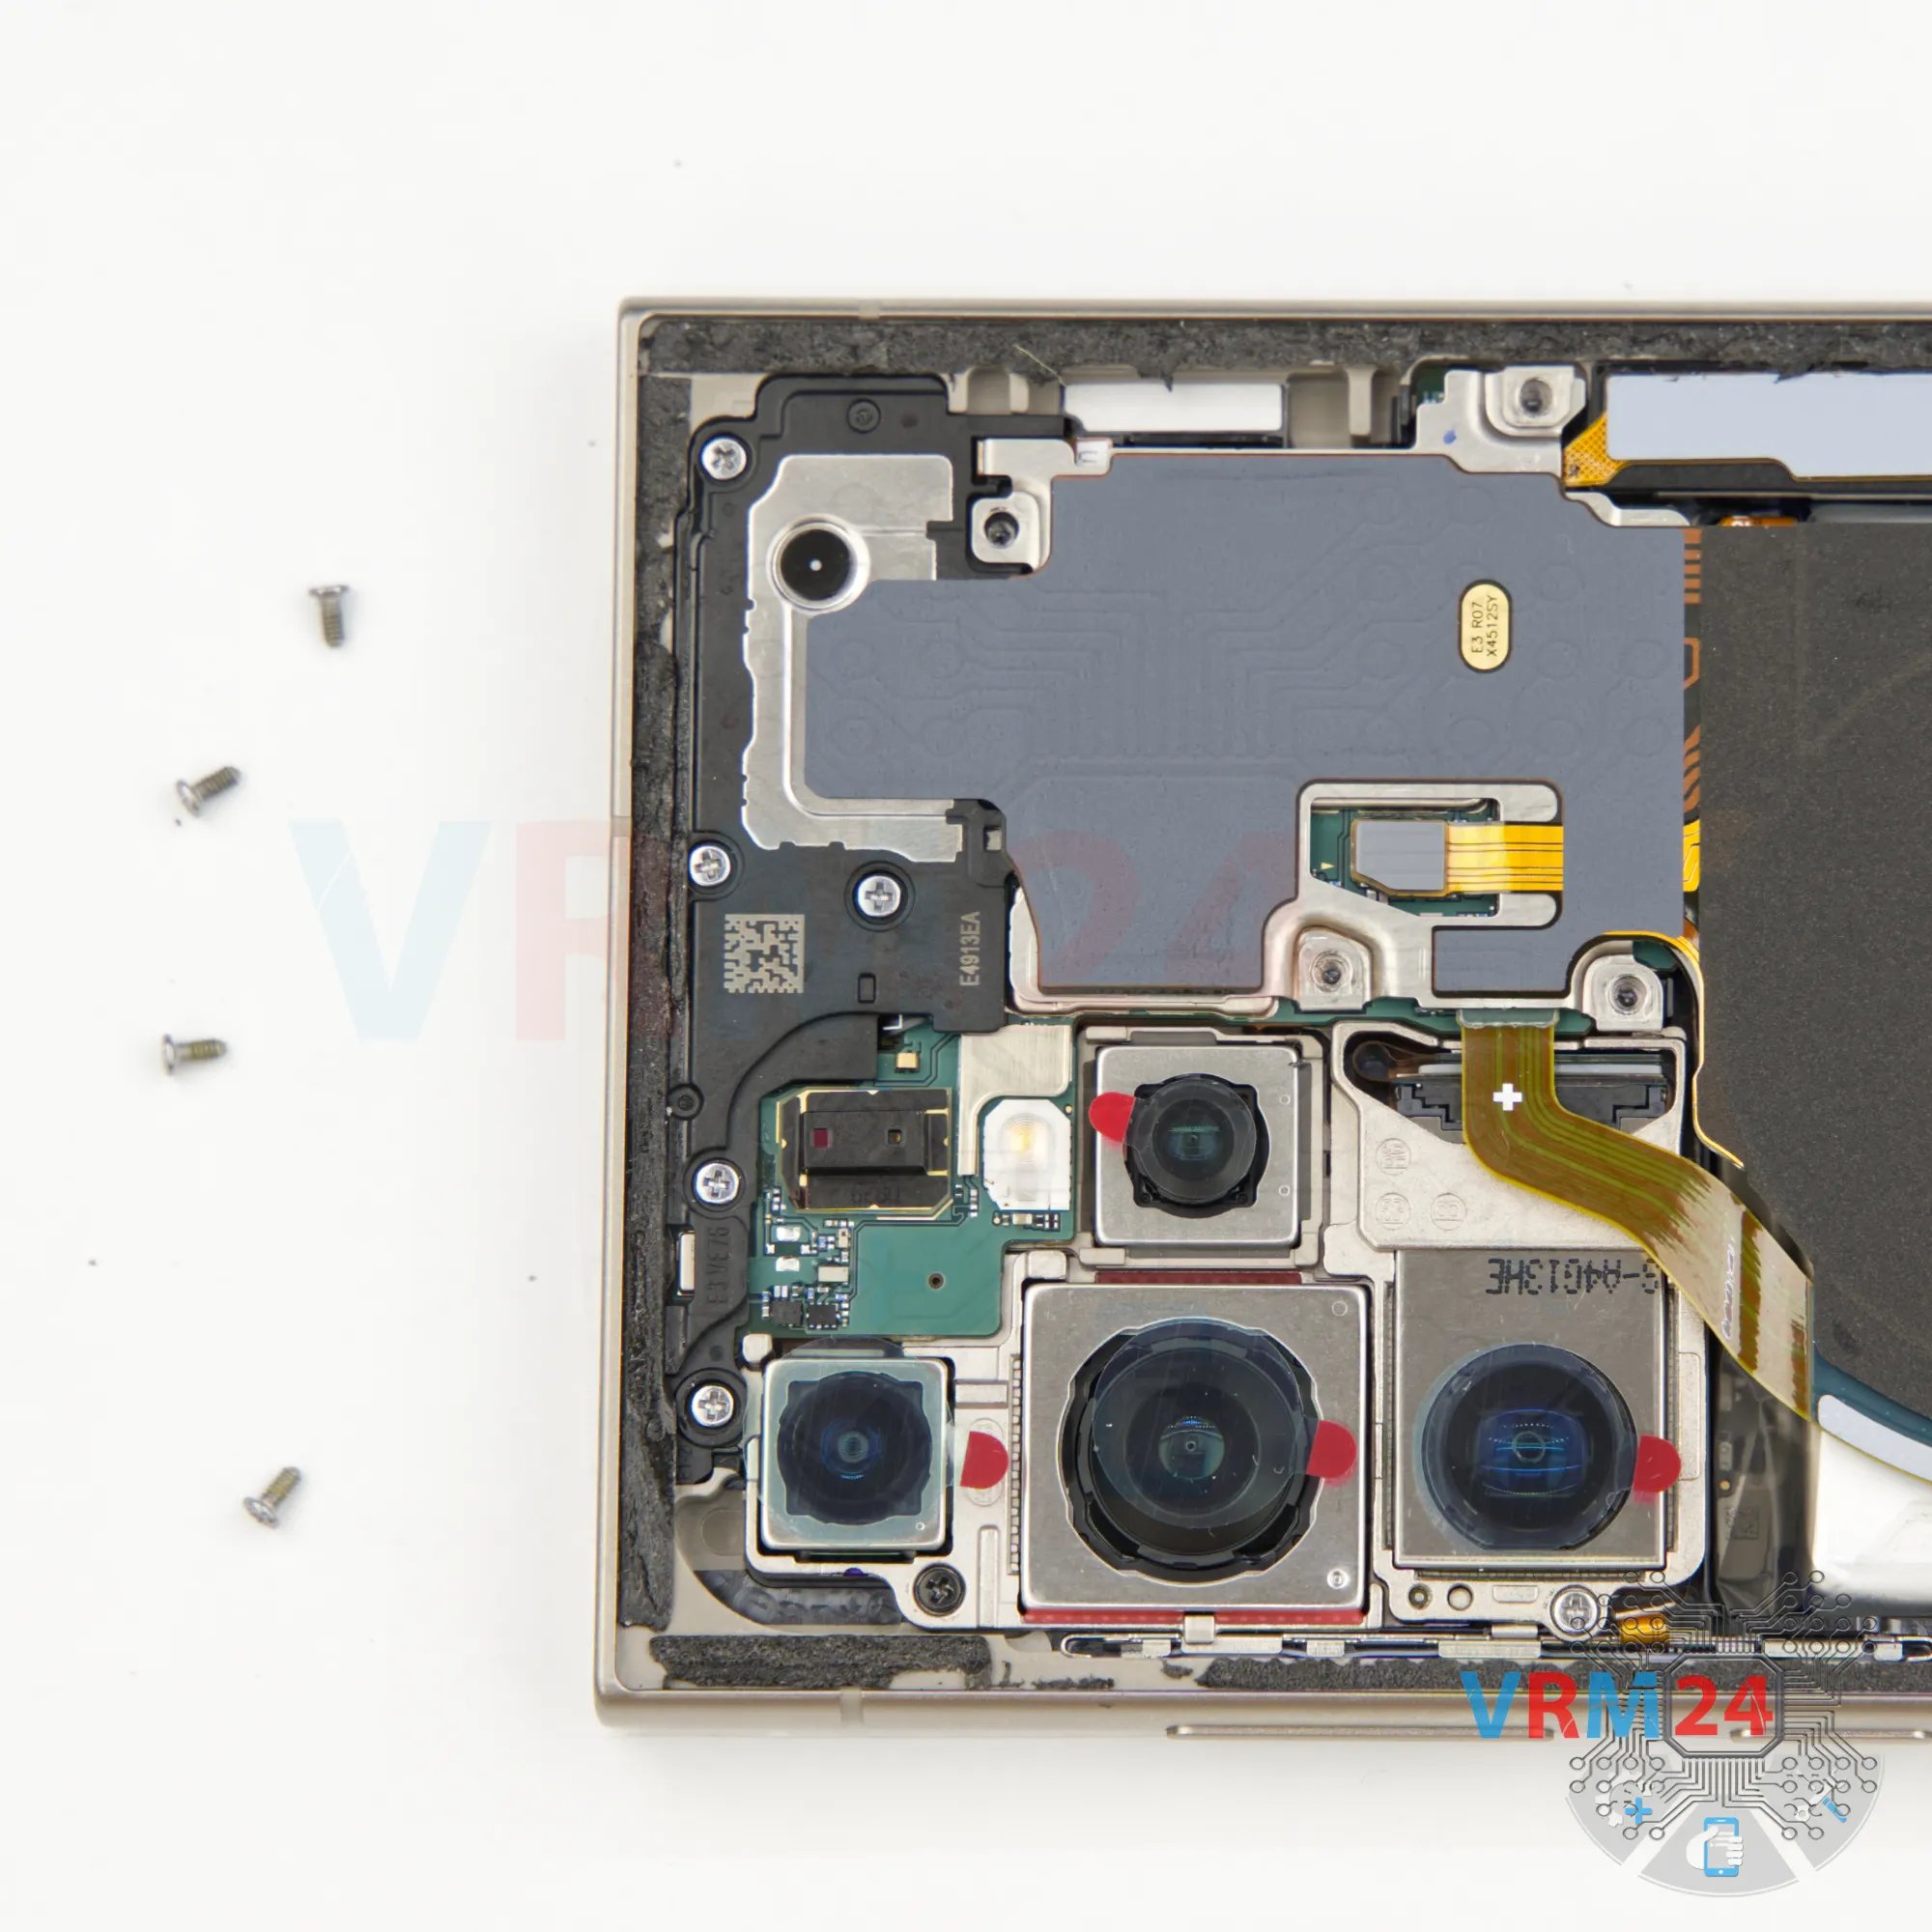
With the lenses covered, we move on to removing the four screws from the top section.
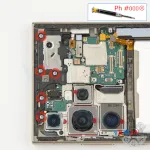
For this, we’re using a 1.5mm Phillips screwdriver (Phillips #000).


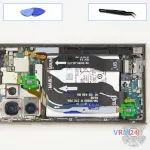
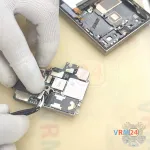
Step 6. Remove the wireless charging
Now, using a plastic (non-metal) tool, disconnect the connector for the wireless charging coil and the NFC module. Gently remove this module.

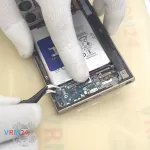
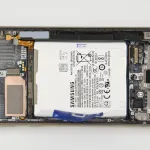
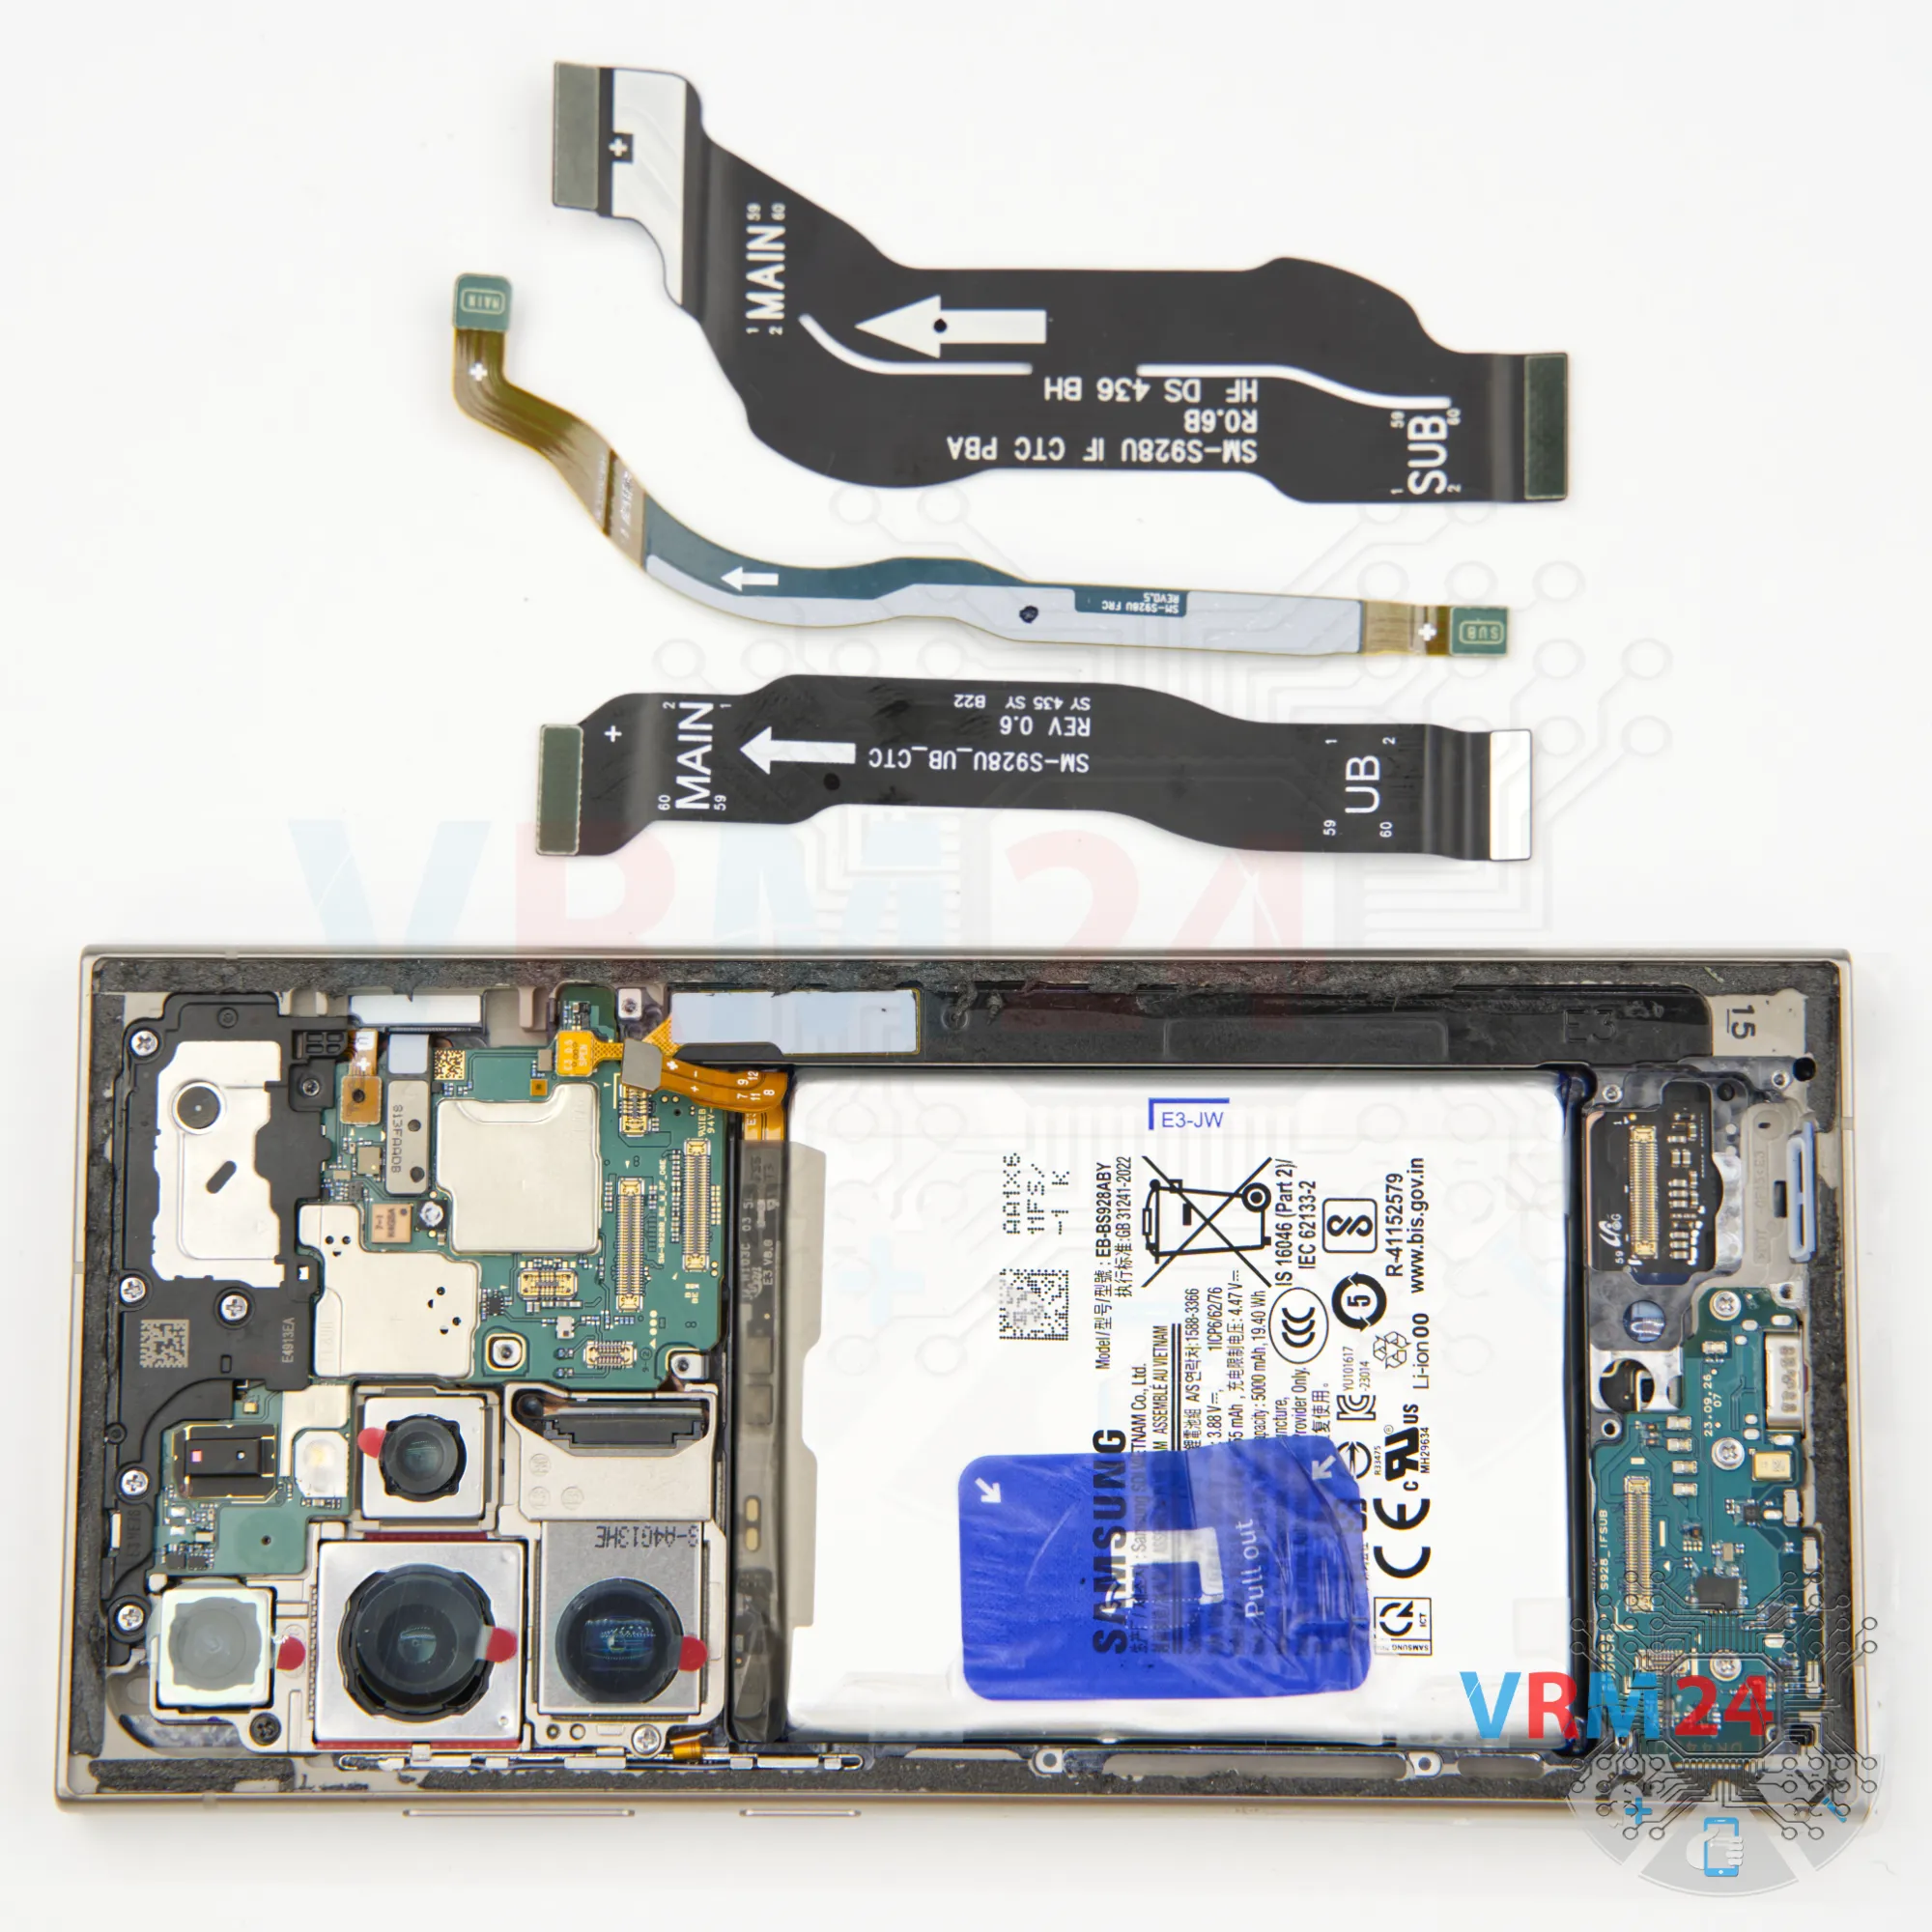
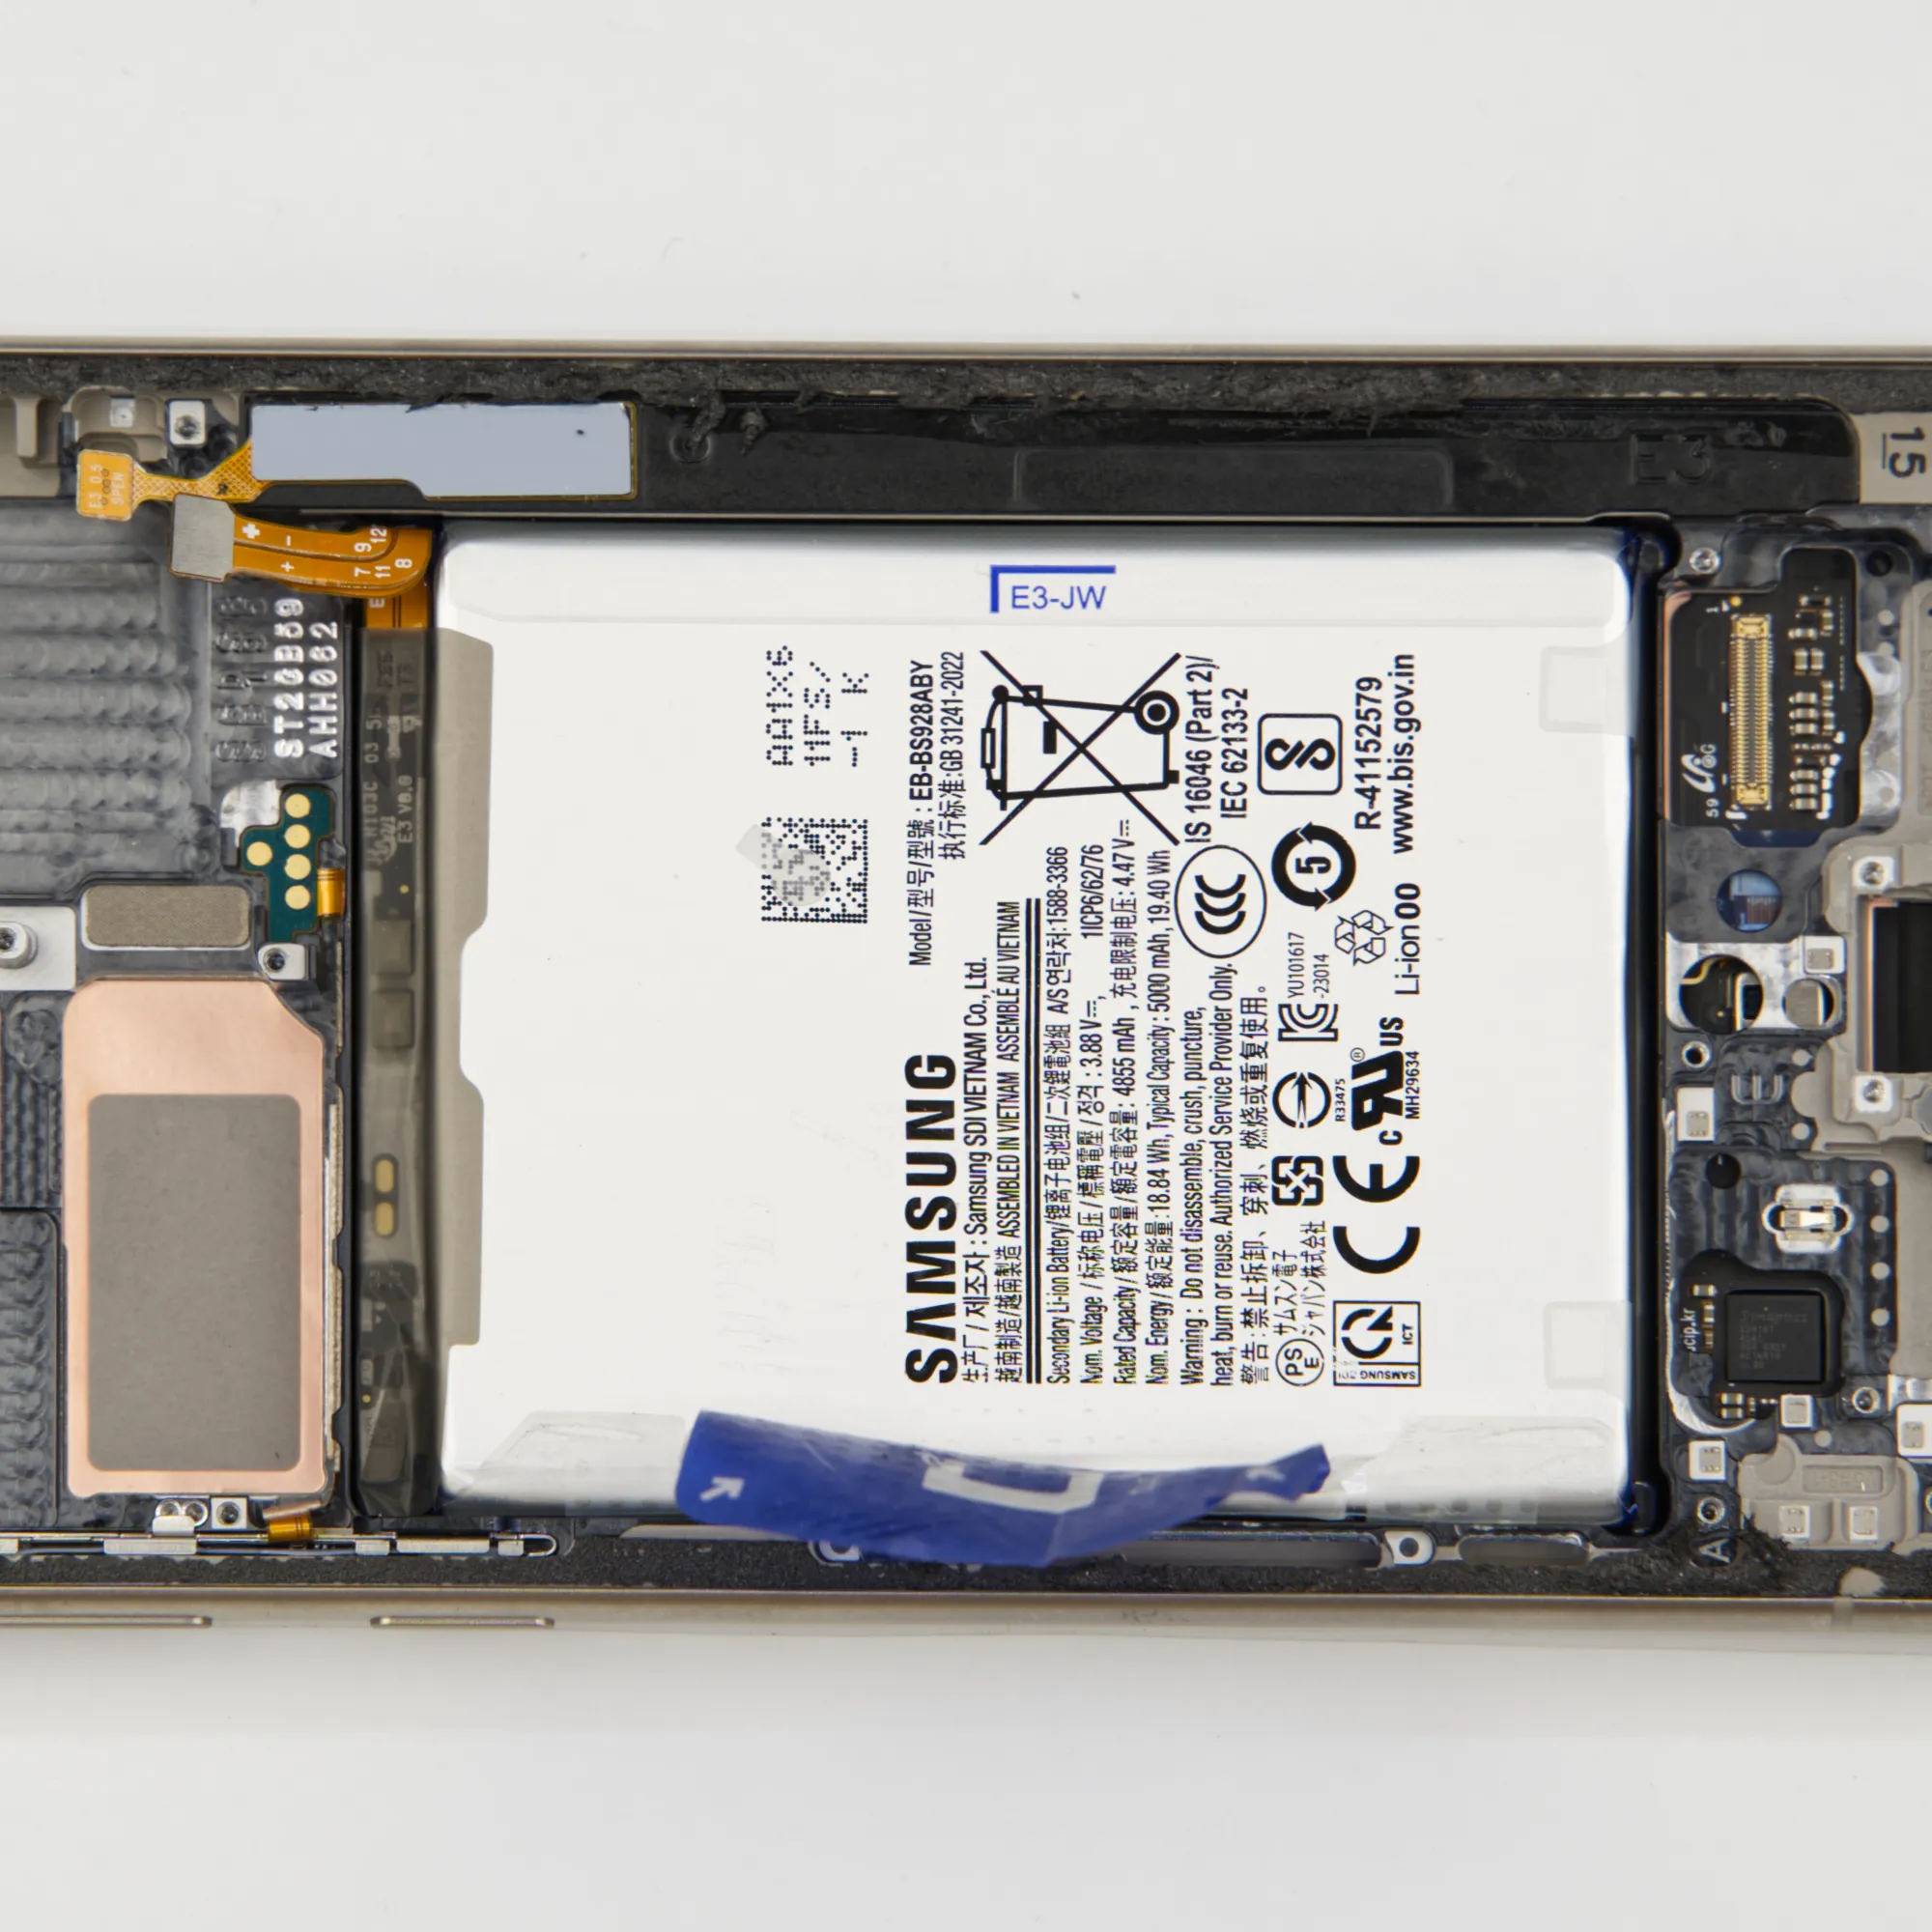
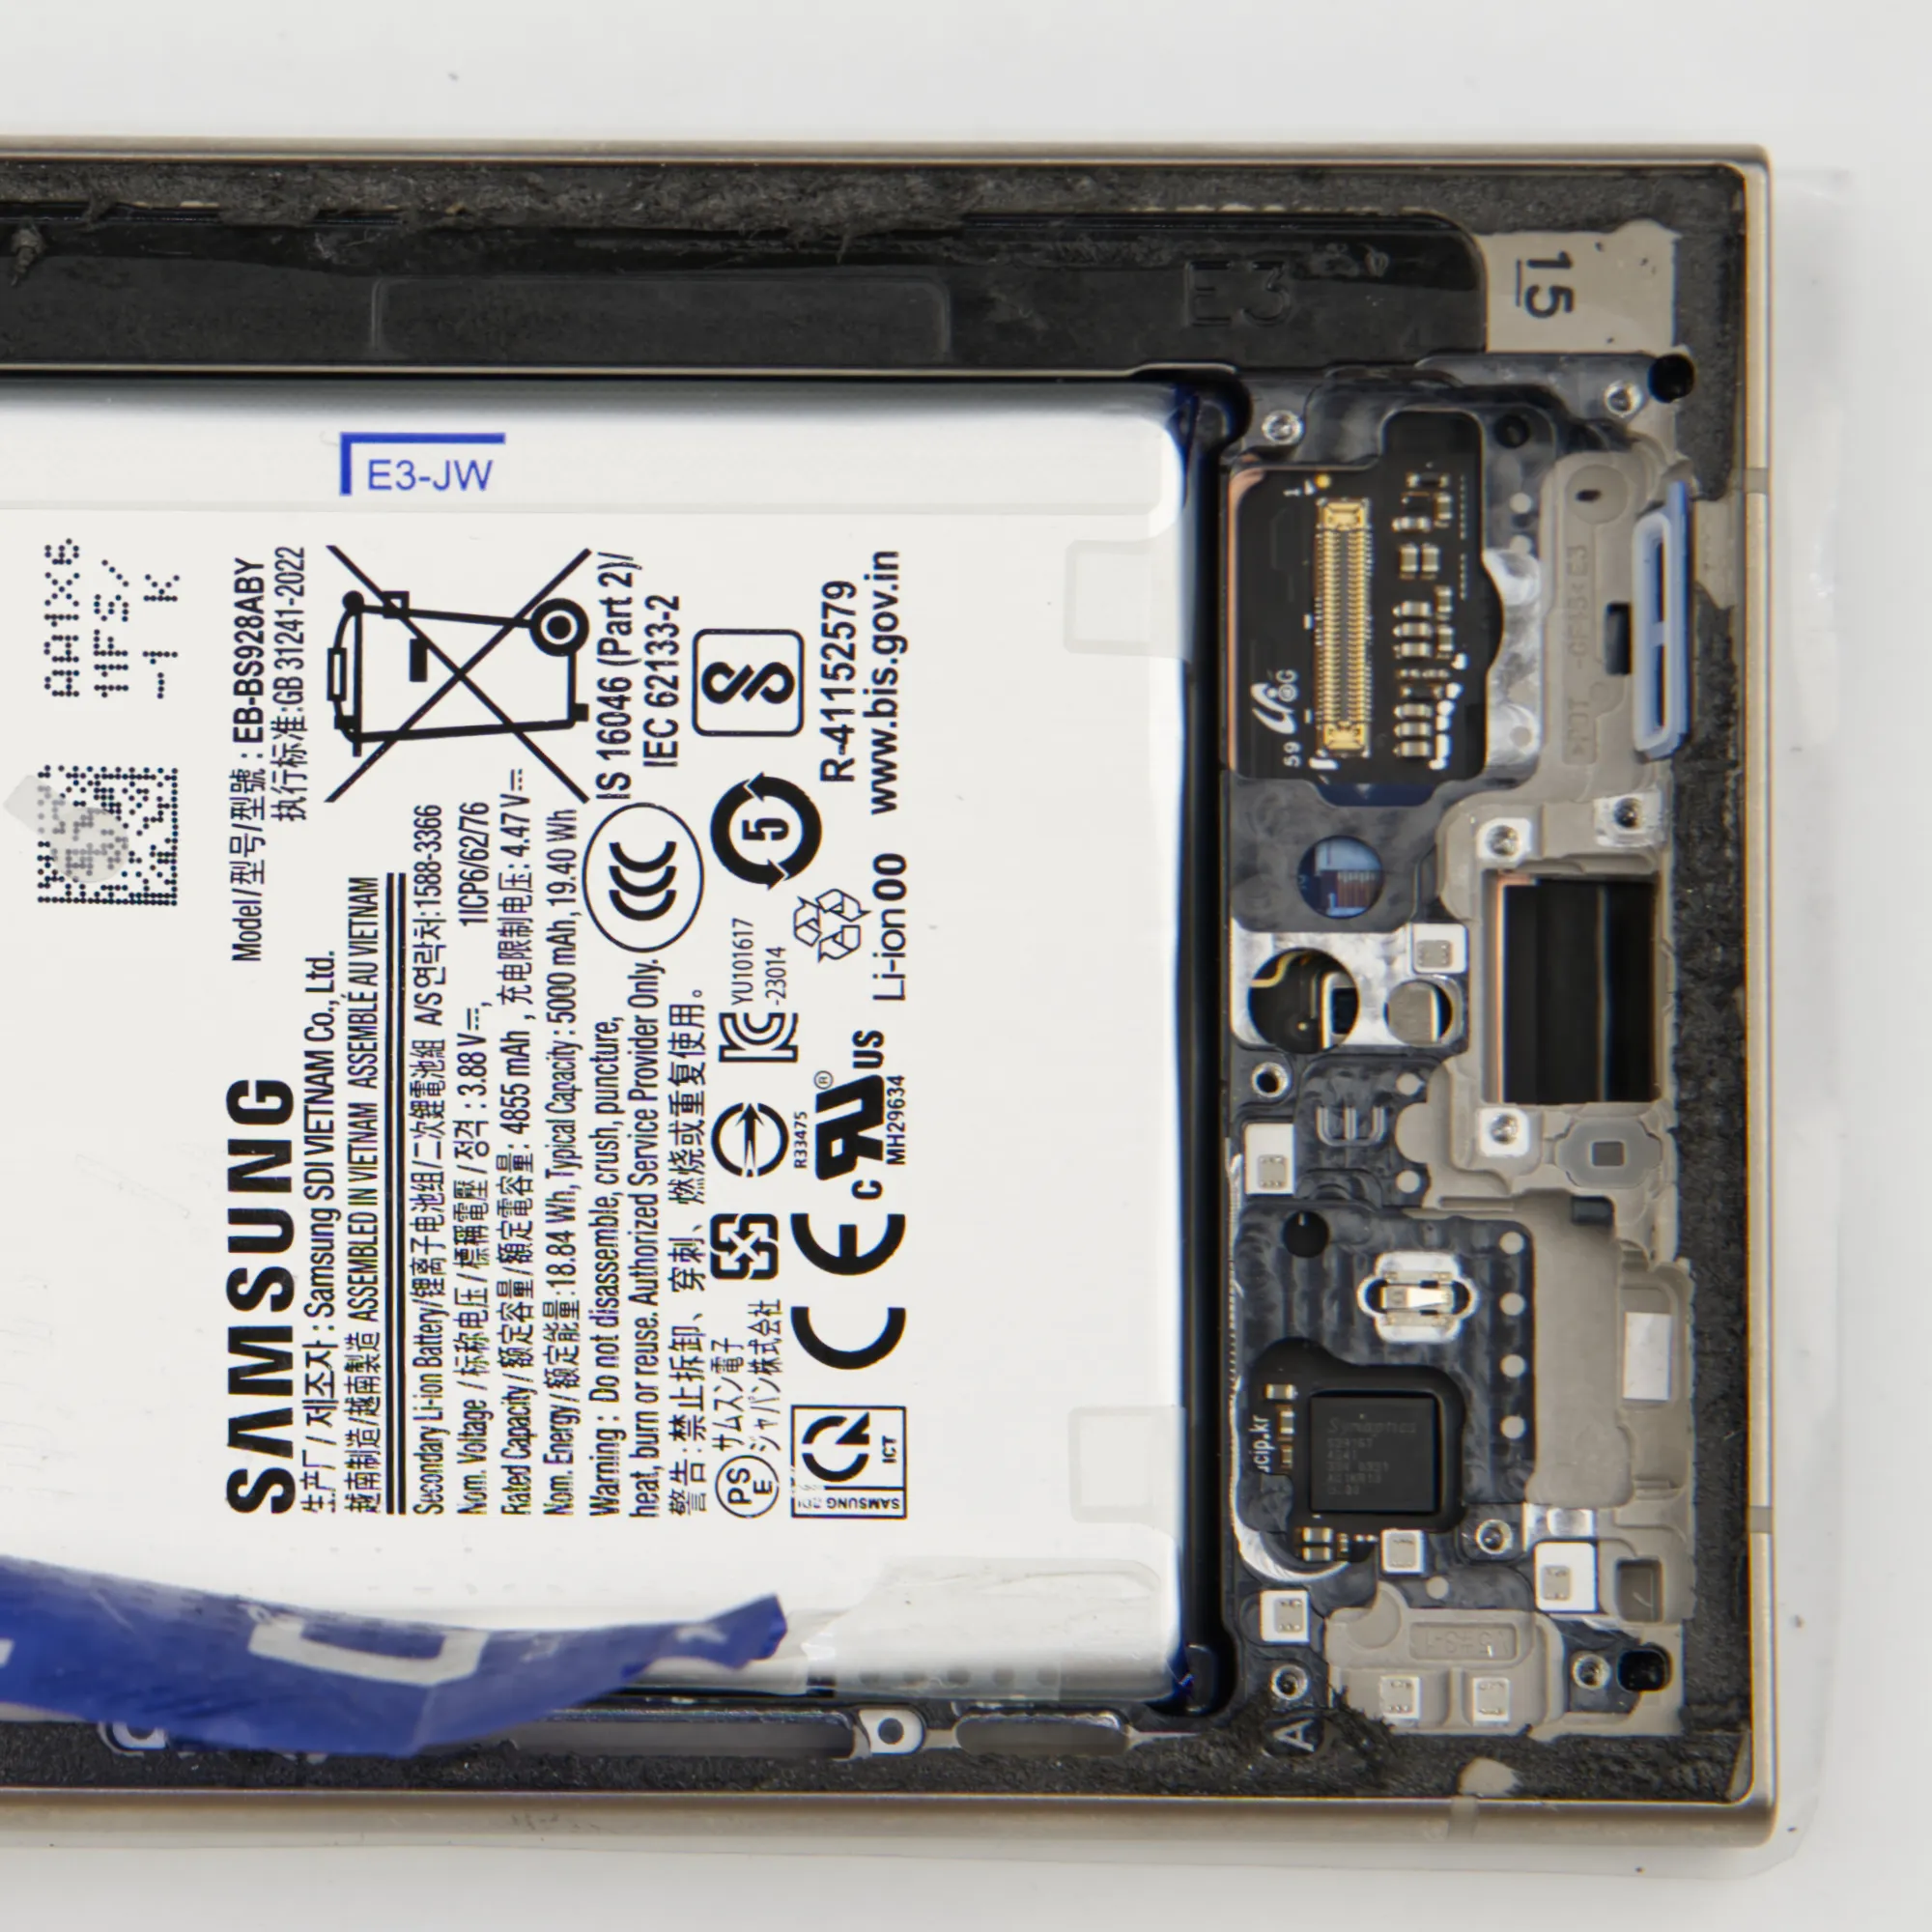
Step 7. Disconnect the battery connector
Disconnect the battery connector as soon as you can. Use a non-metallic or plastic tool to avoid any damage.
ℹ️️ The Samsung Galaxy S24 Ultra 5G SM-S928 model has a battery EB-BS928ABY with a capacity of 5000 mAh (also known as a rechargeable battery).


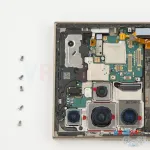
Step 8. Unscrew the screws
Now we can unscrew the bottom screws.
Again, use a 1.5mm Phillips #000 screwdriver and keep these screws separate from the top ones.
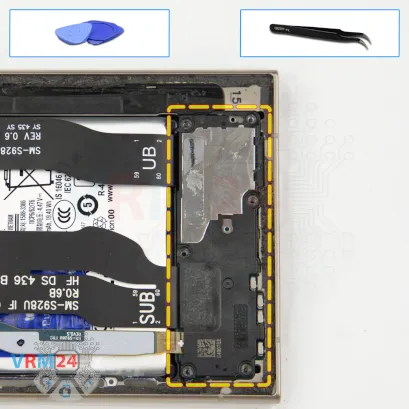


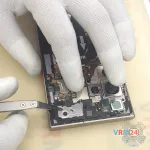
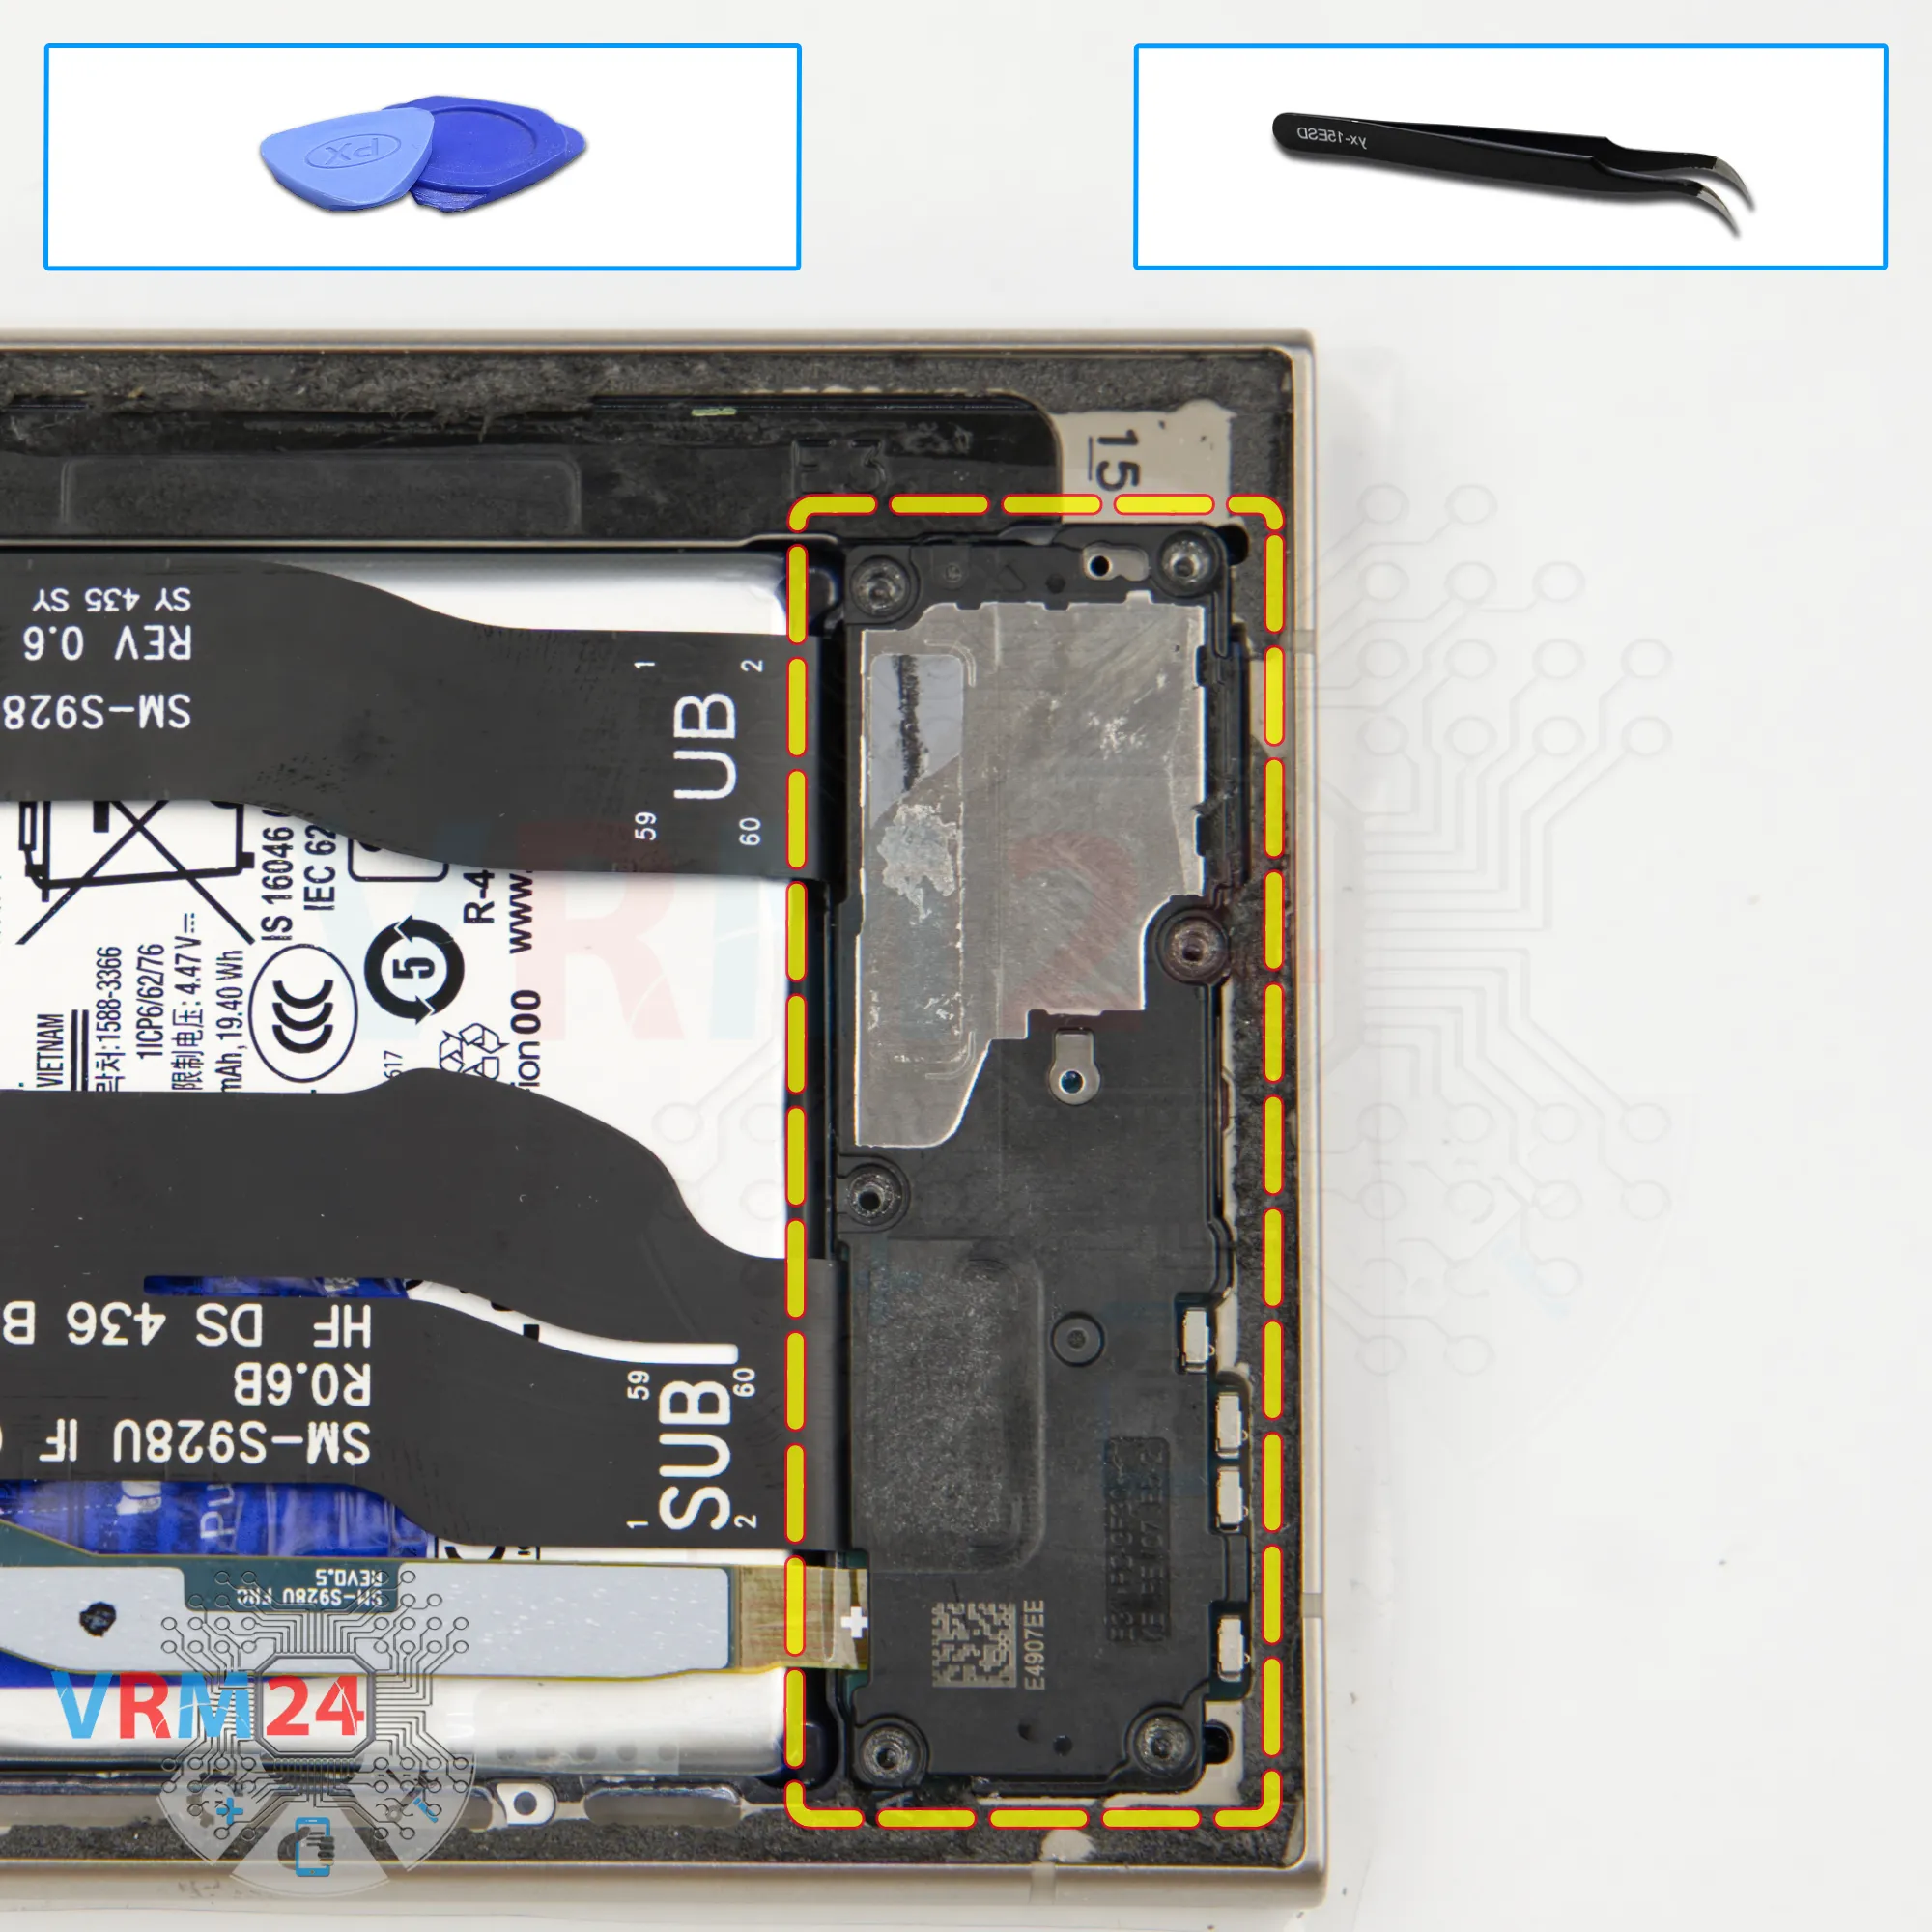
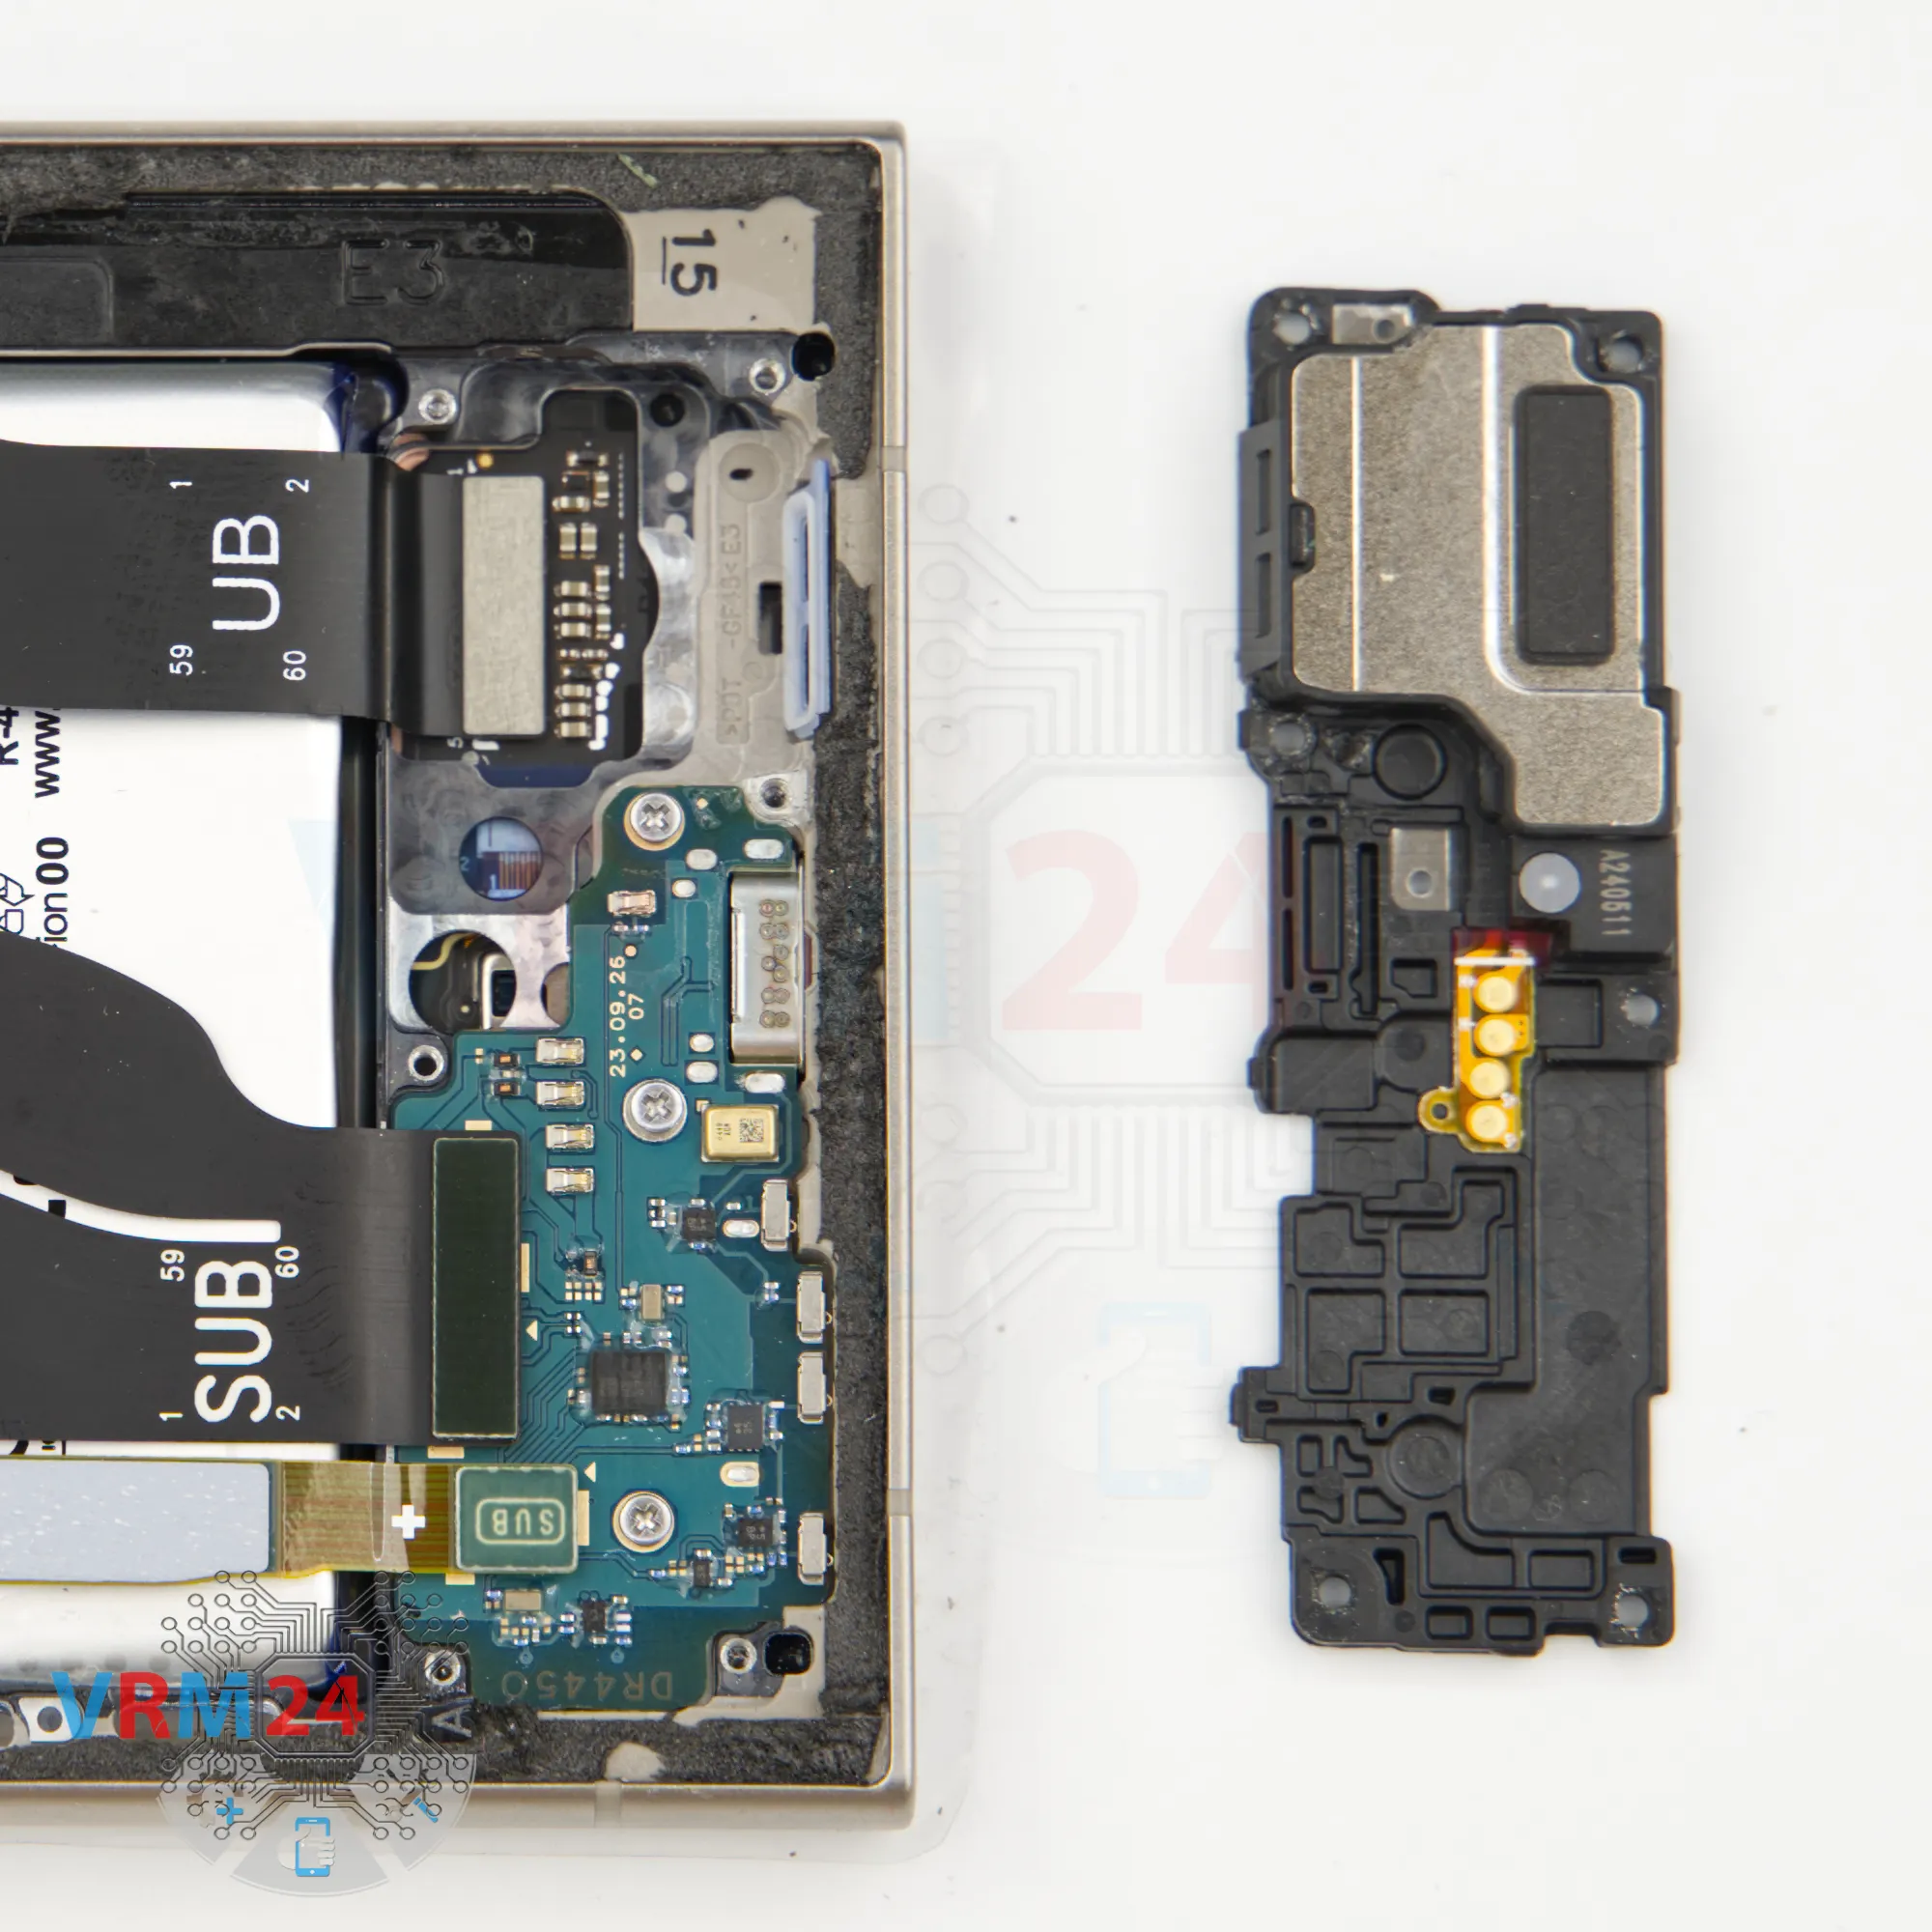
Step 9. Remove the loudspeaker
Move on to the lower speaker cover.
It’s really important to find the correct spot to start prying the bottom speaker cover. On this model, there’s a small arrow indicating where to start. It points to an opening on the top side of the cover.
Carefully disconnect and lift off the cover with the loudspeaker and set it aside.
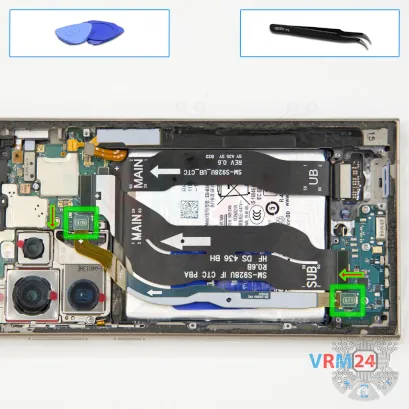


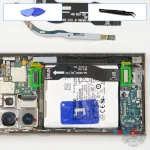
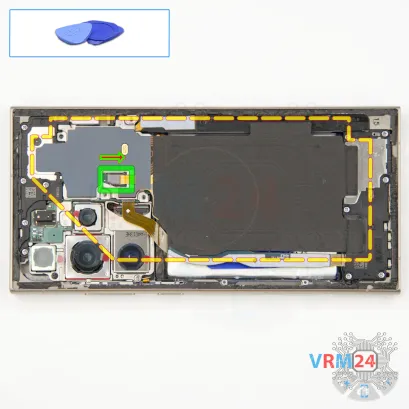
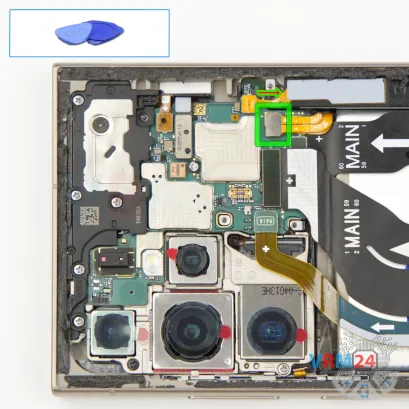
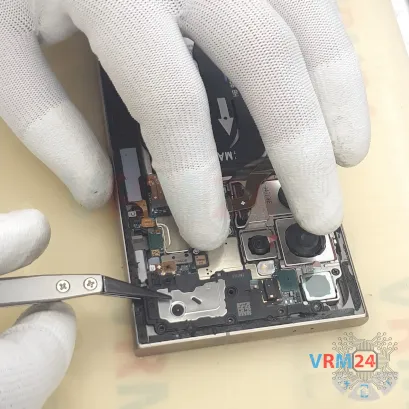
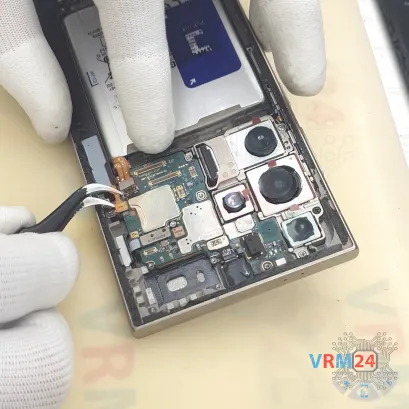
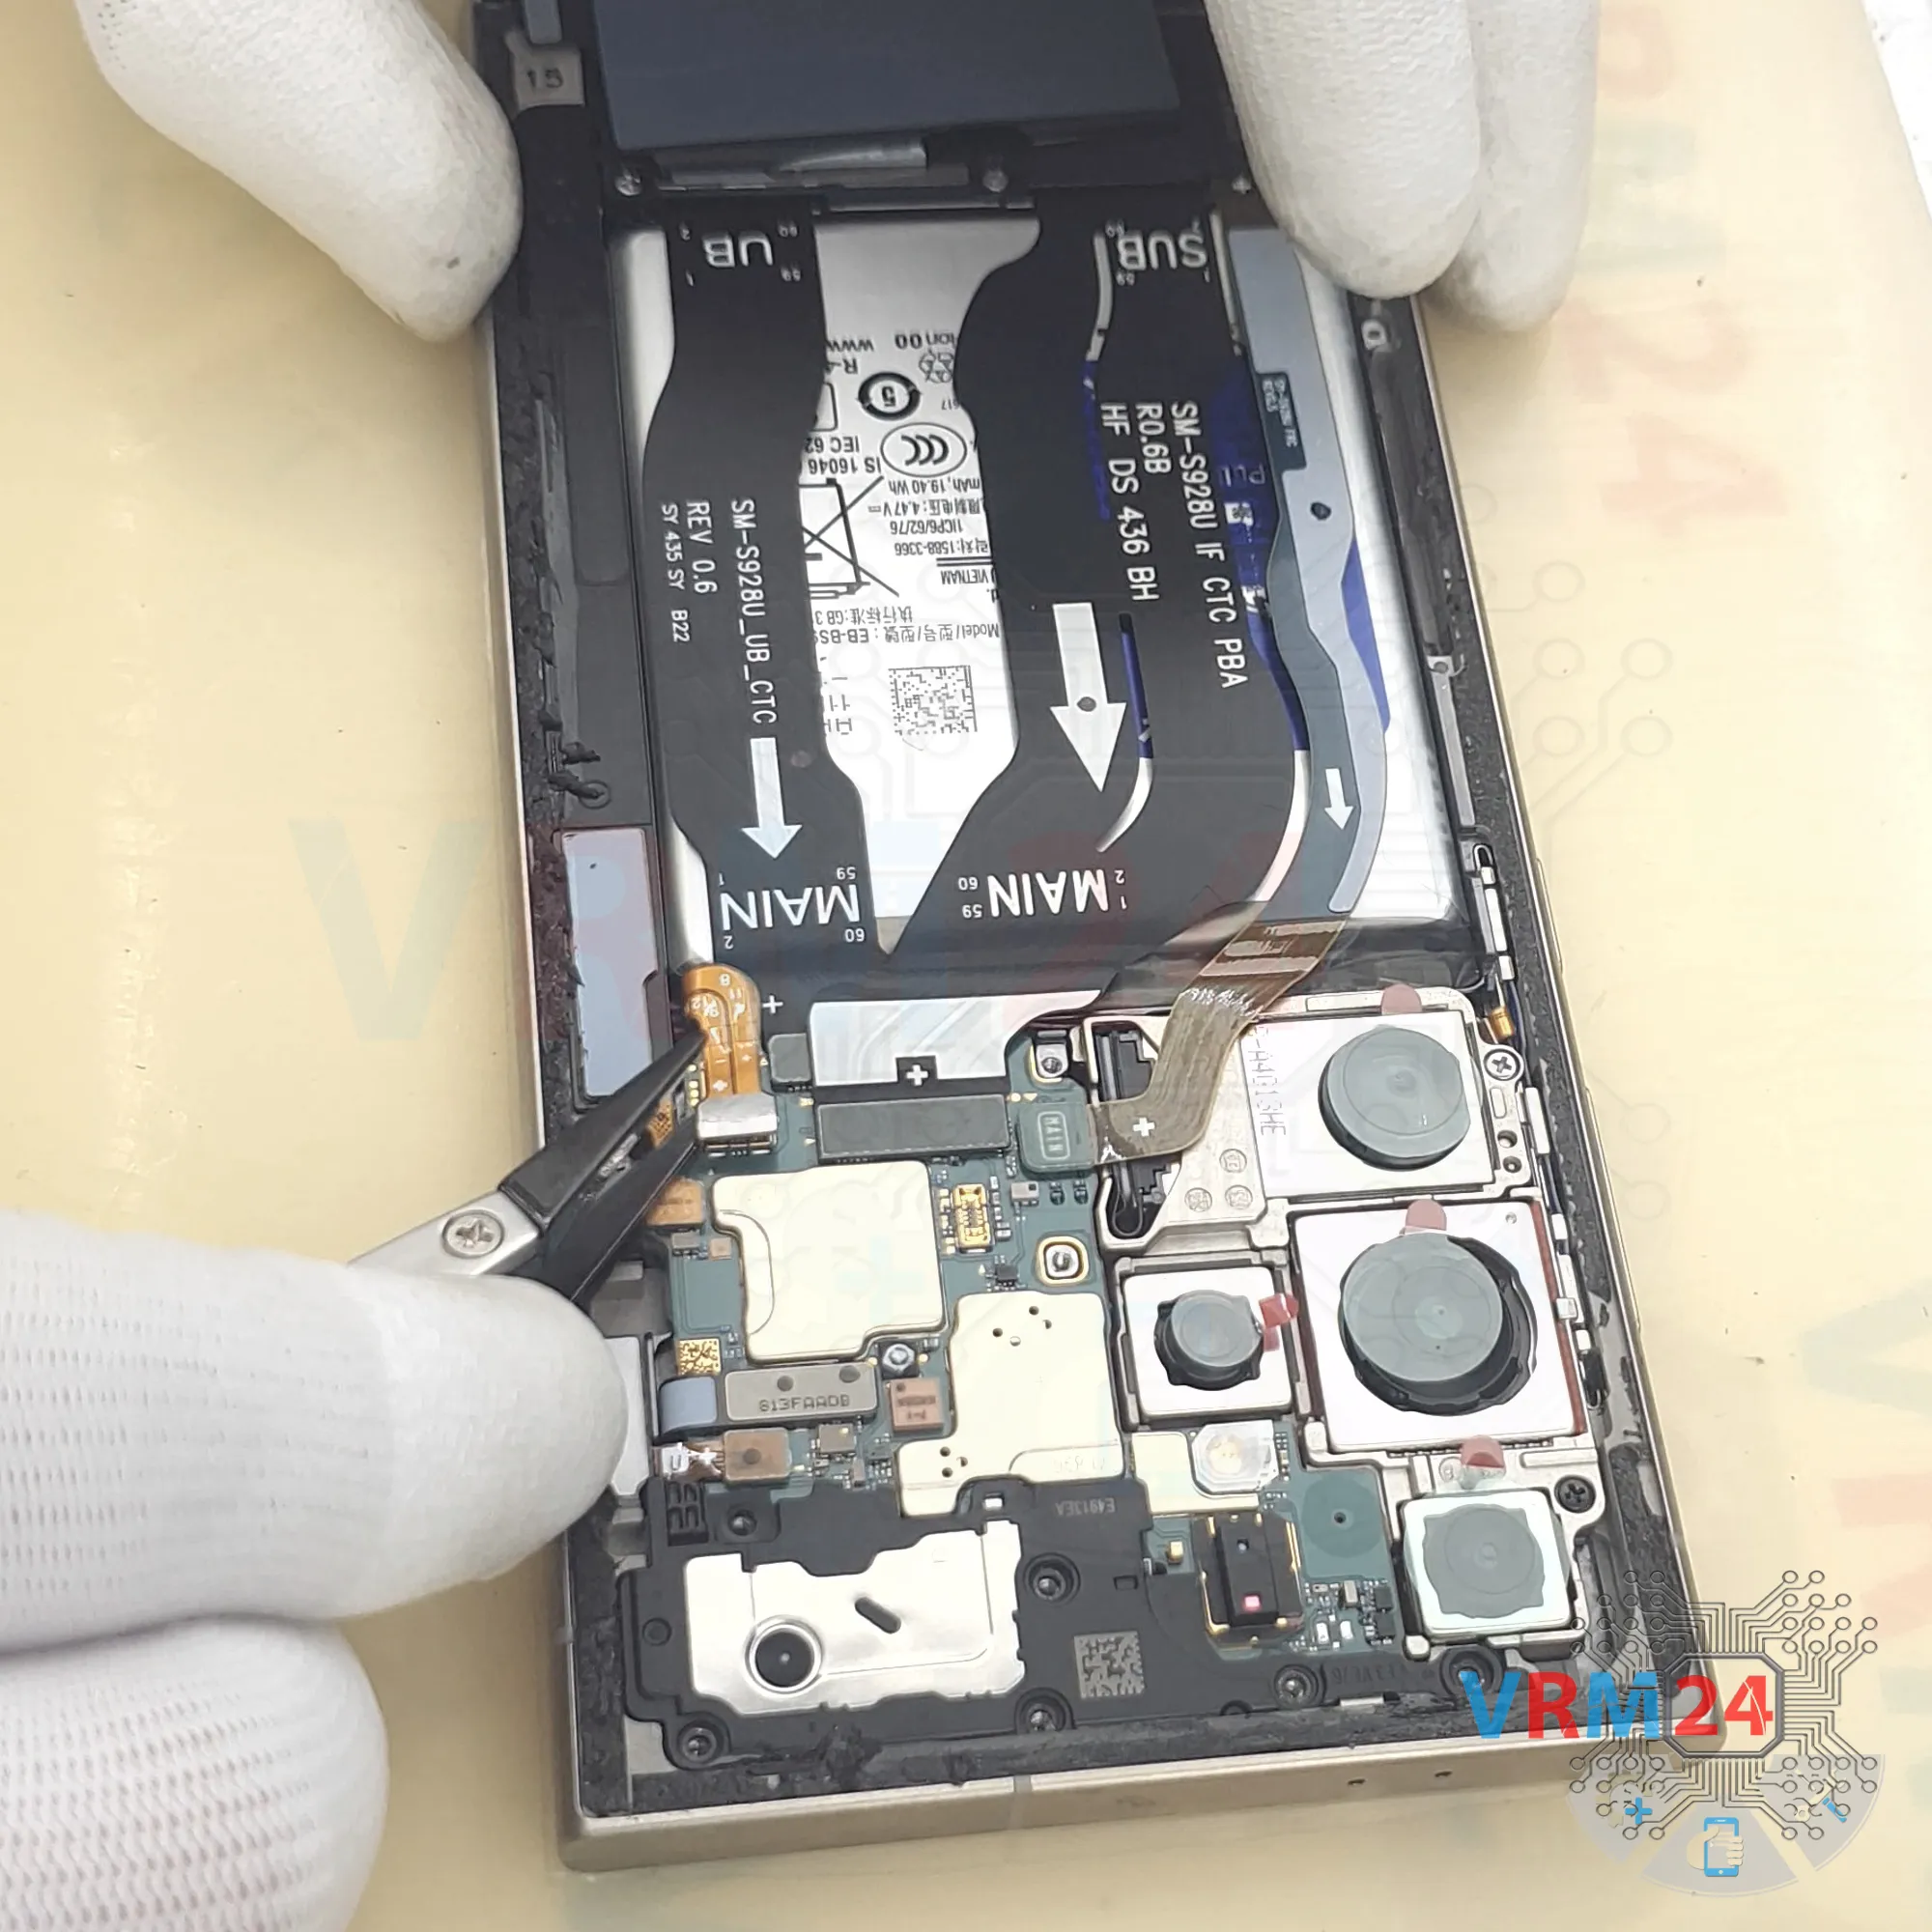
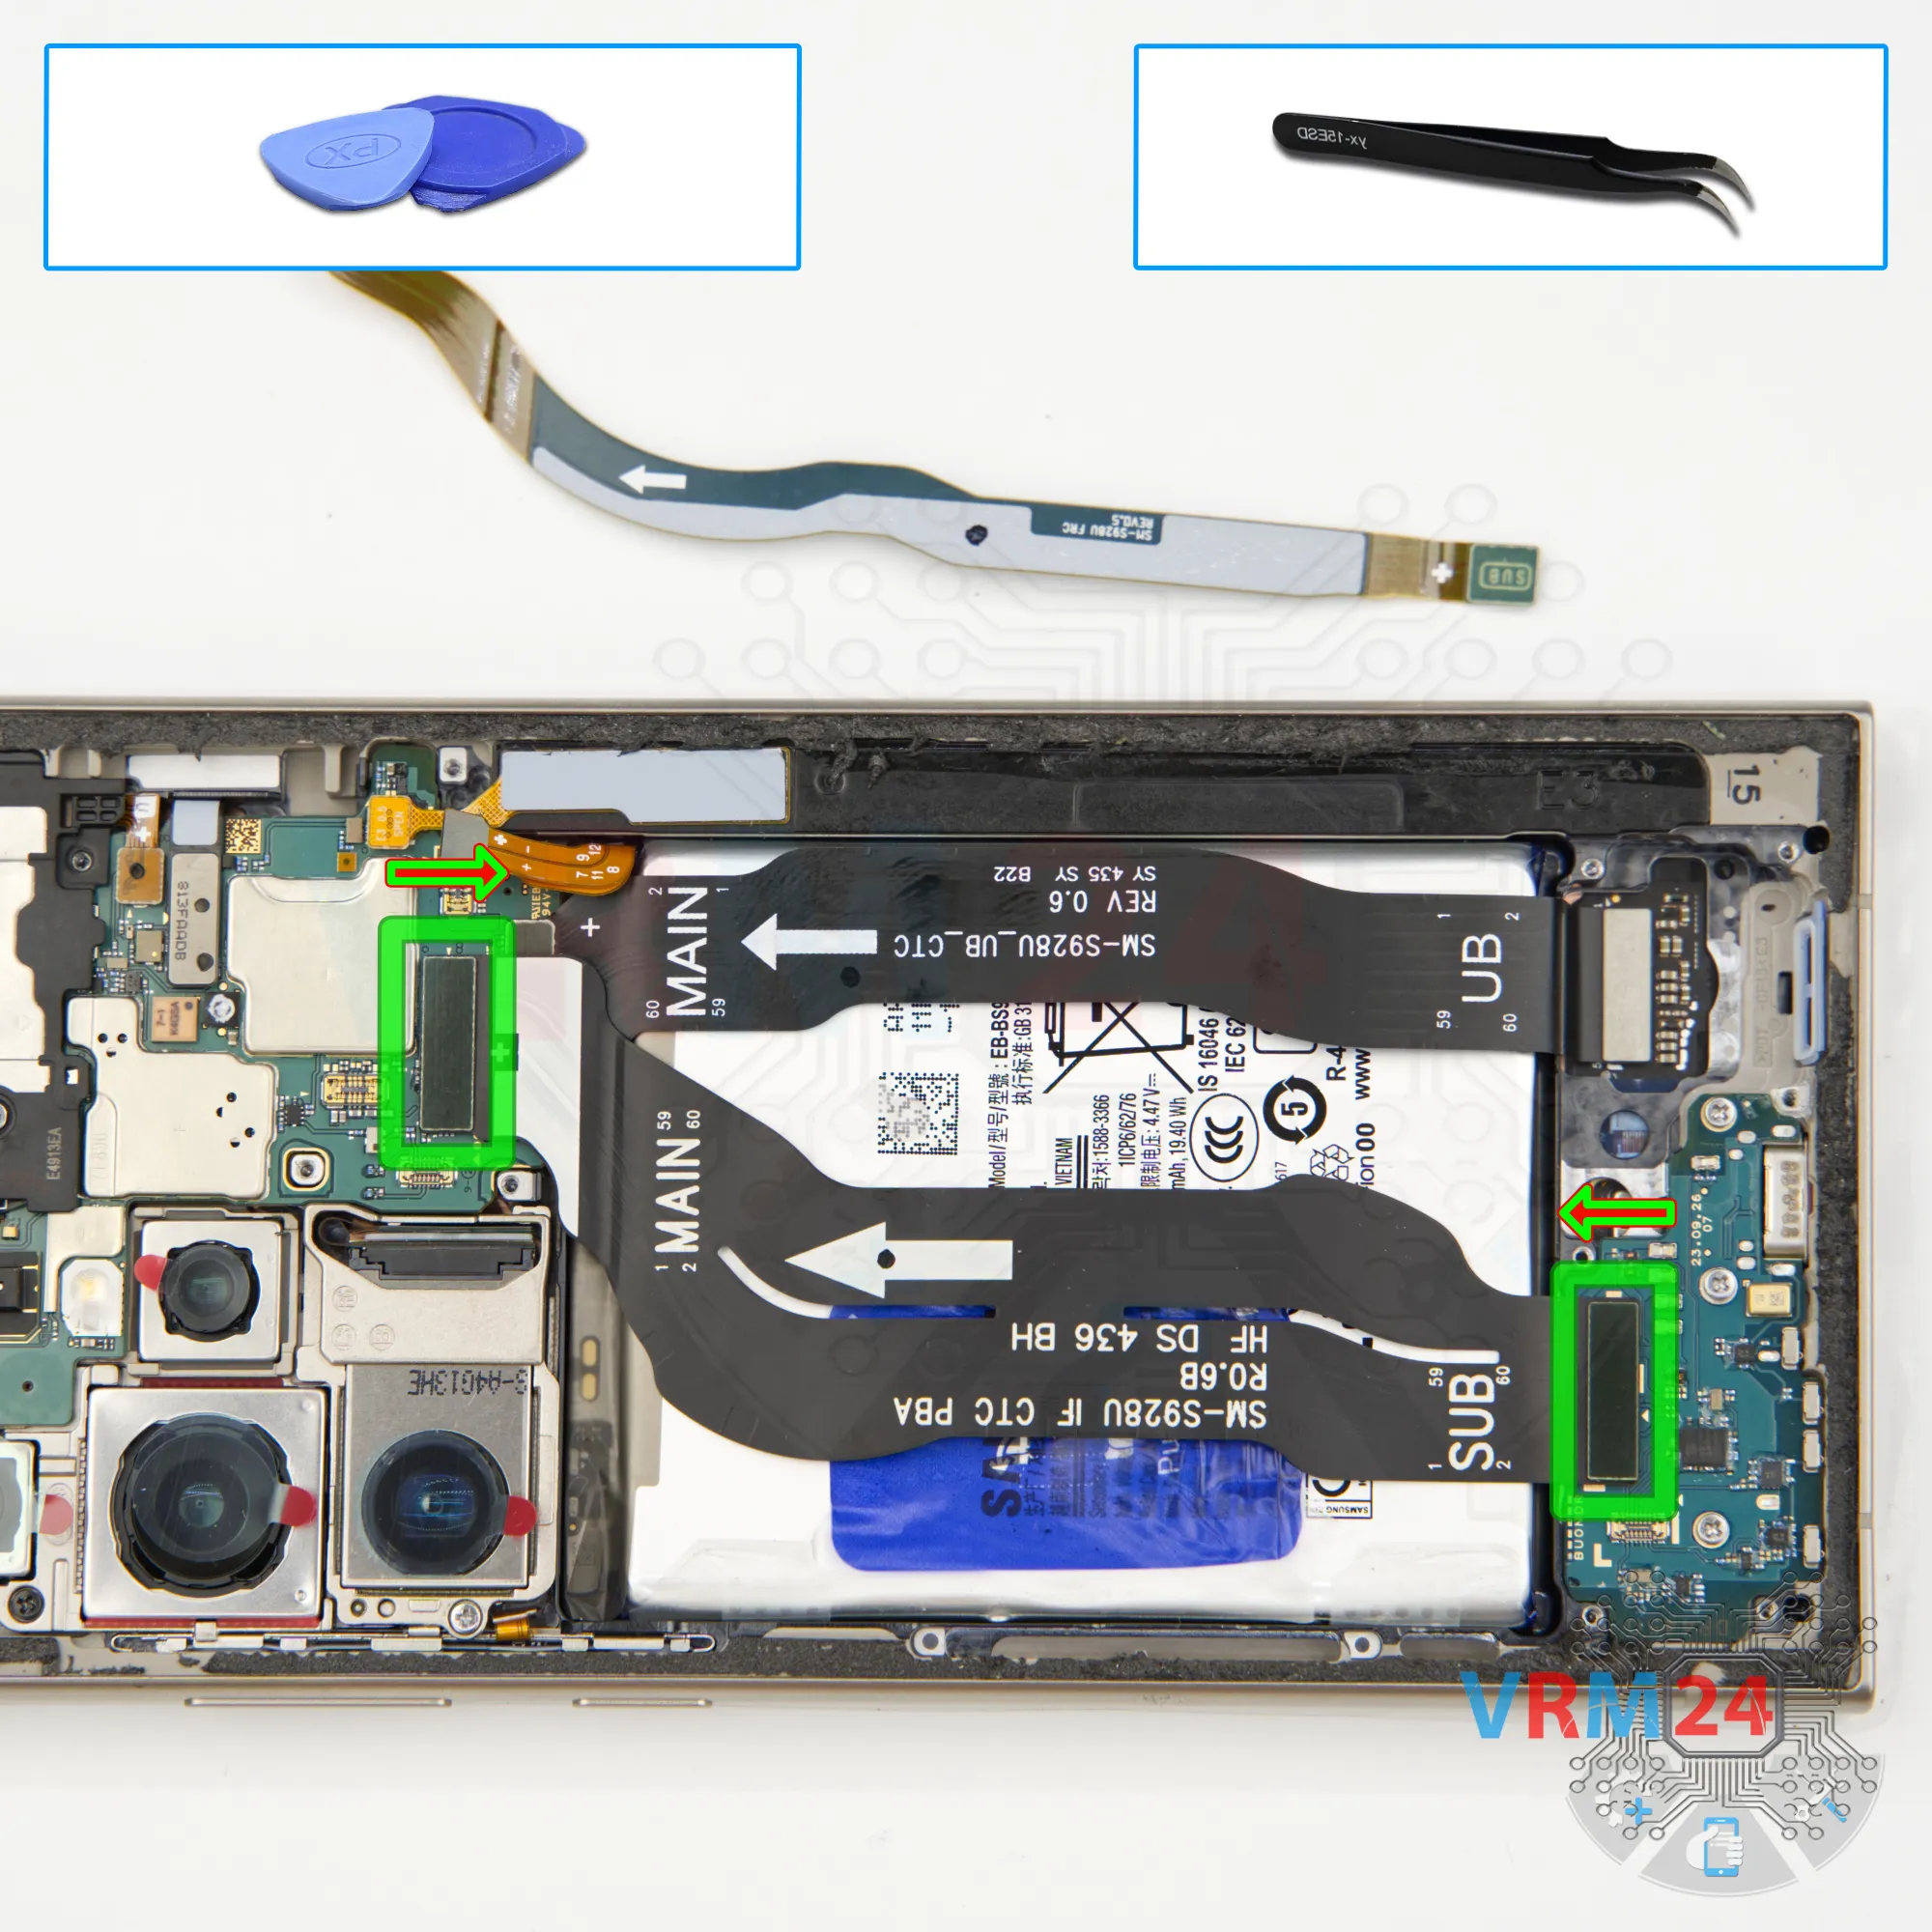
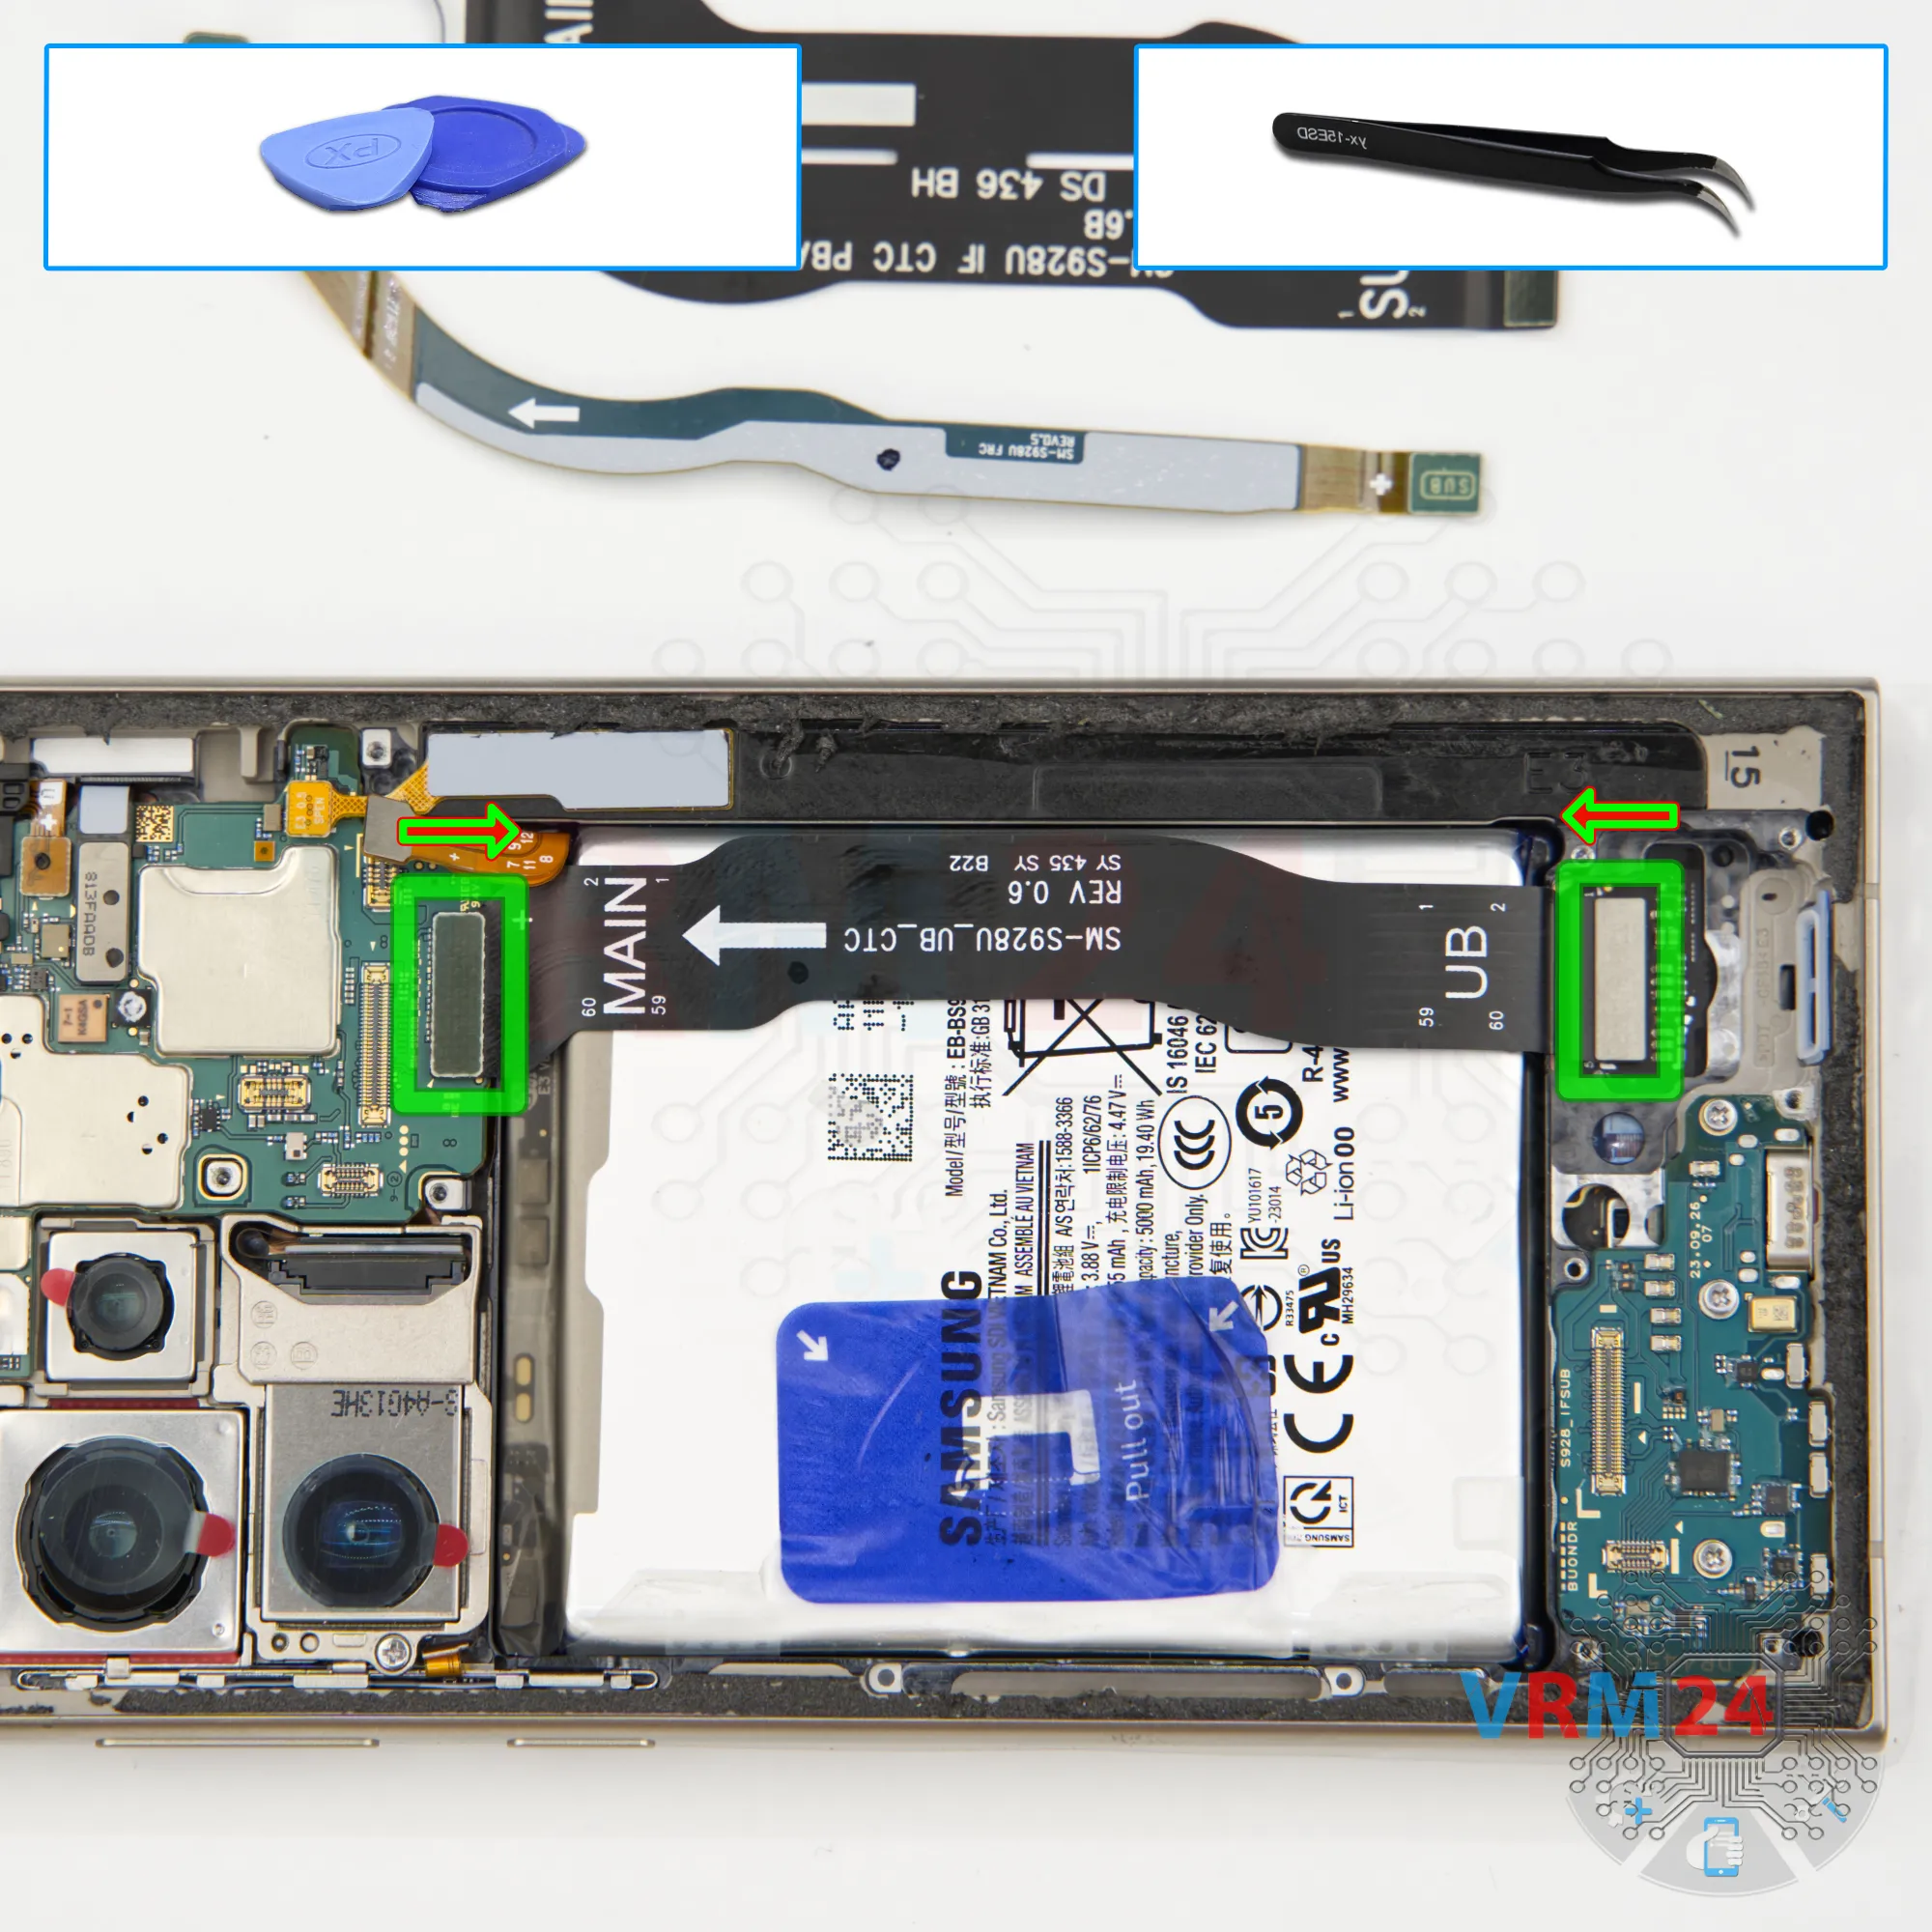
Step 10. Remove the interconnect cables
Now we’ll start disconnecting cables. Detach the interconnect flex cable and the antenna cable, and move them out of the way.
By the way, the flex cables are labeled with arrows showing the direction toward the motherboard.
Disconnect the display cable and move it aside as well.
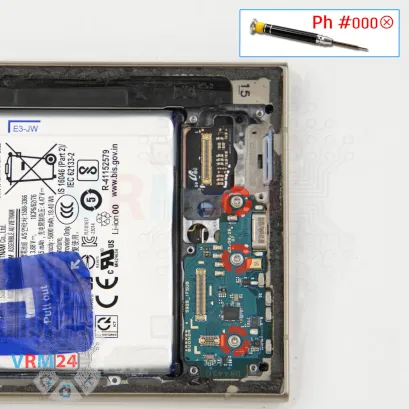


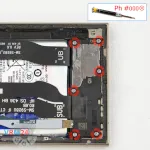
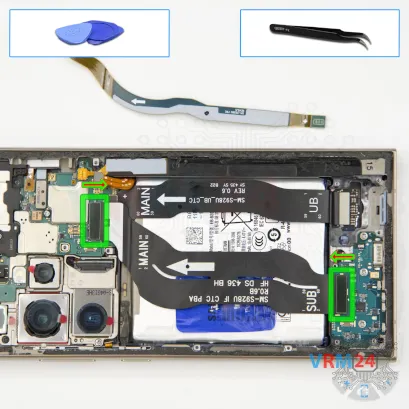
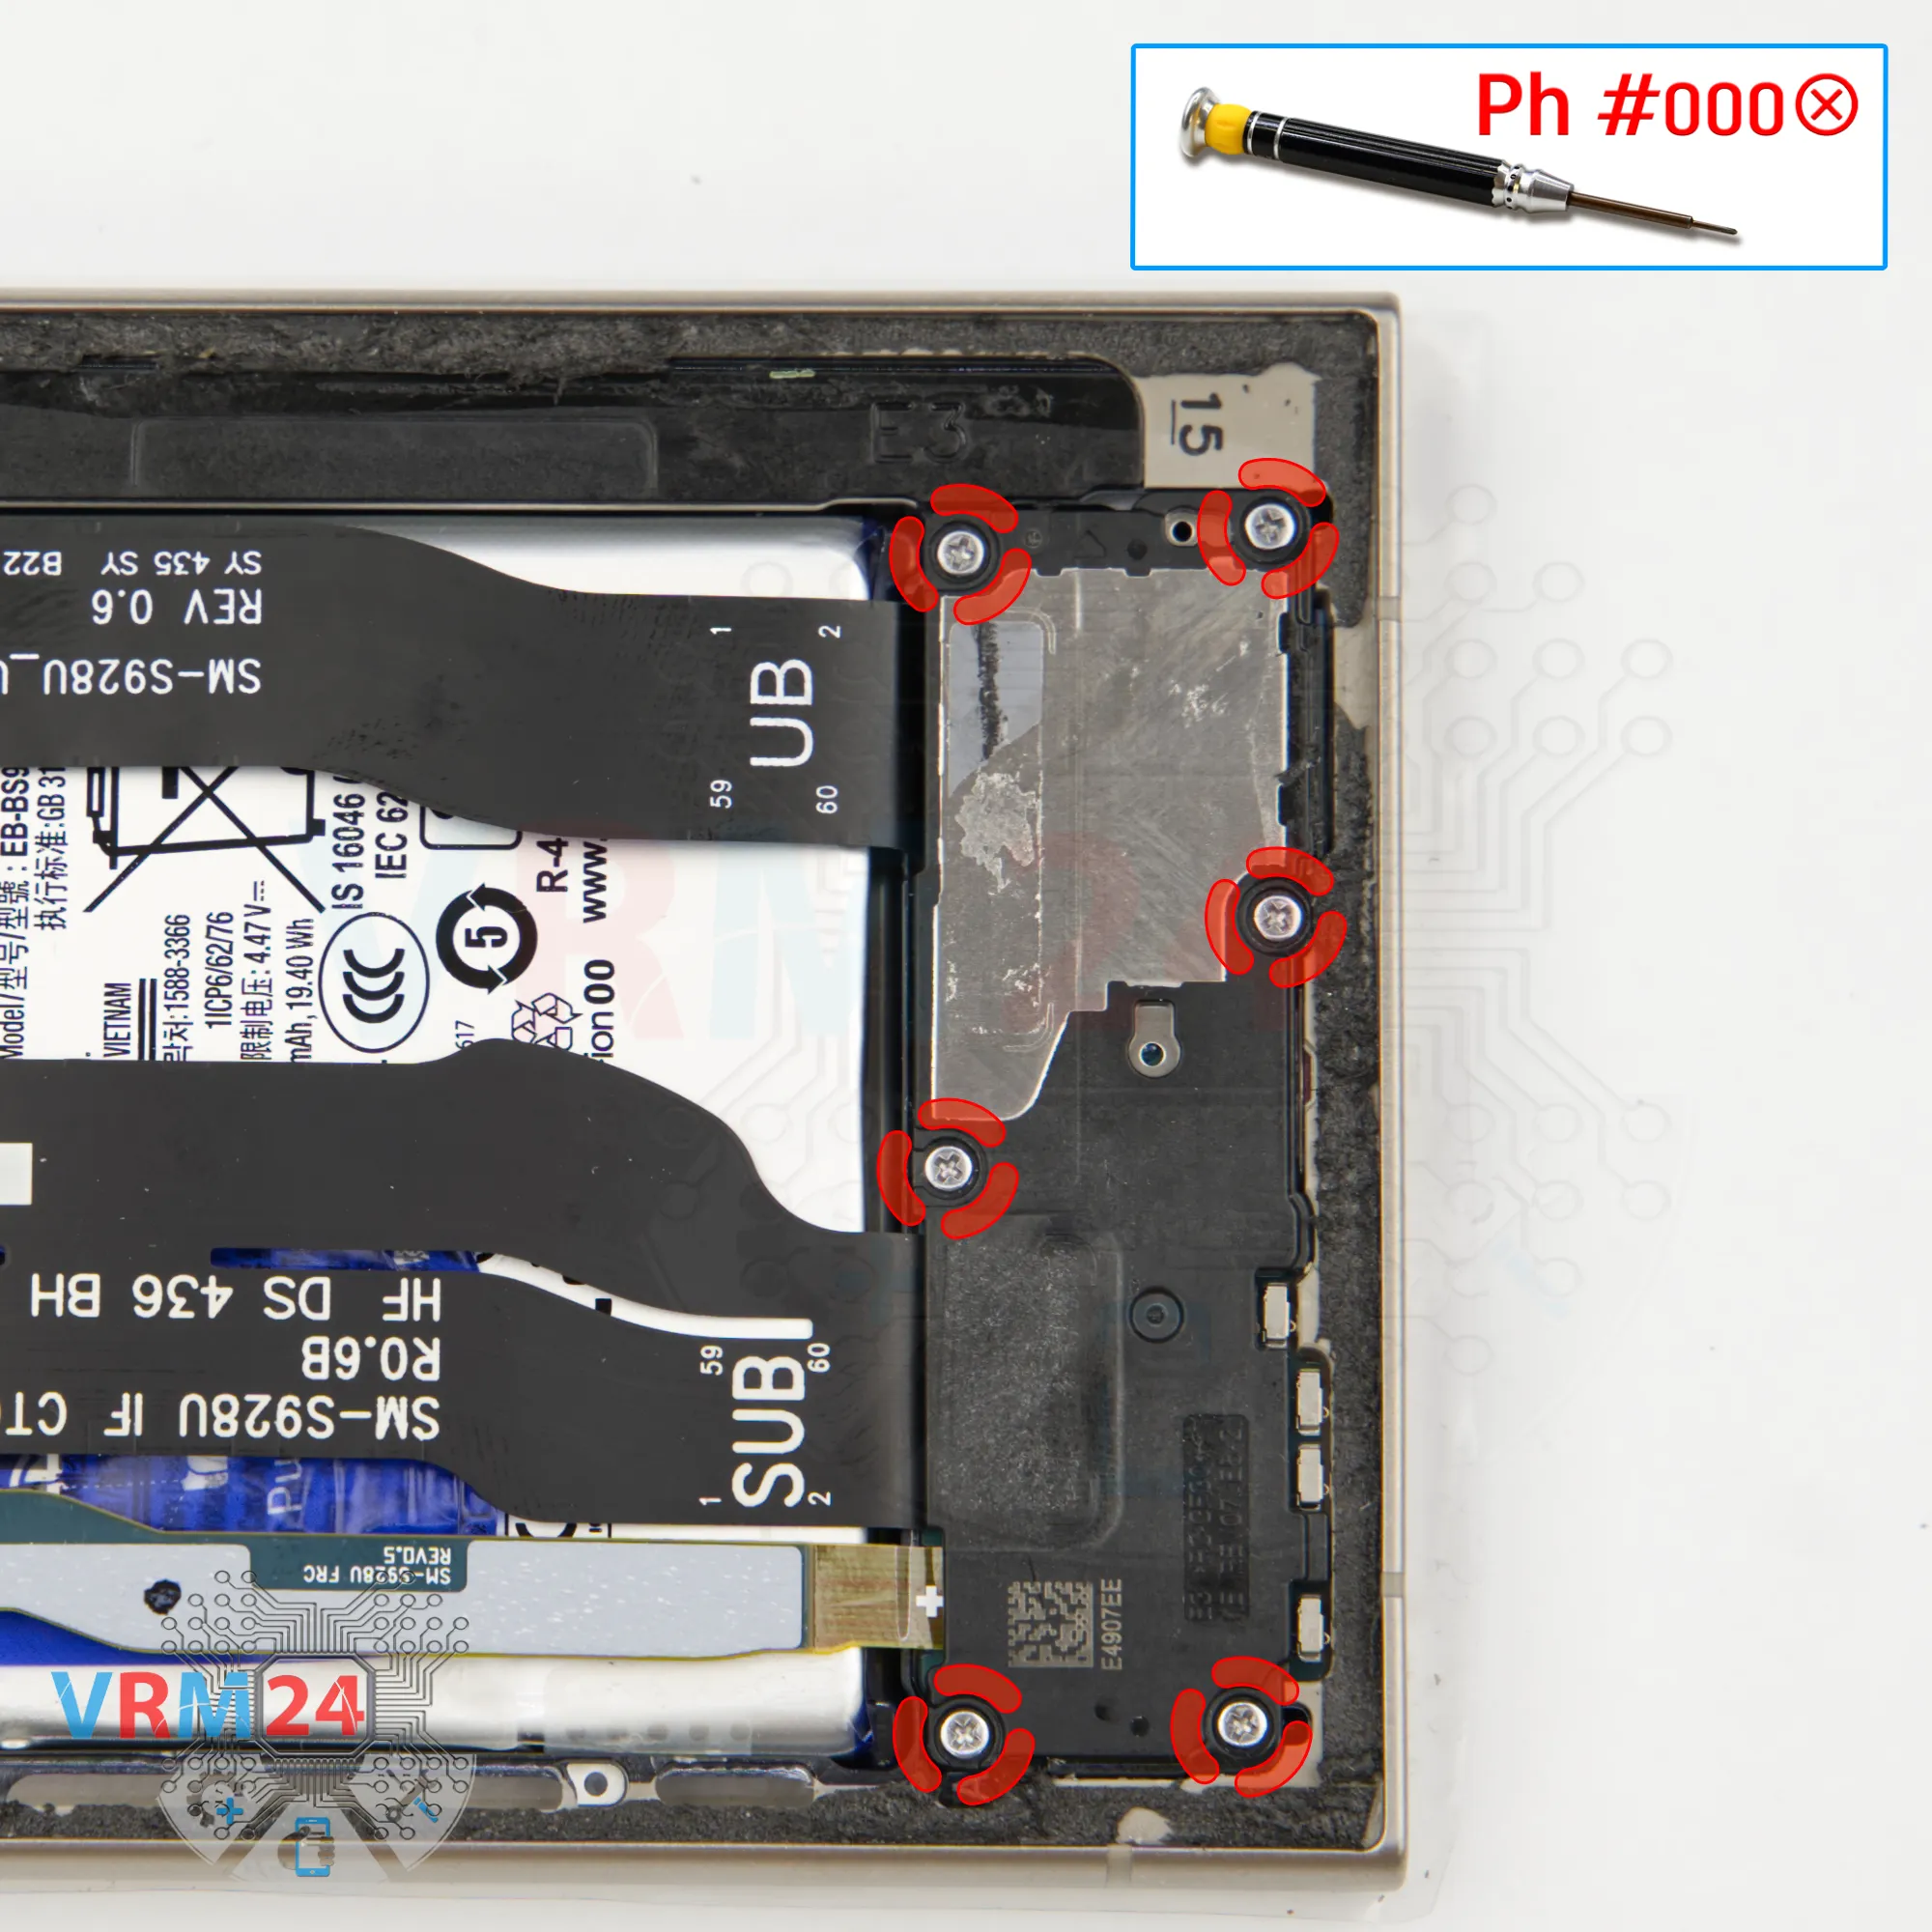
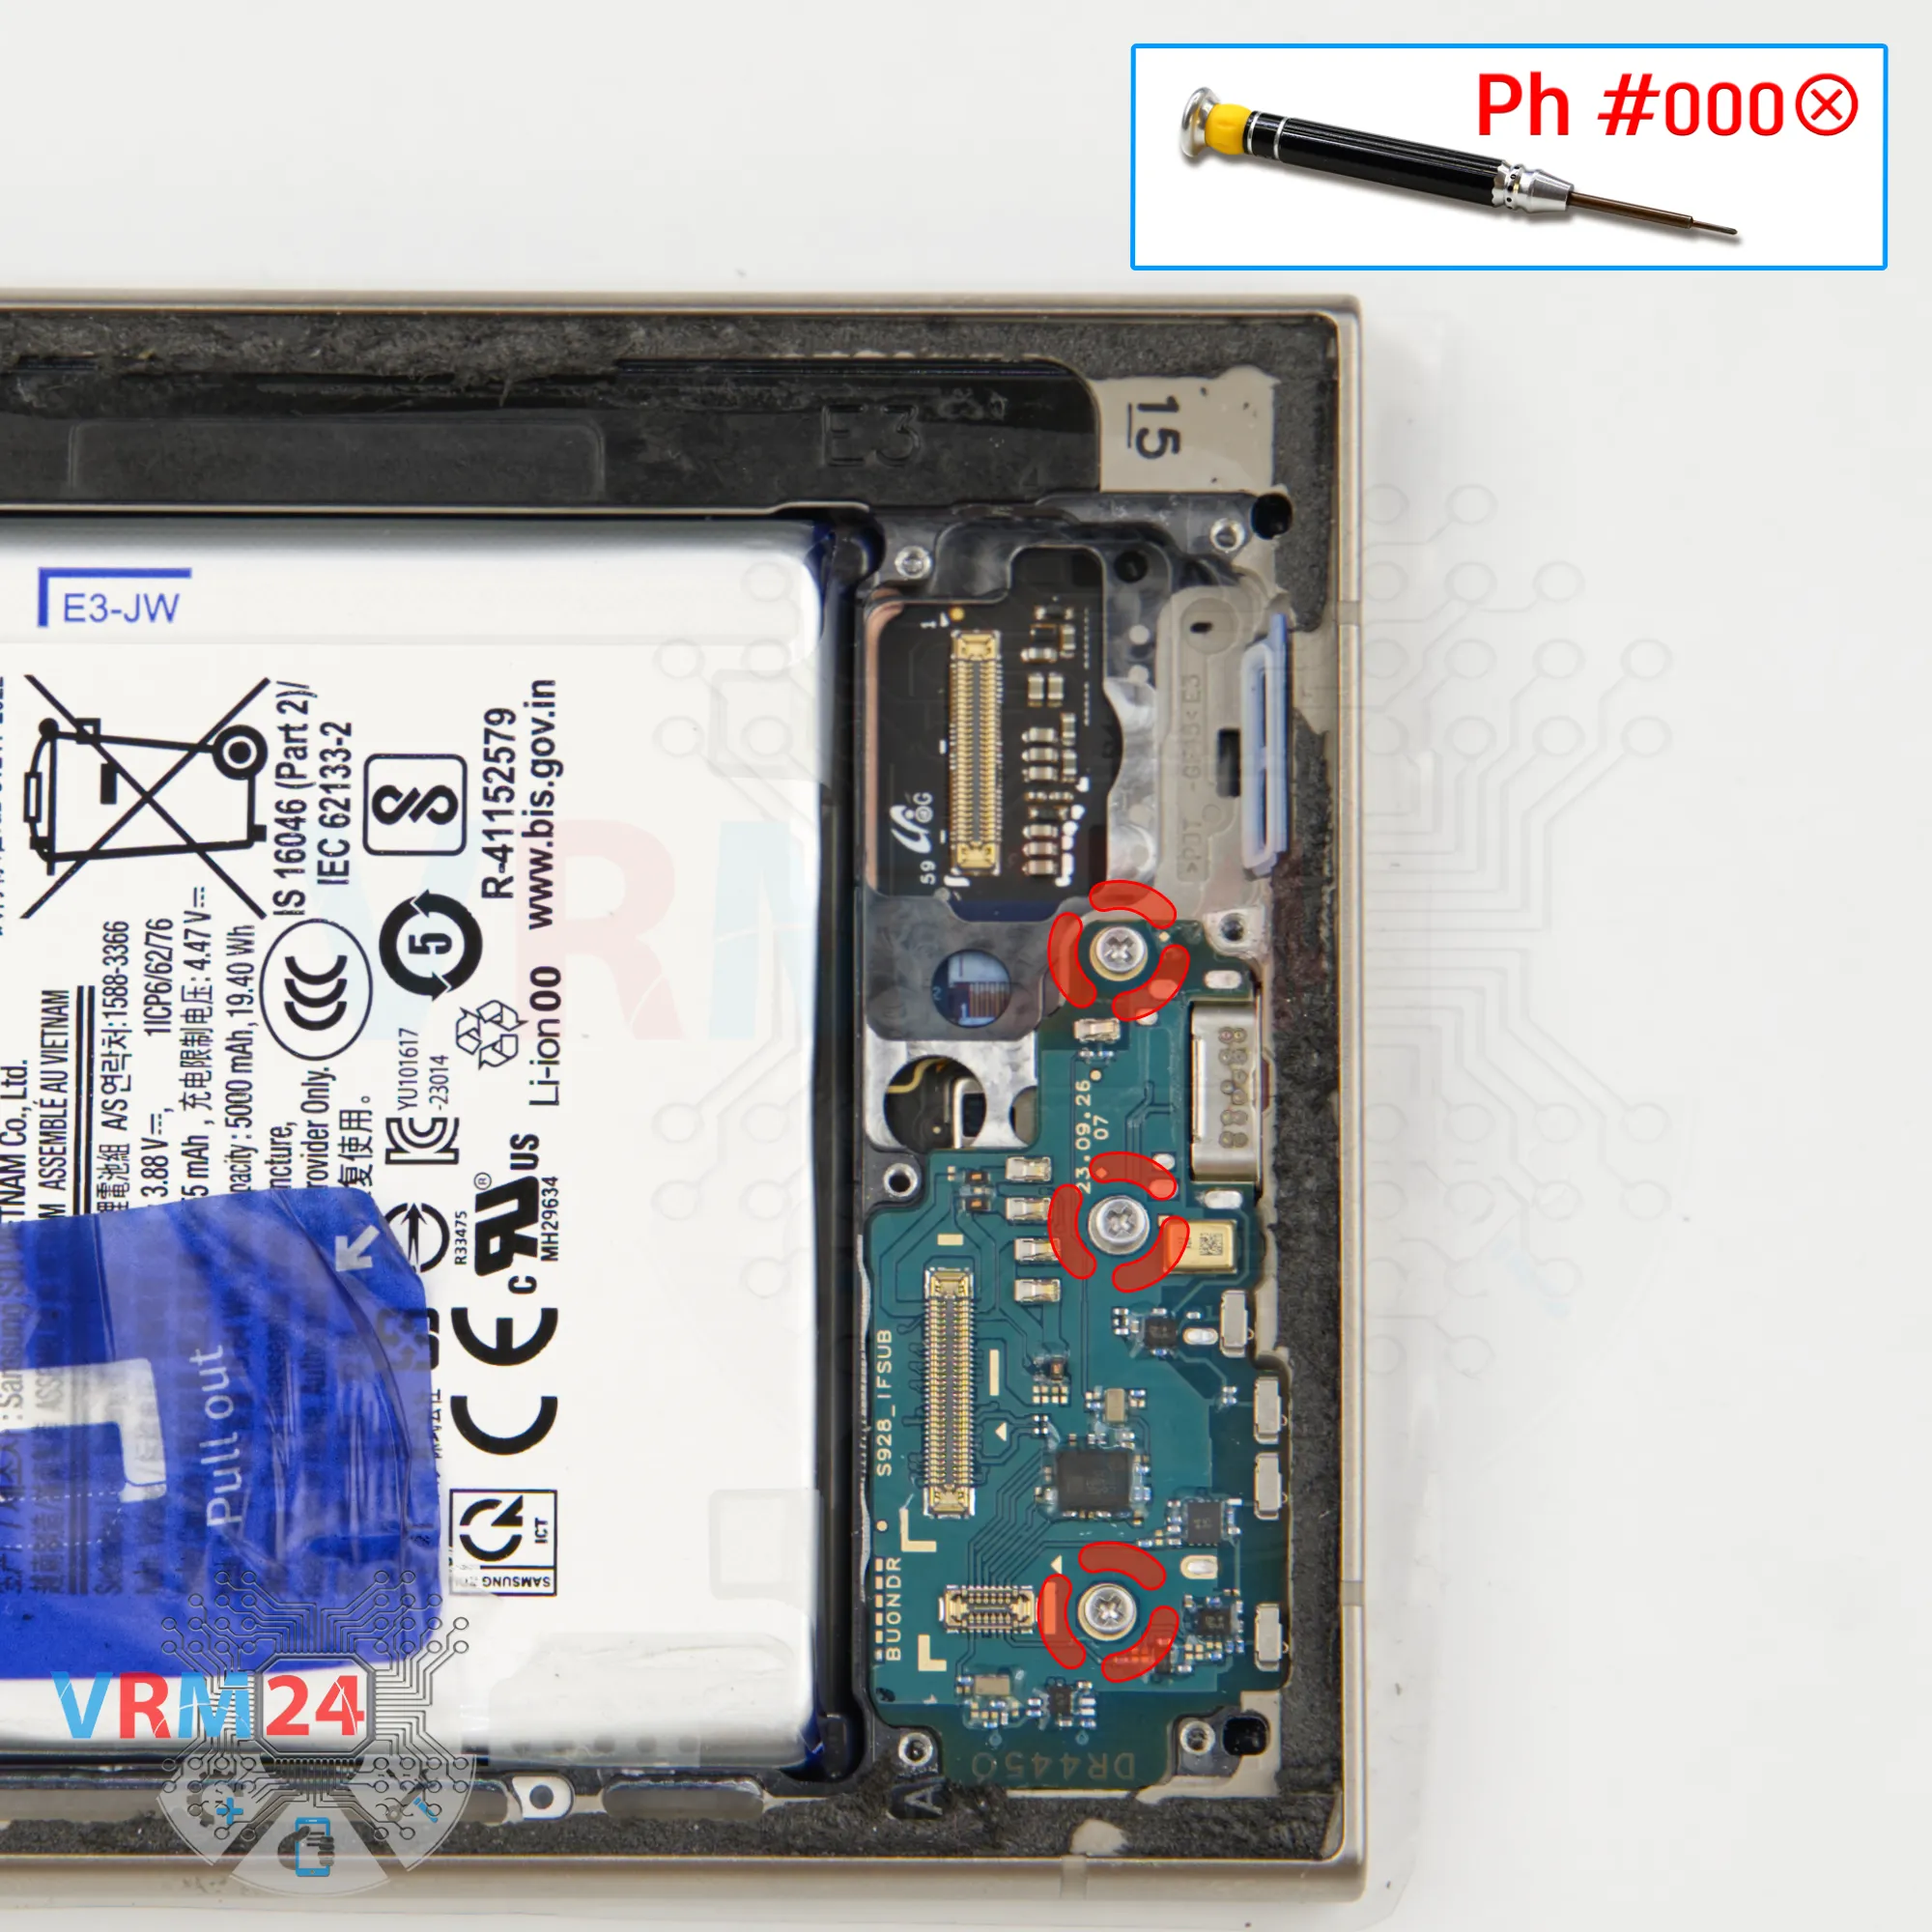
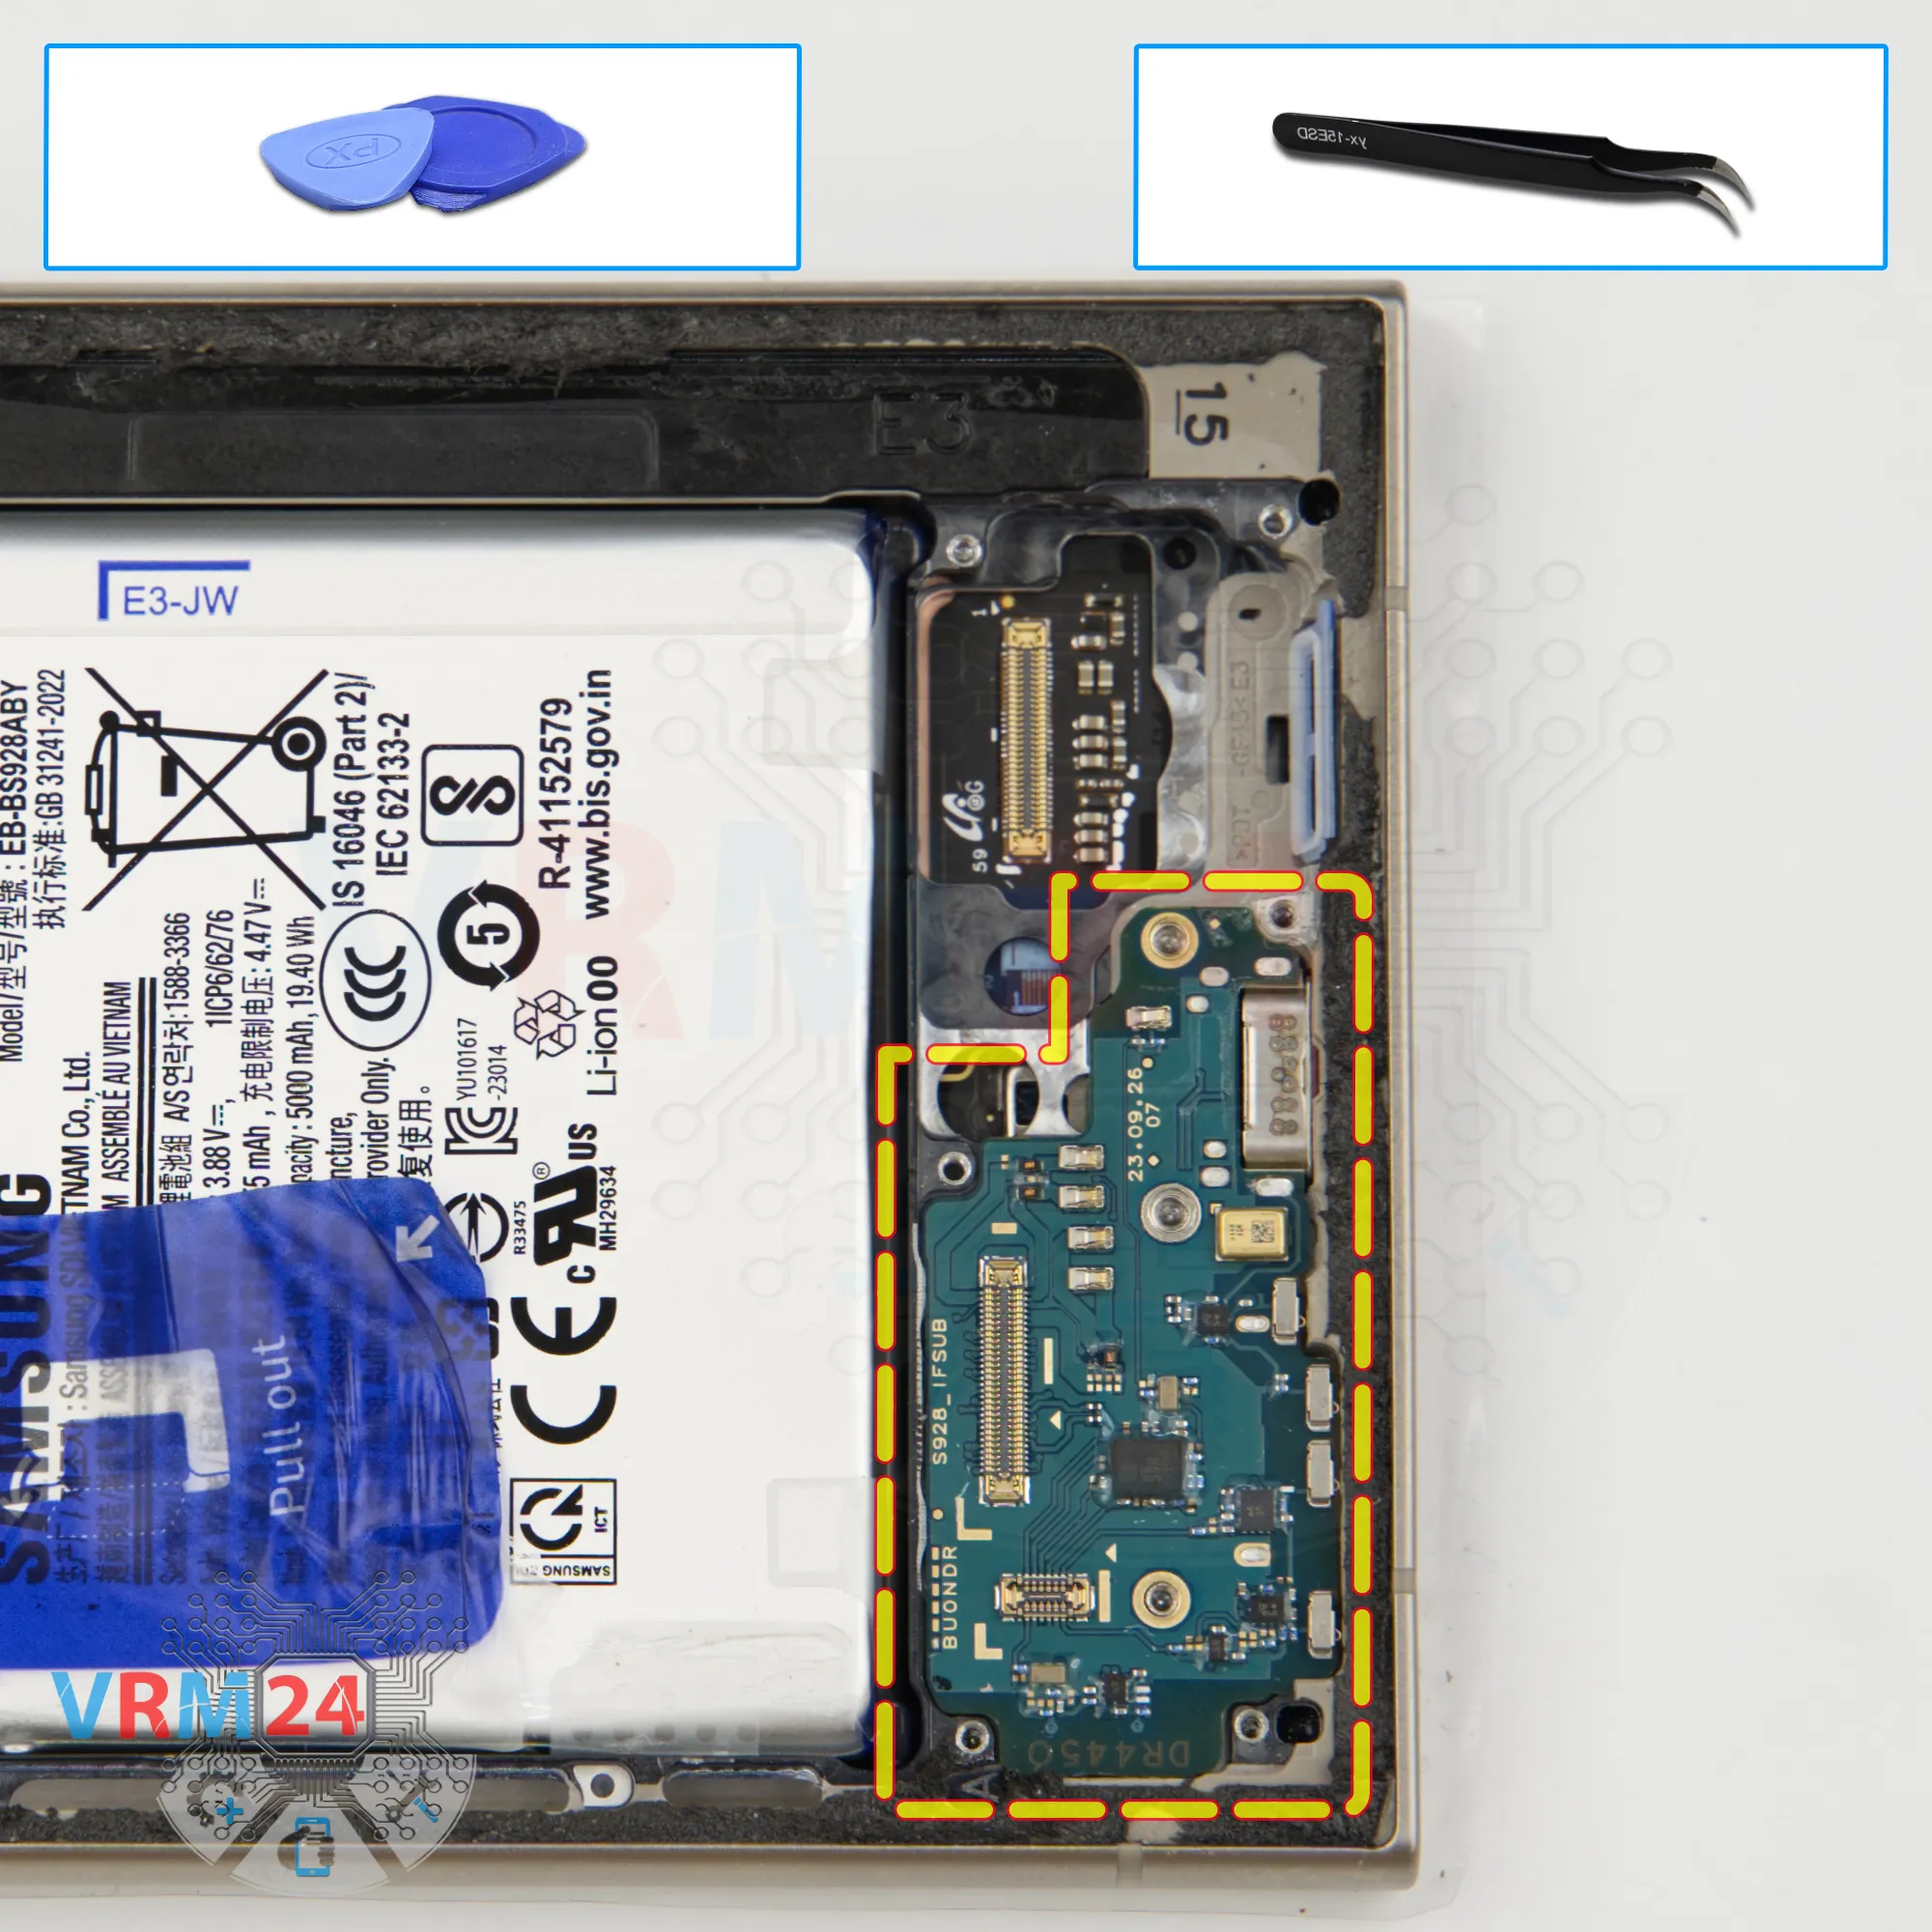
Step 11. Unscrew the screws
Now we’ll remove the screws holding the sub-board (charging board) in place.
These screws are different from the previous ones, so keep them separated.
We’re still using the same 1.5mm Phillips screwdriver here.
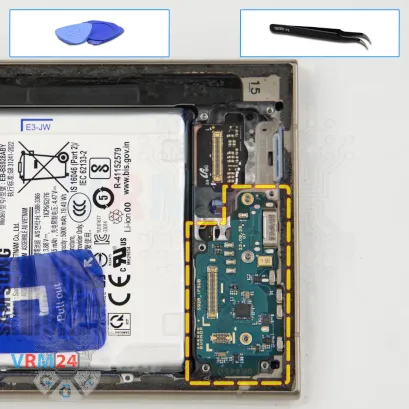


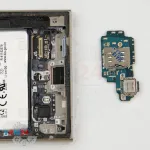
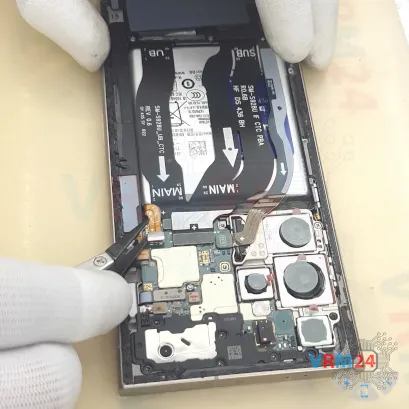
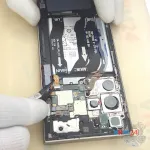
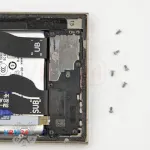
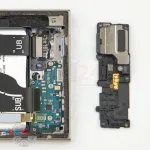
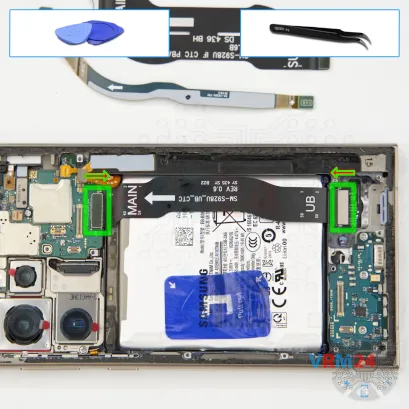
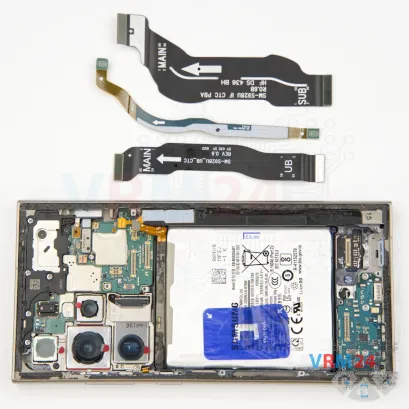
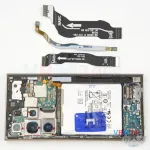
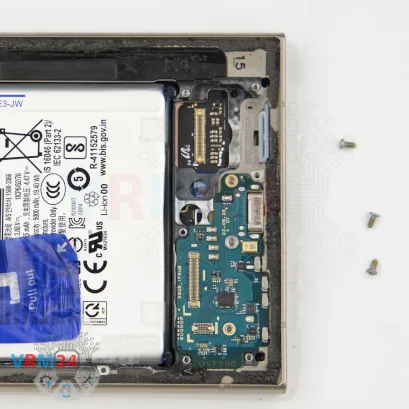
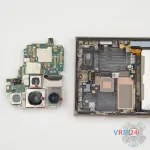
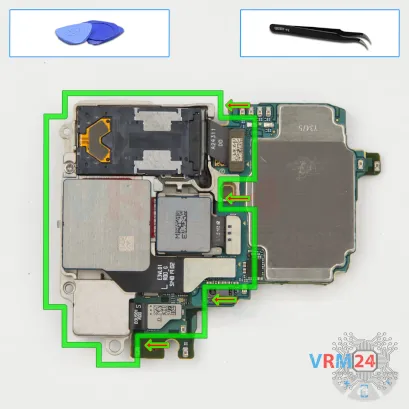
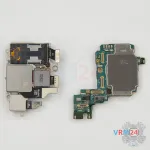
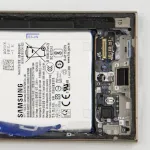
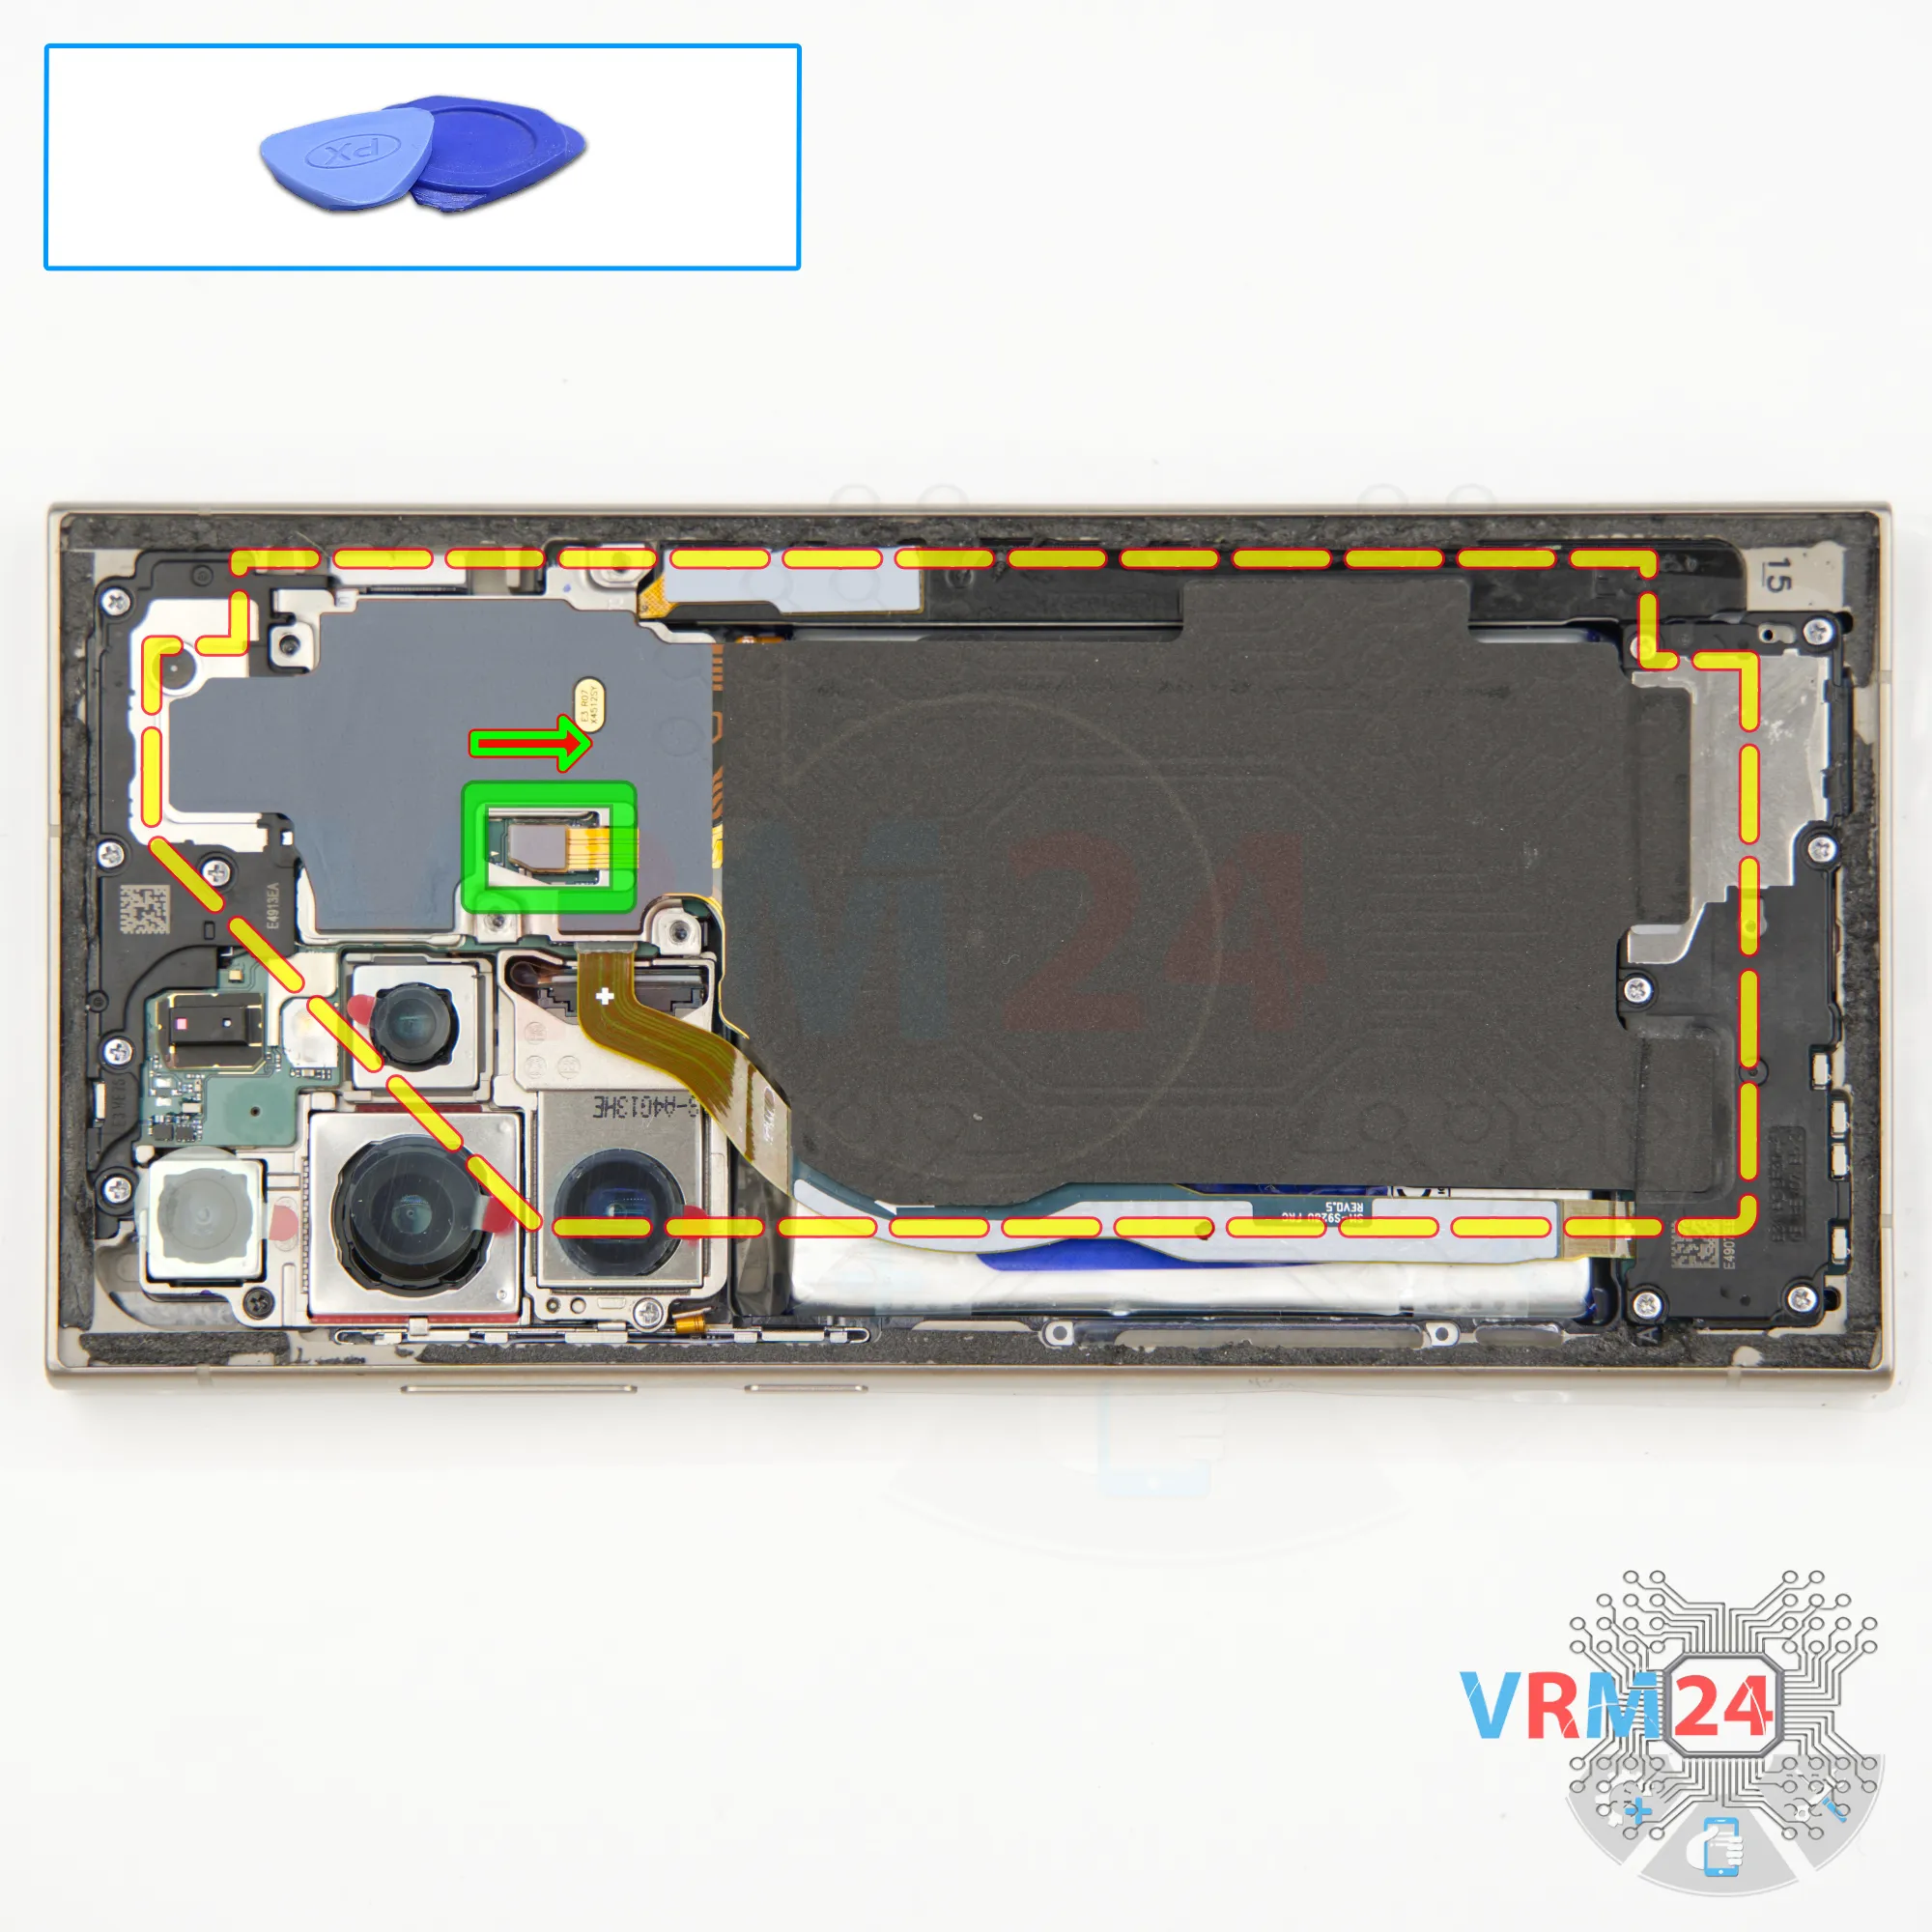
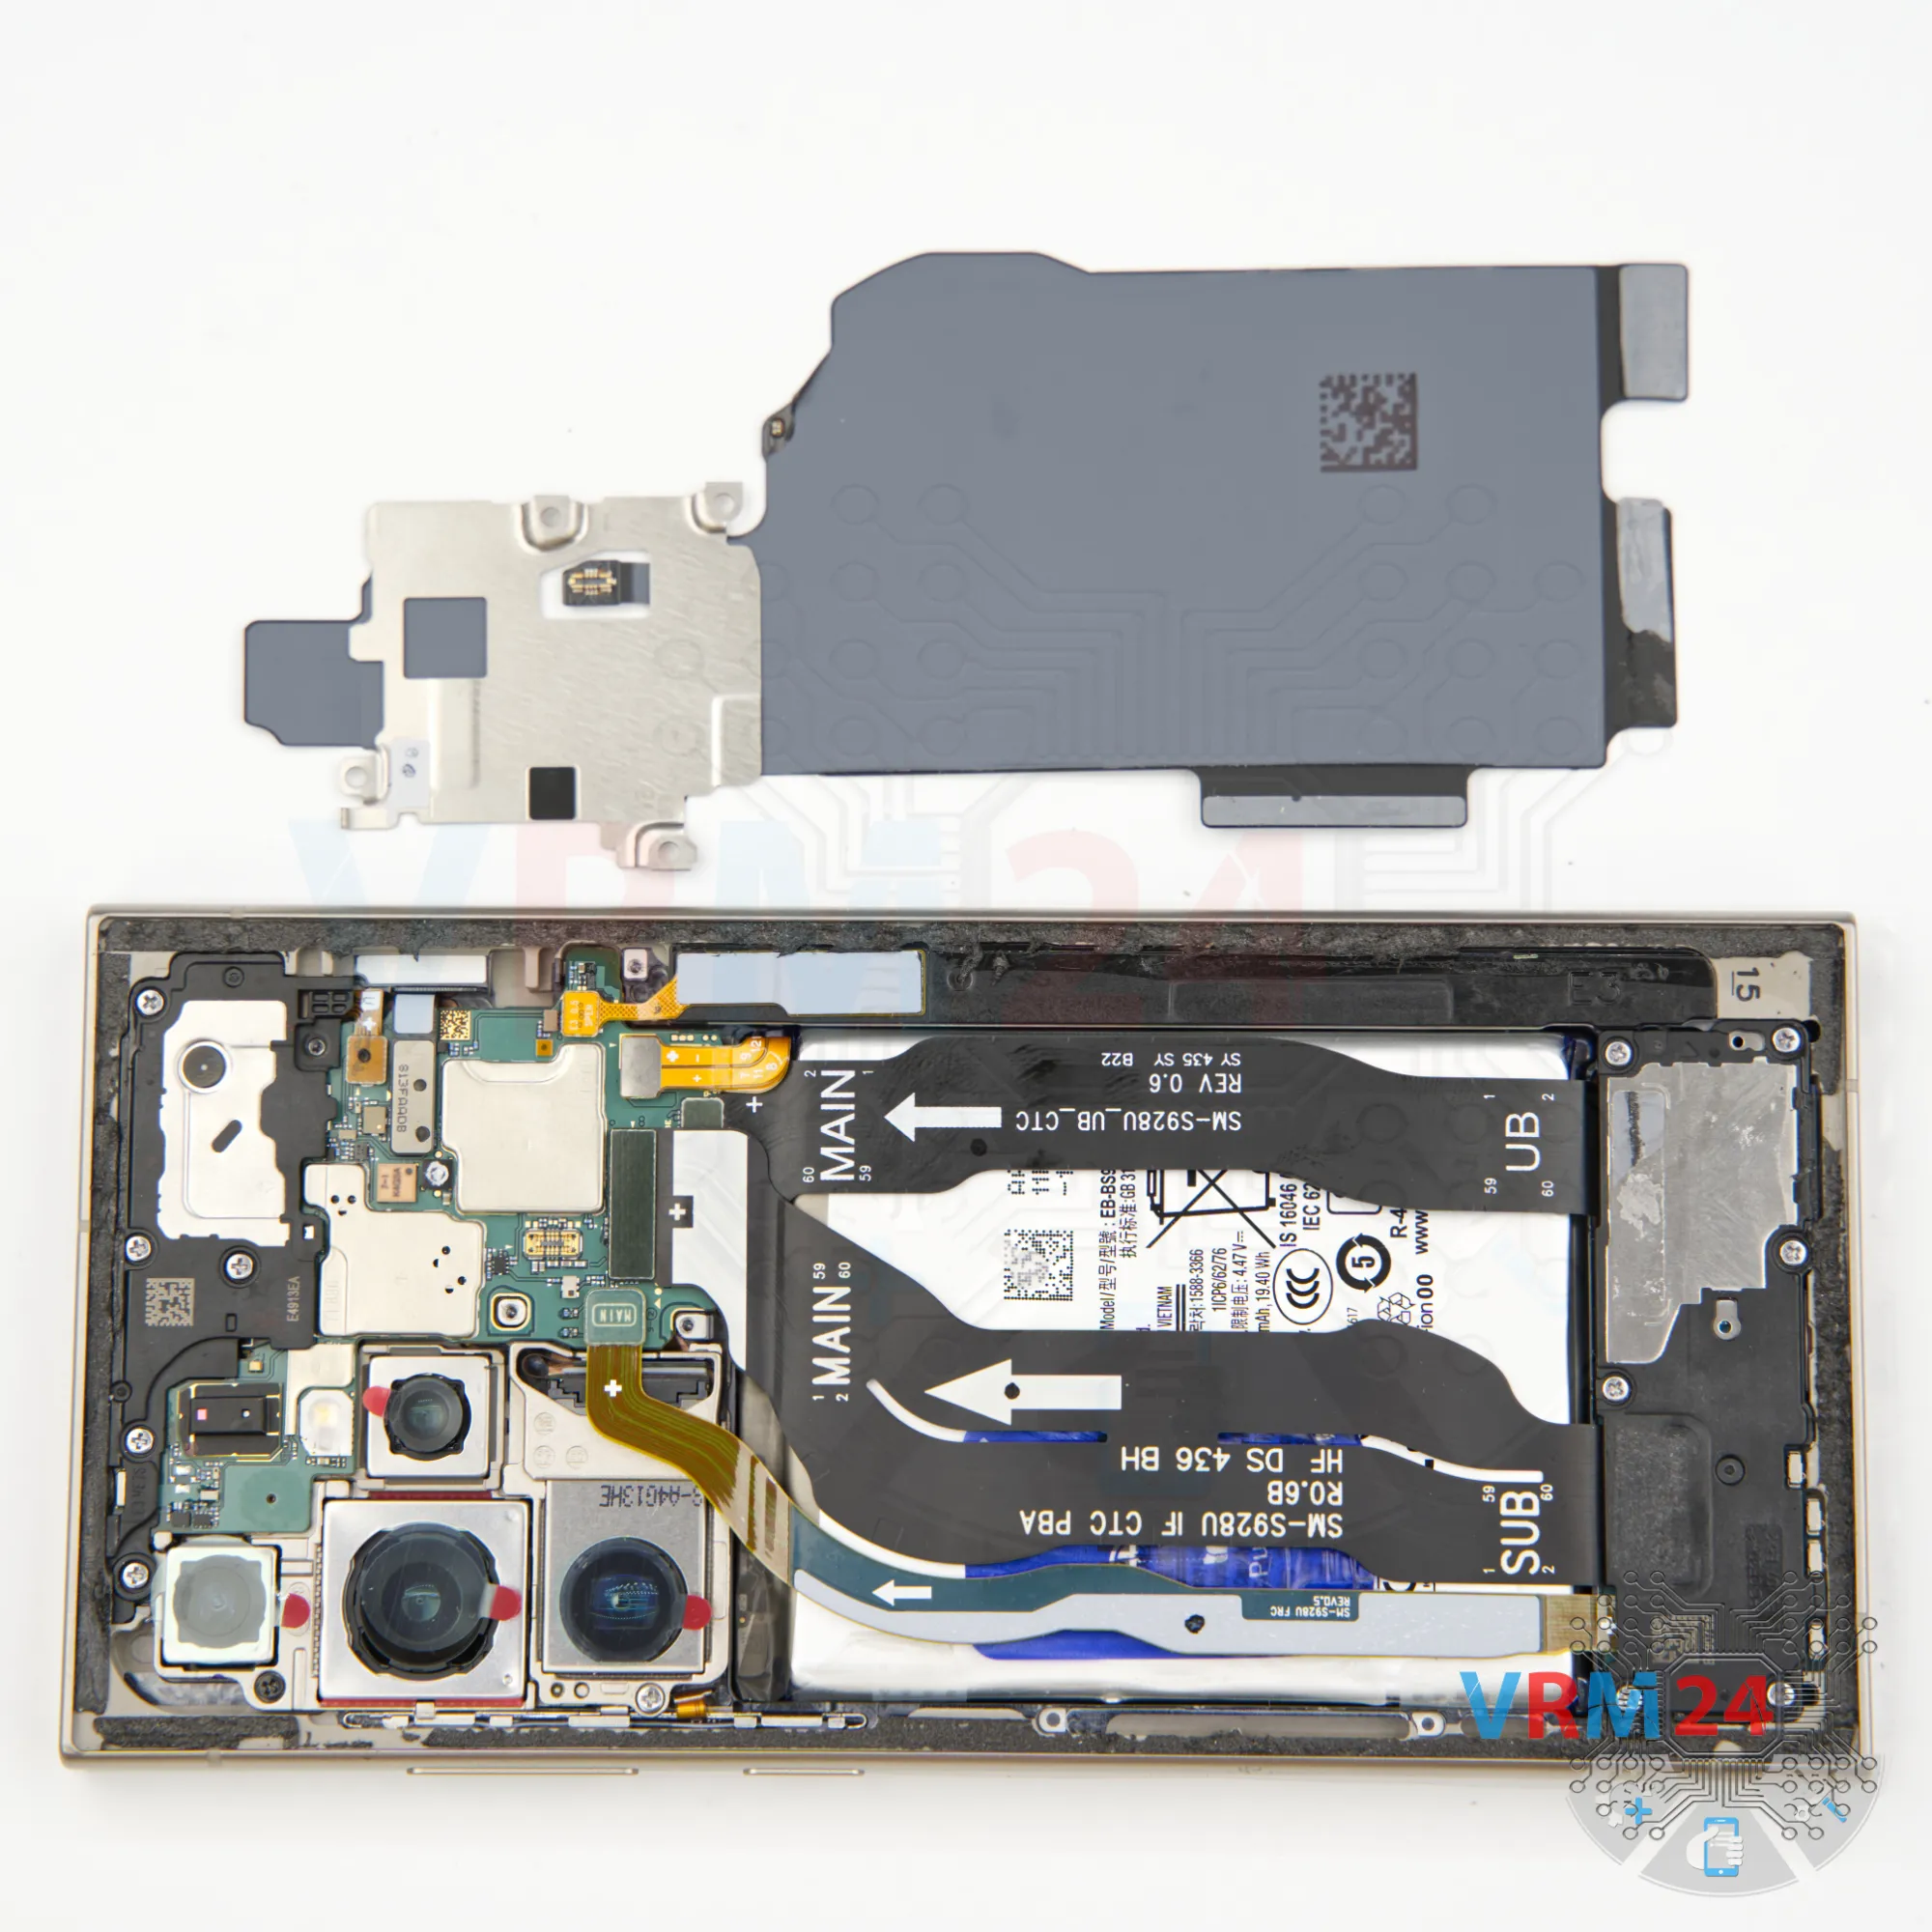
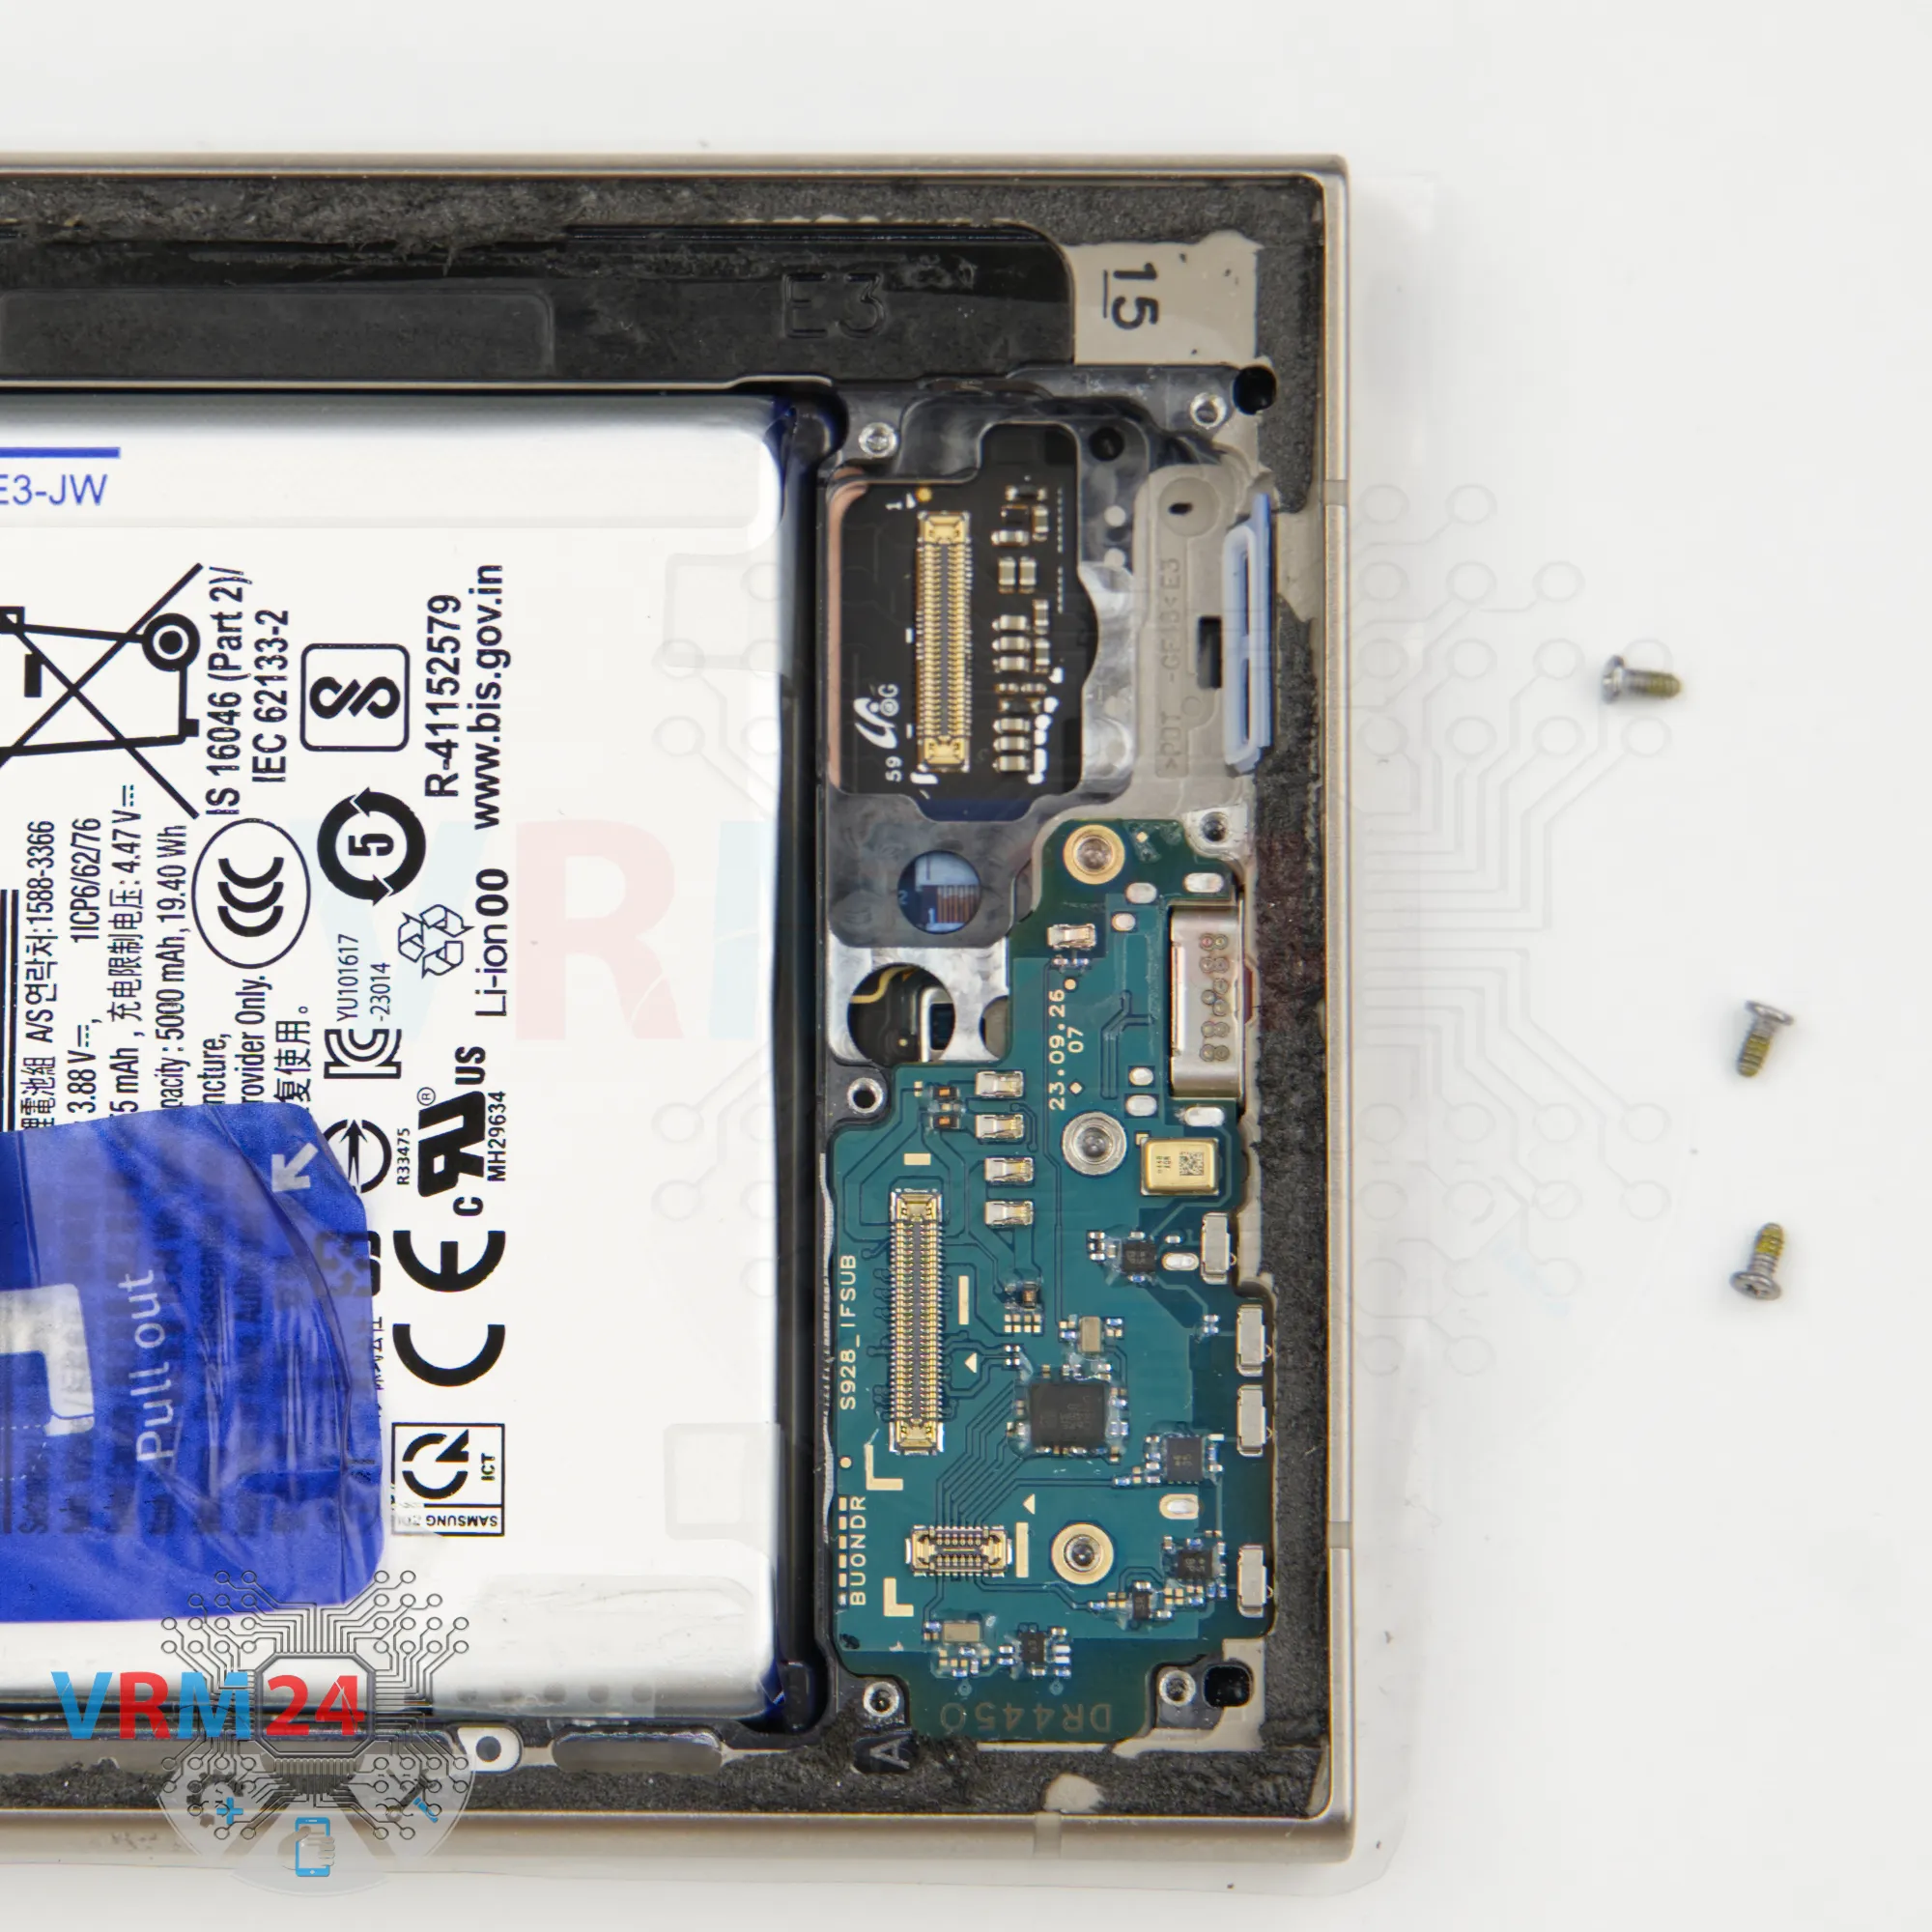
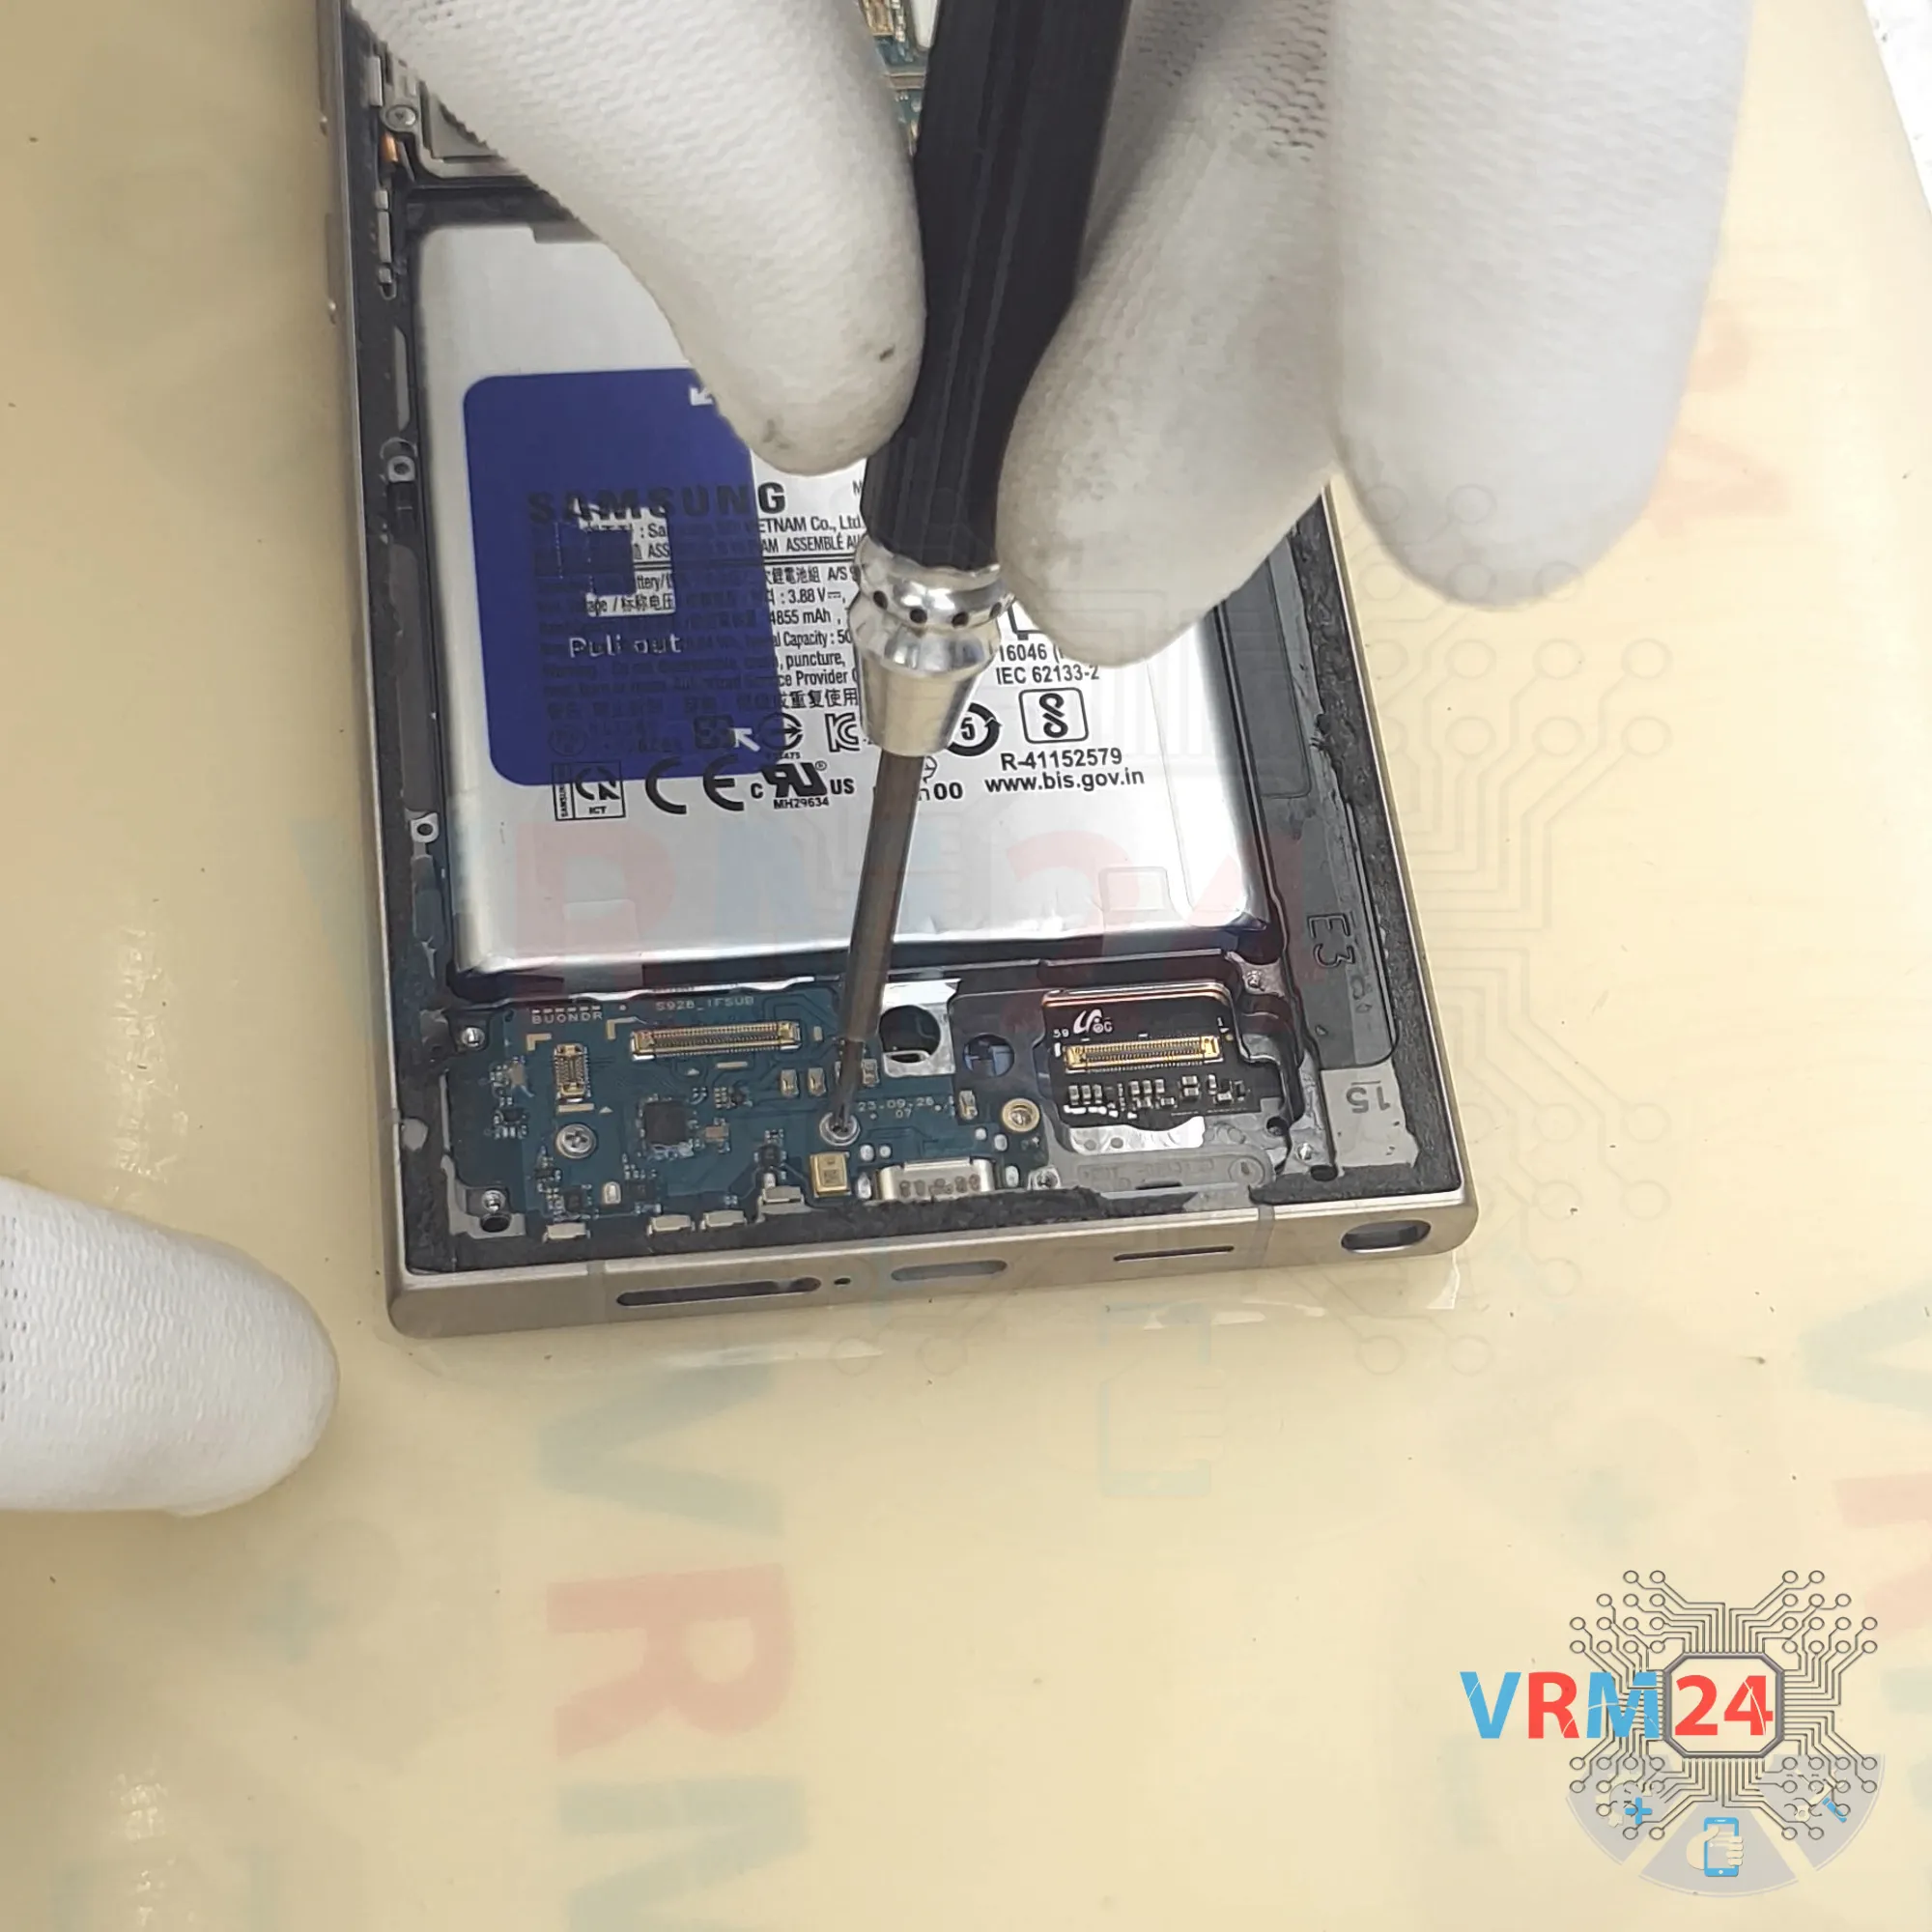
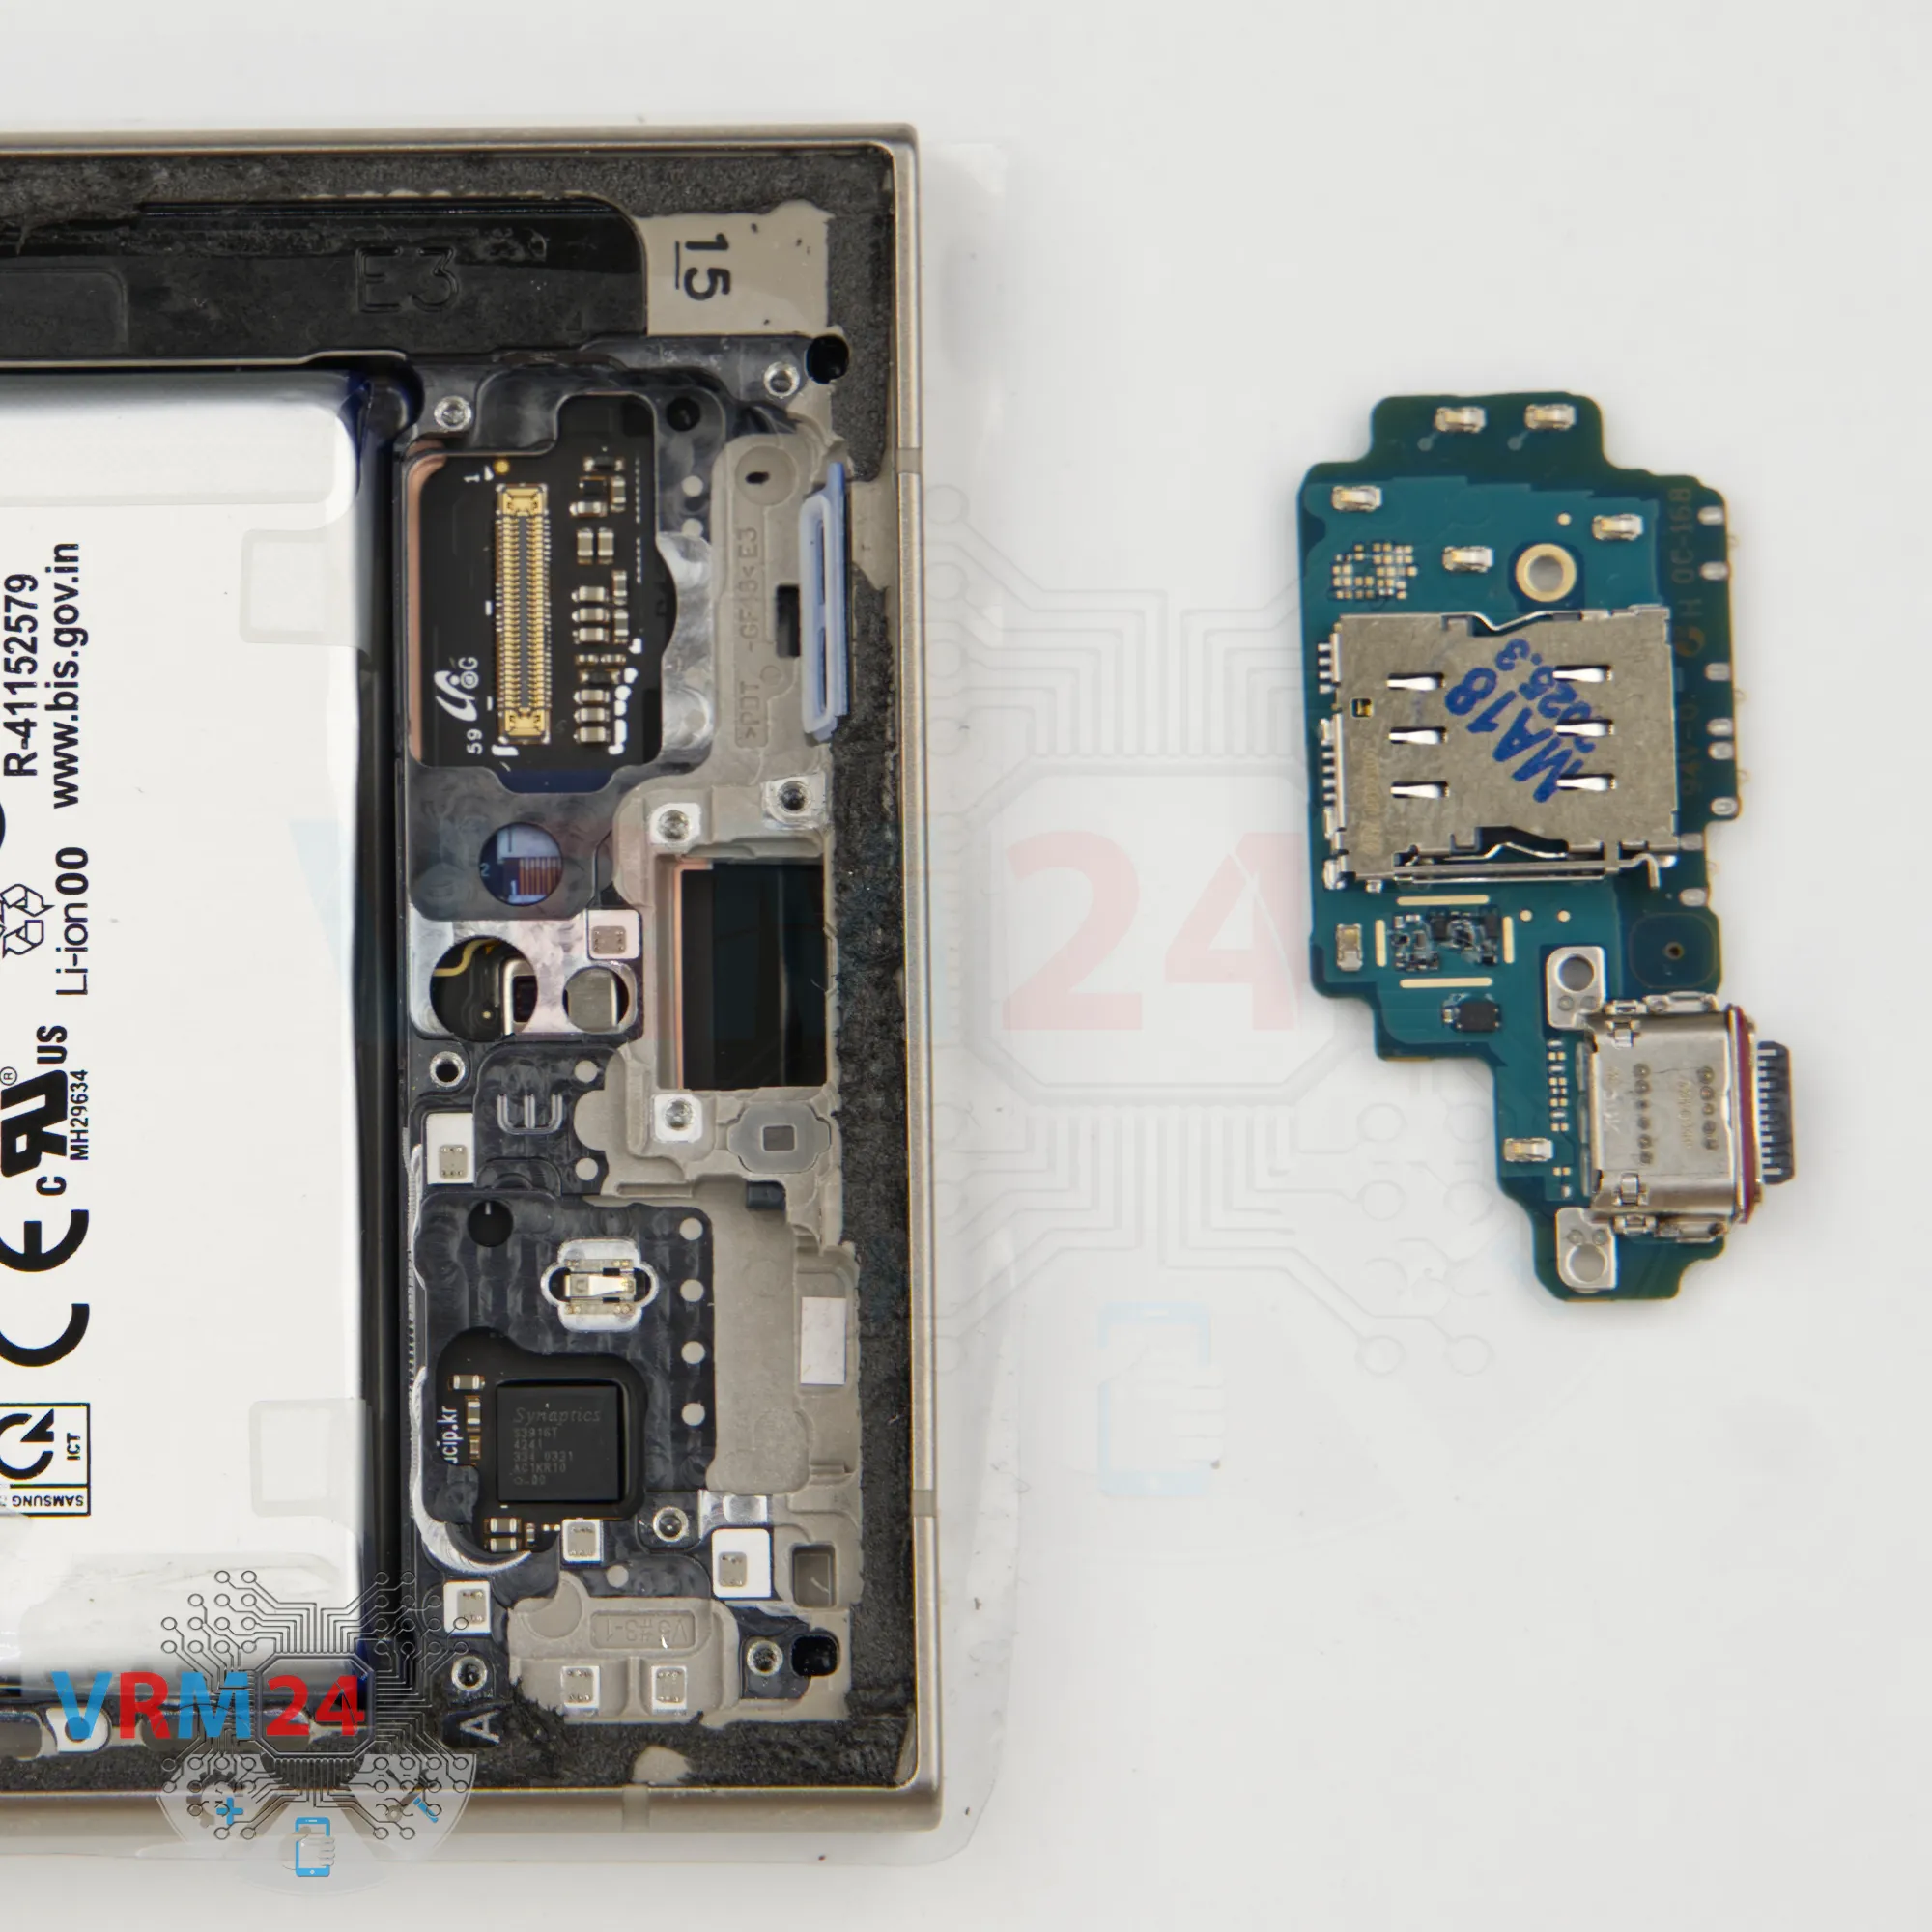
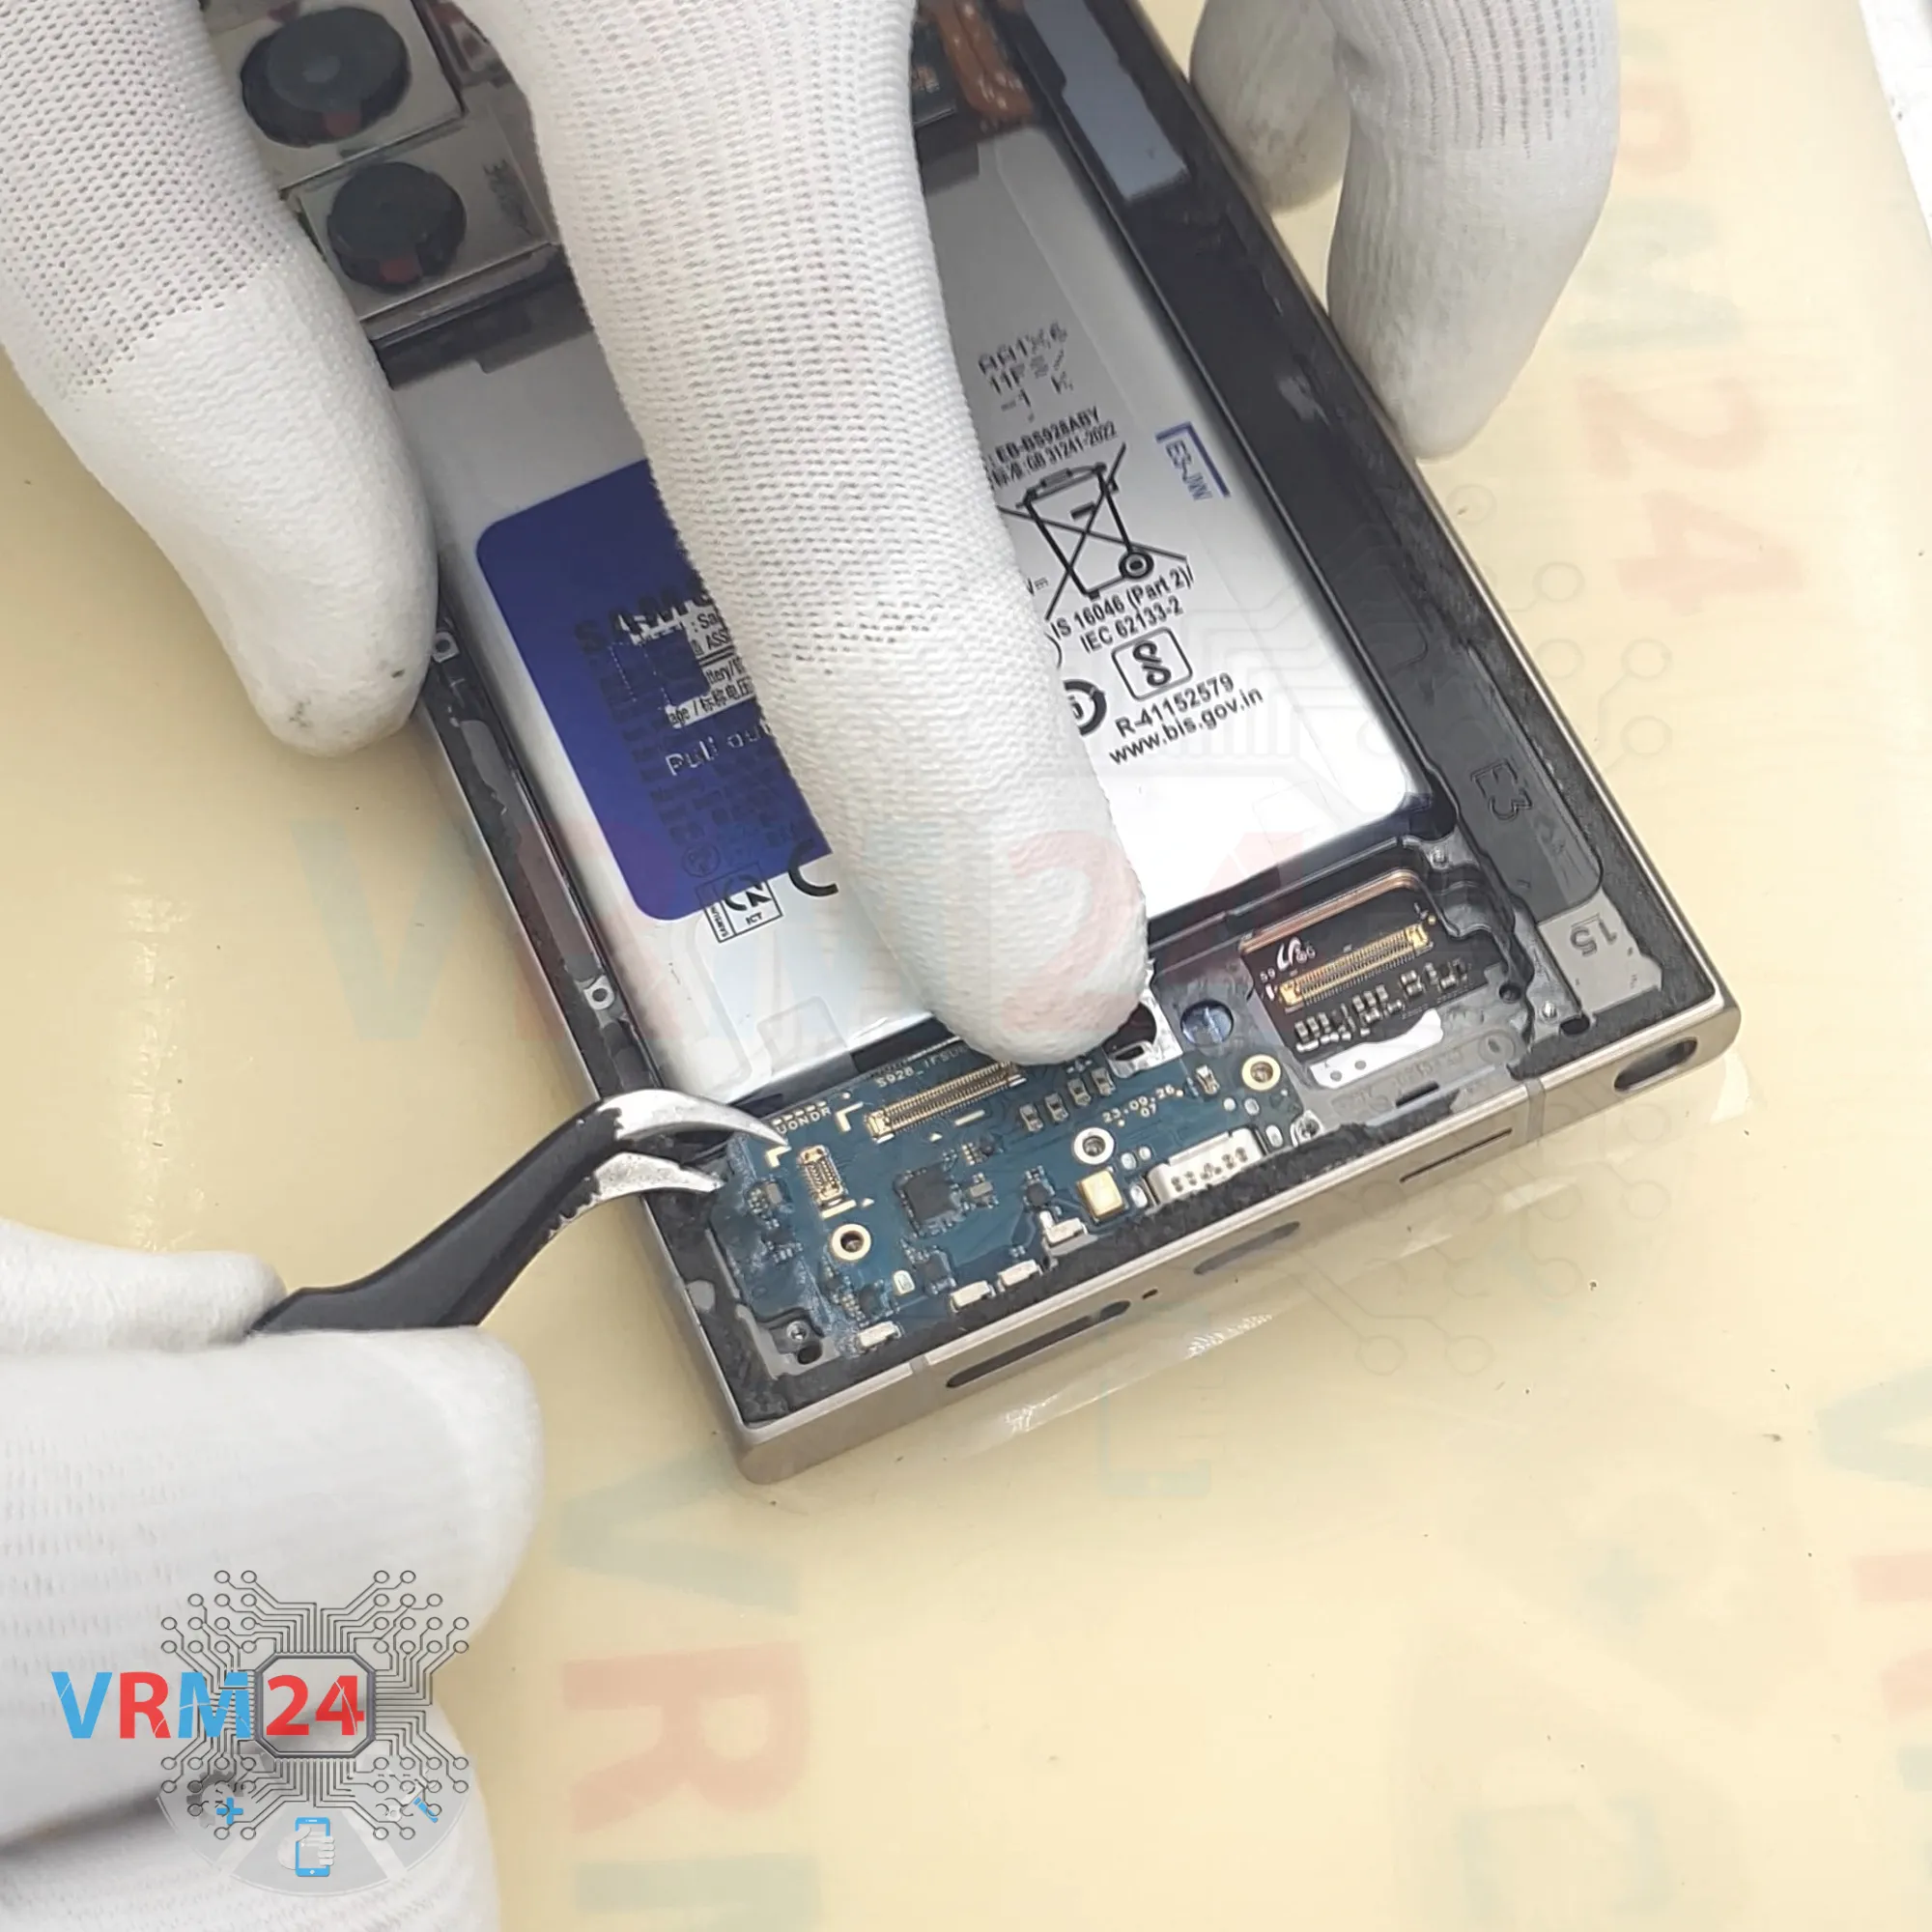
Step 12. Remove the sub-board
Once the screws are out, we can remove the sub-board. Gently pry it up from the edge and lift it out.
As we can see the sub-board houses the microphone, charging port, and SIM card connector (on the reverse side).
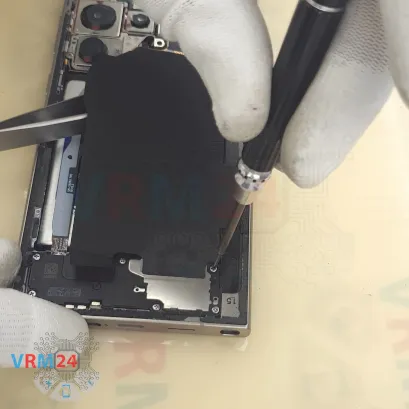
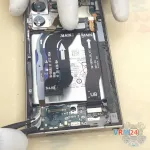
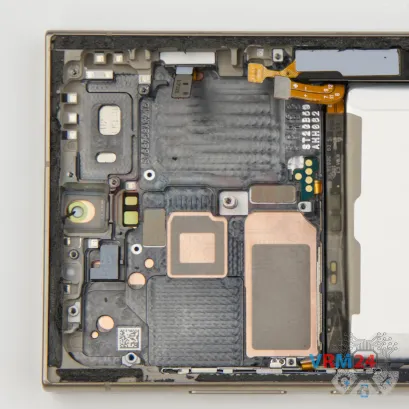
Step 13. Unscrew the screws
Now, we move on to the motherboard.
Unscrew the five screws securing the cover with the earpiece speaker.
We’re using the same 1.5mm Phillips screwdriver here too.


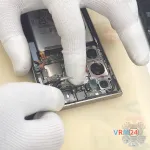
Step 14. Remove the earpiece speaker
Next, we remove the upper cover with the earpiece speaker.
Carefully pry it up and lift it off, making sure nothing’s in the way. Set it aside.
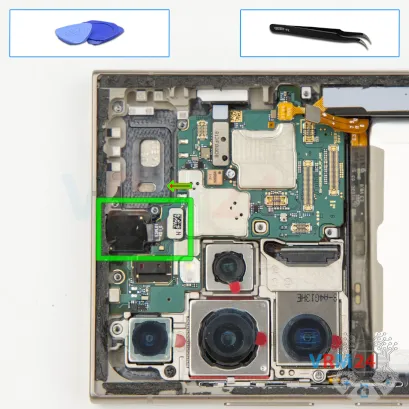

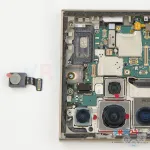
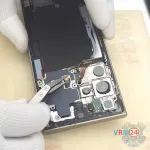
Step 15. Remove the front camera
We can now disconnect the front-facing camera.
Usually, it’s secured with compound, but in our case, it’s removable.
Just be careful to lift it by the base so you don’t snap it in half.
Gently lift the camera from the base and set it aside. It’s a good idea to cover the lens to prevent dust from settling on it.
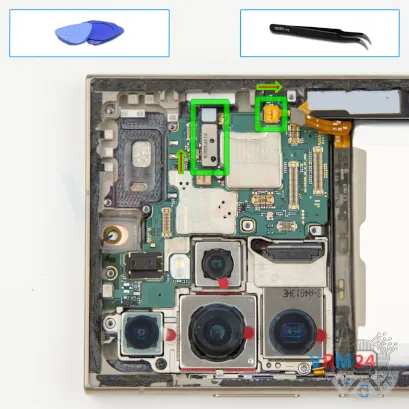


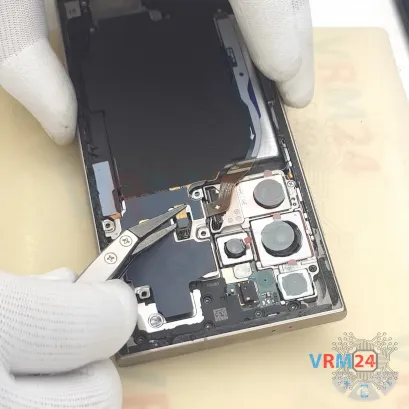
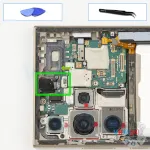
Step 16. Disconnect the connectors
Disconnect the S Pen connector, and also the connector for the side buttons.
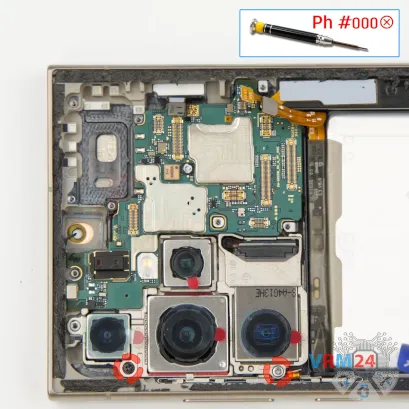


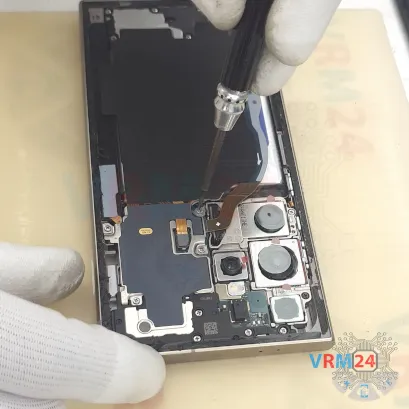
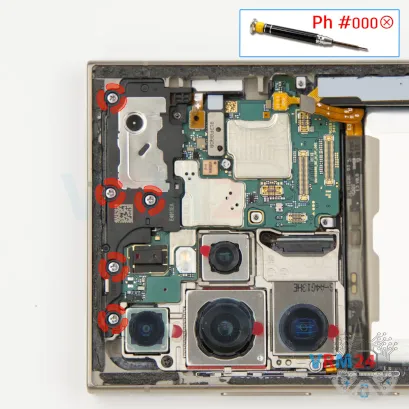
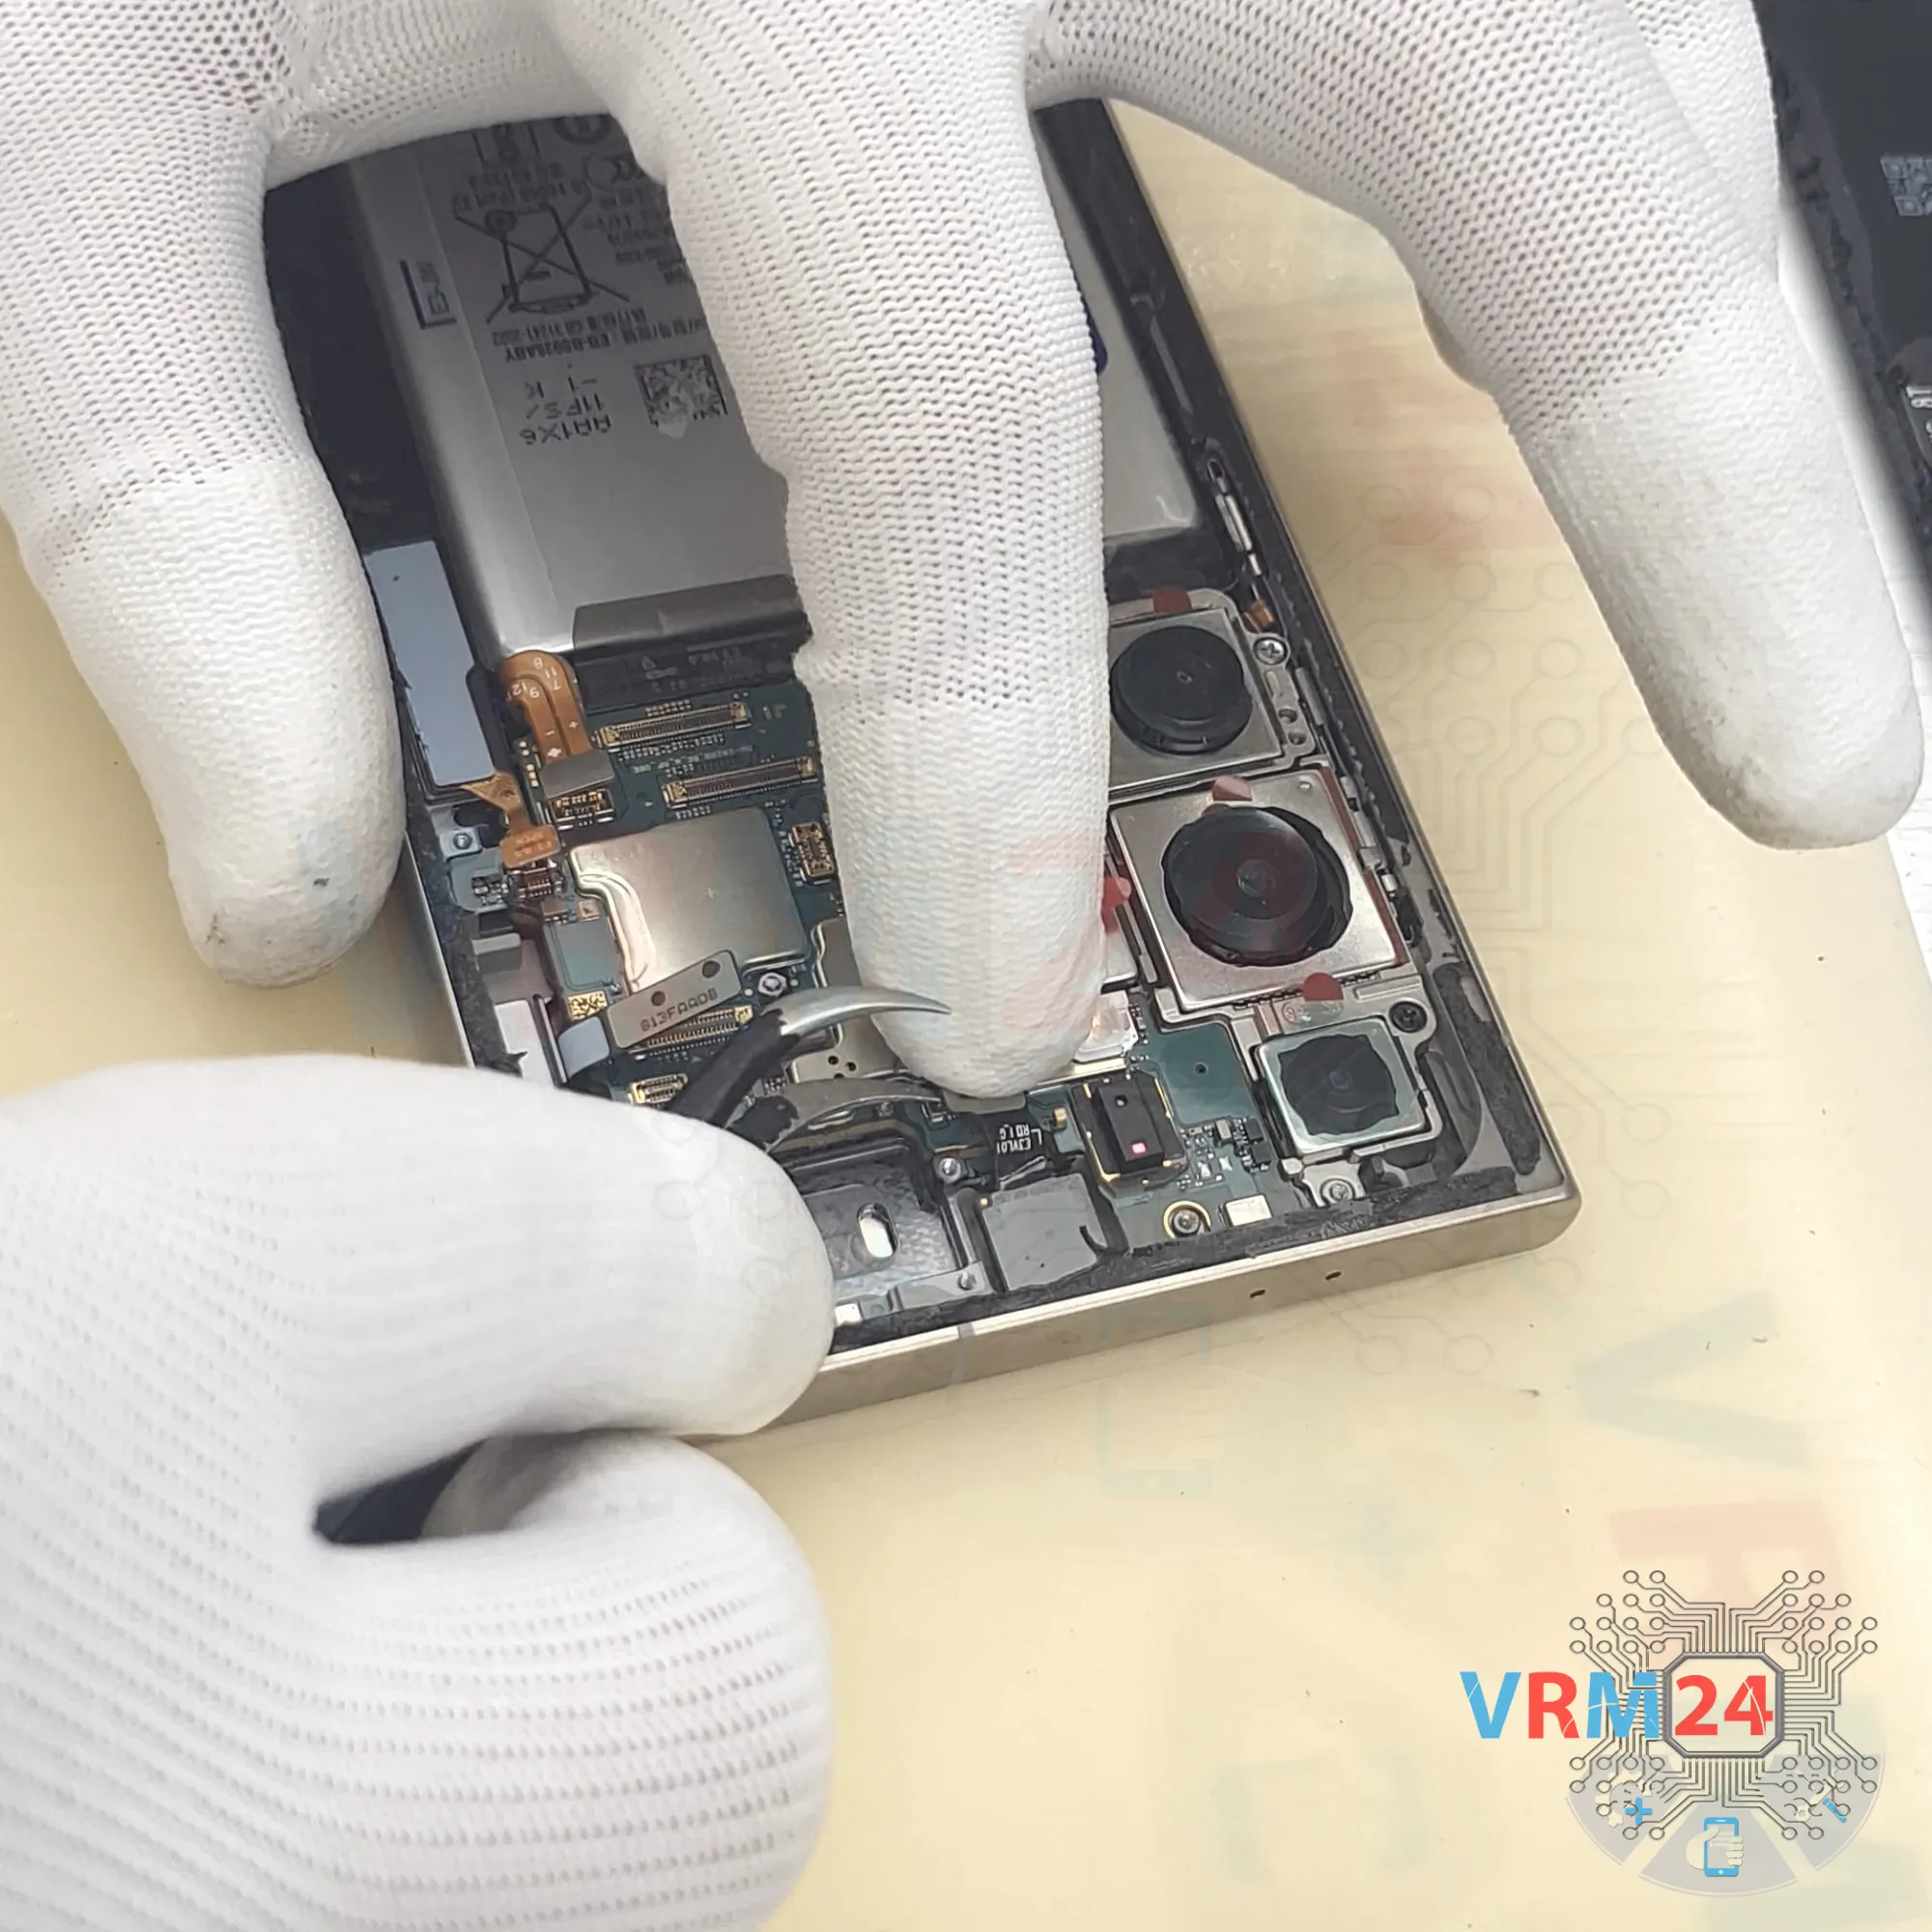
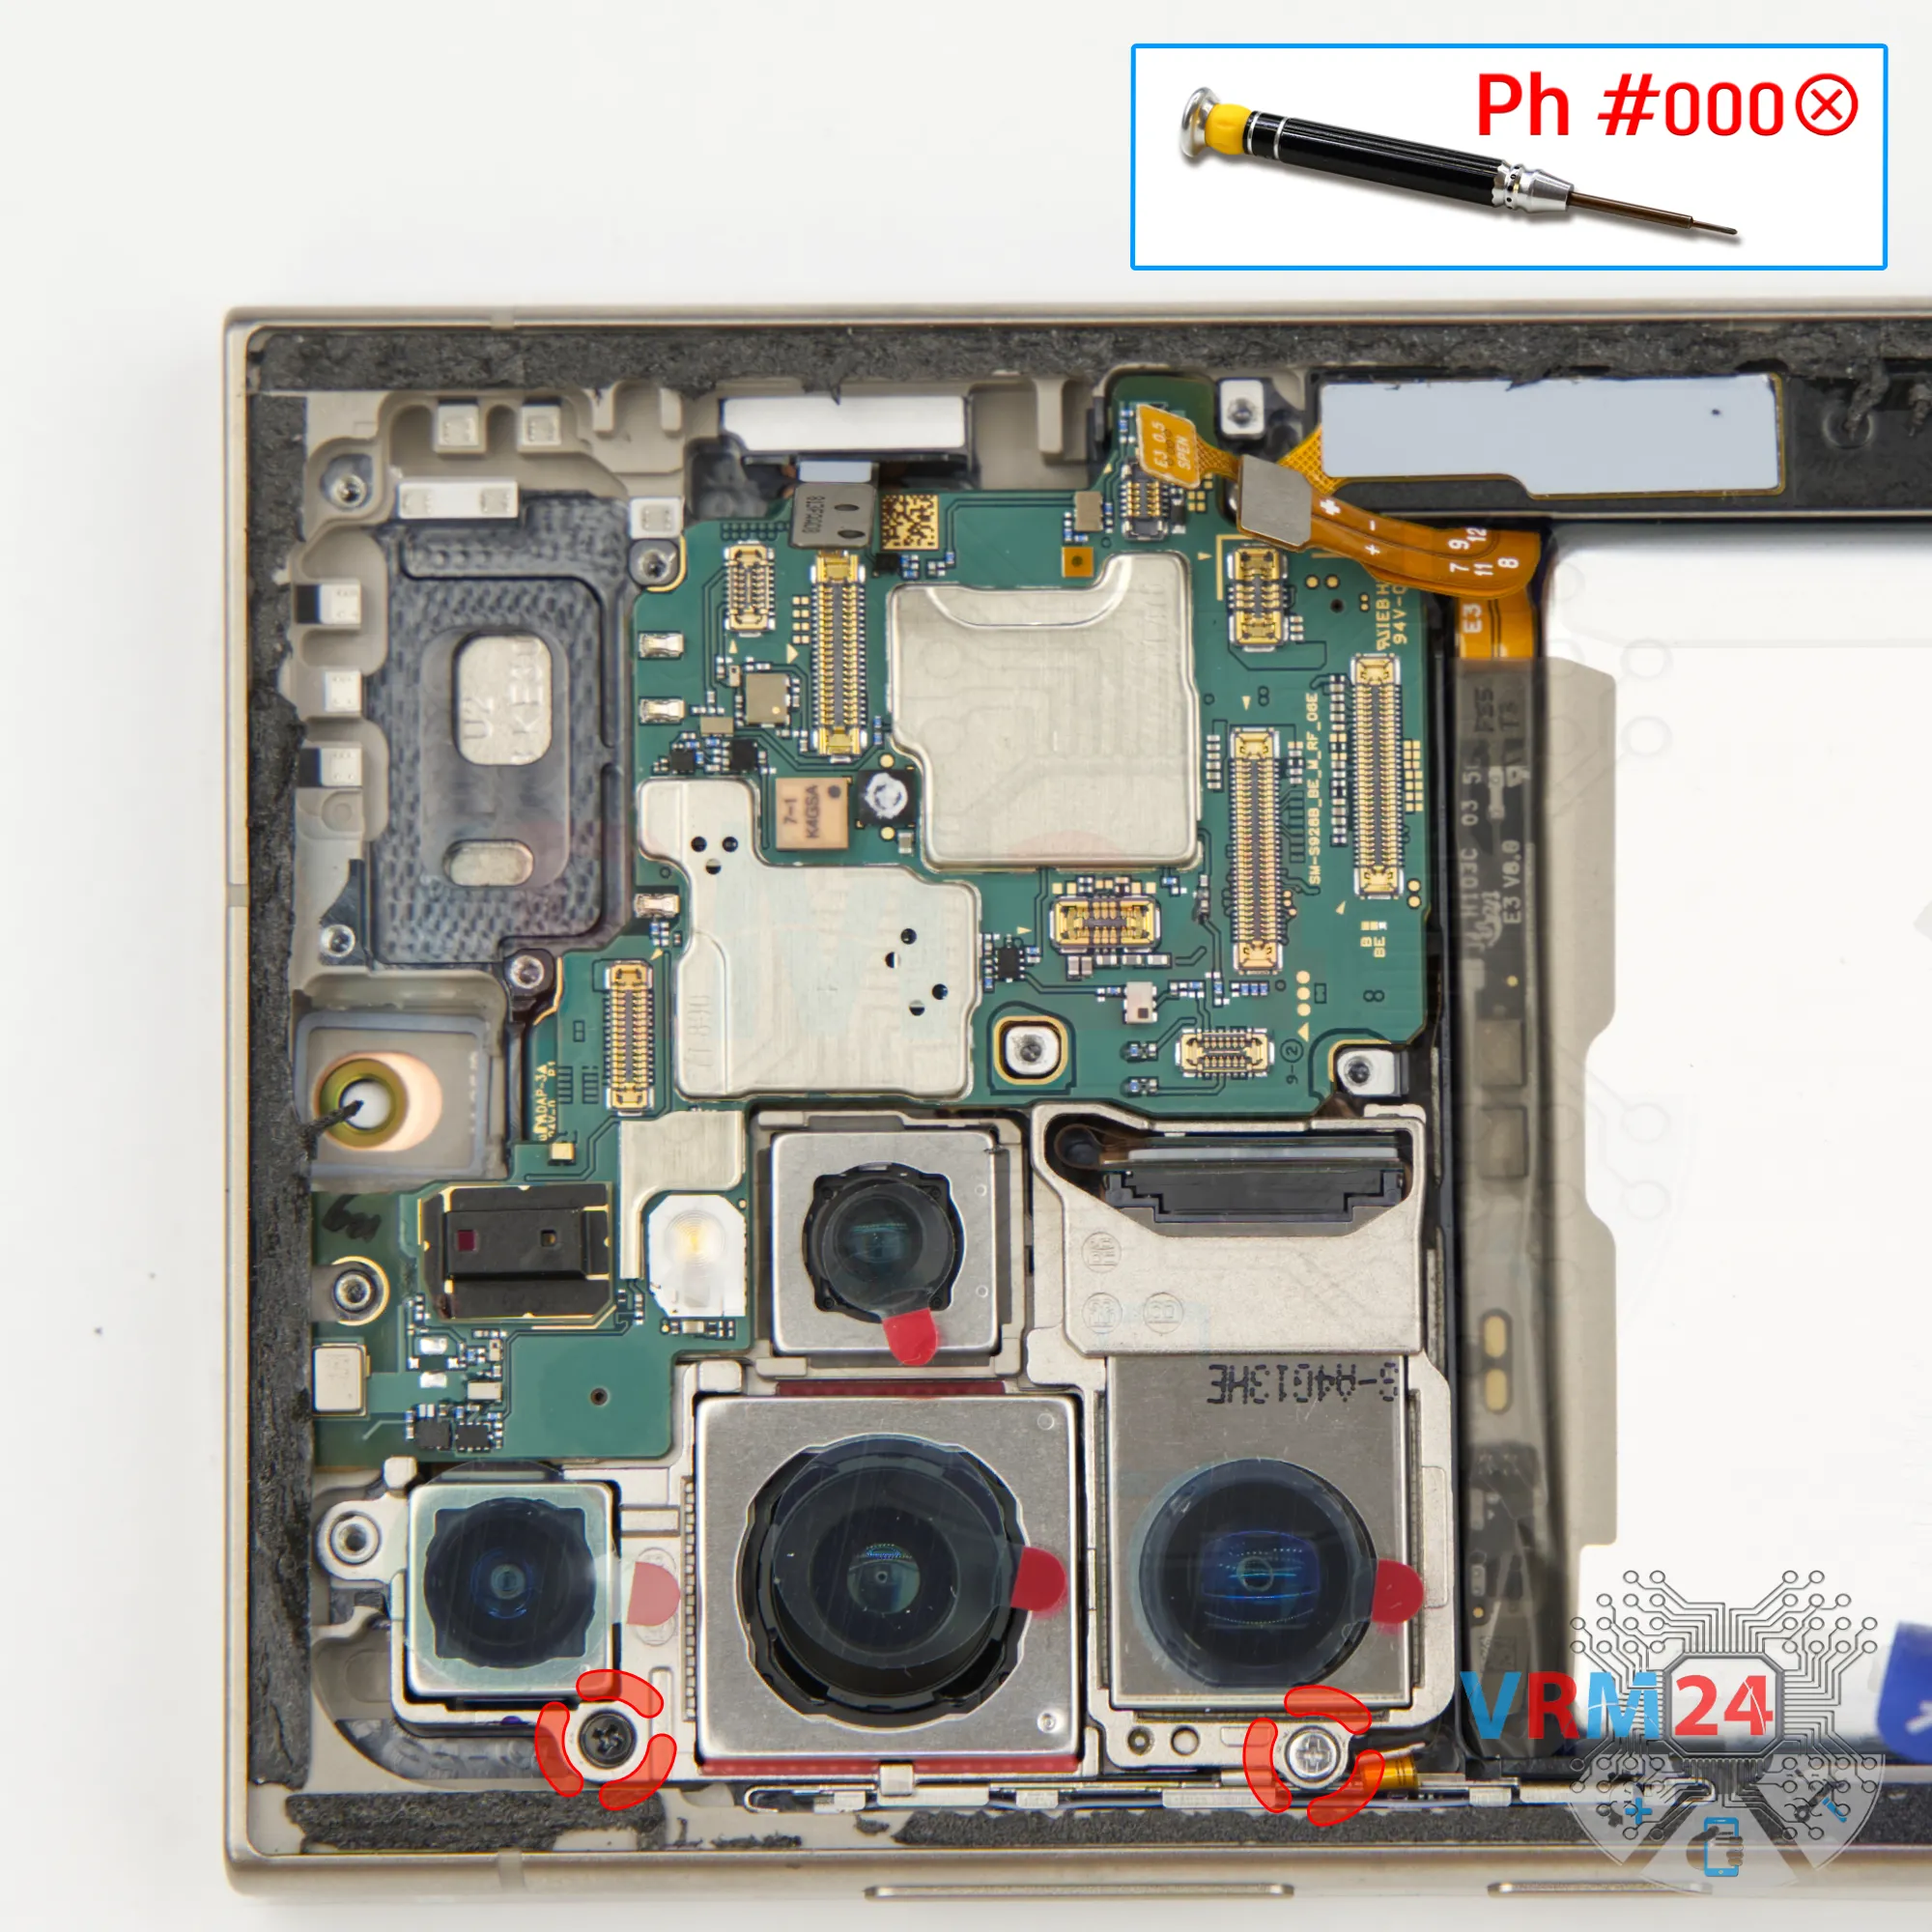
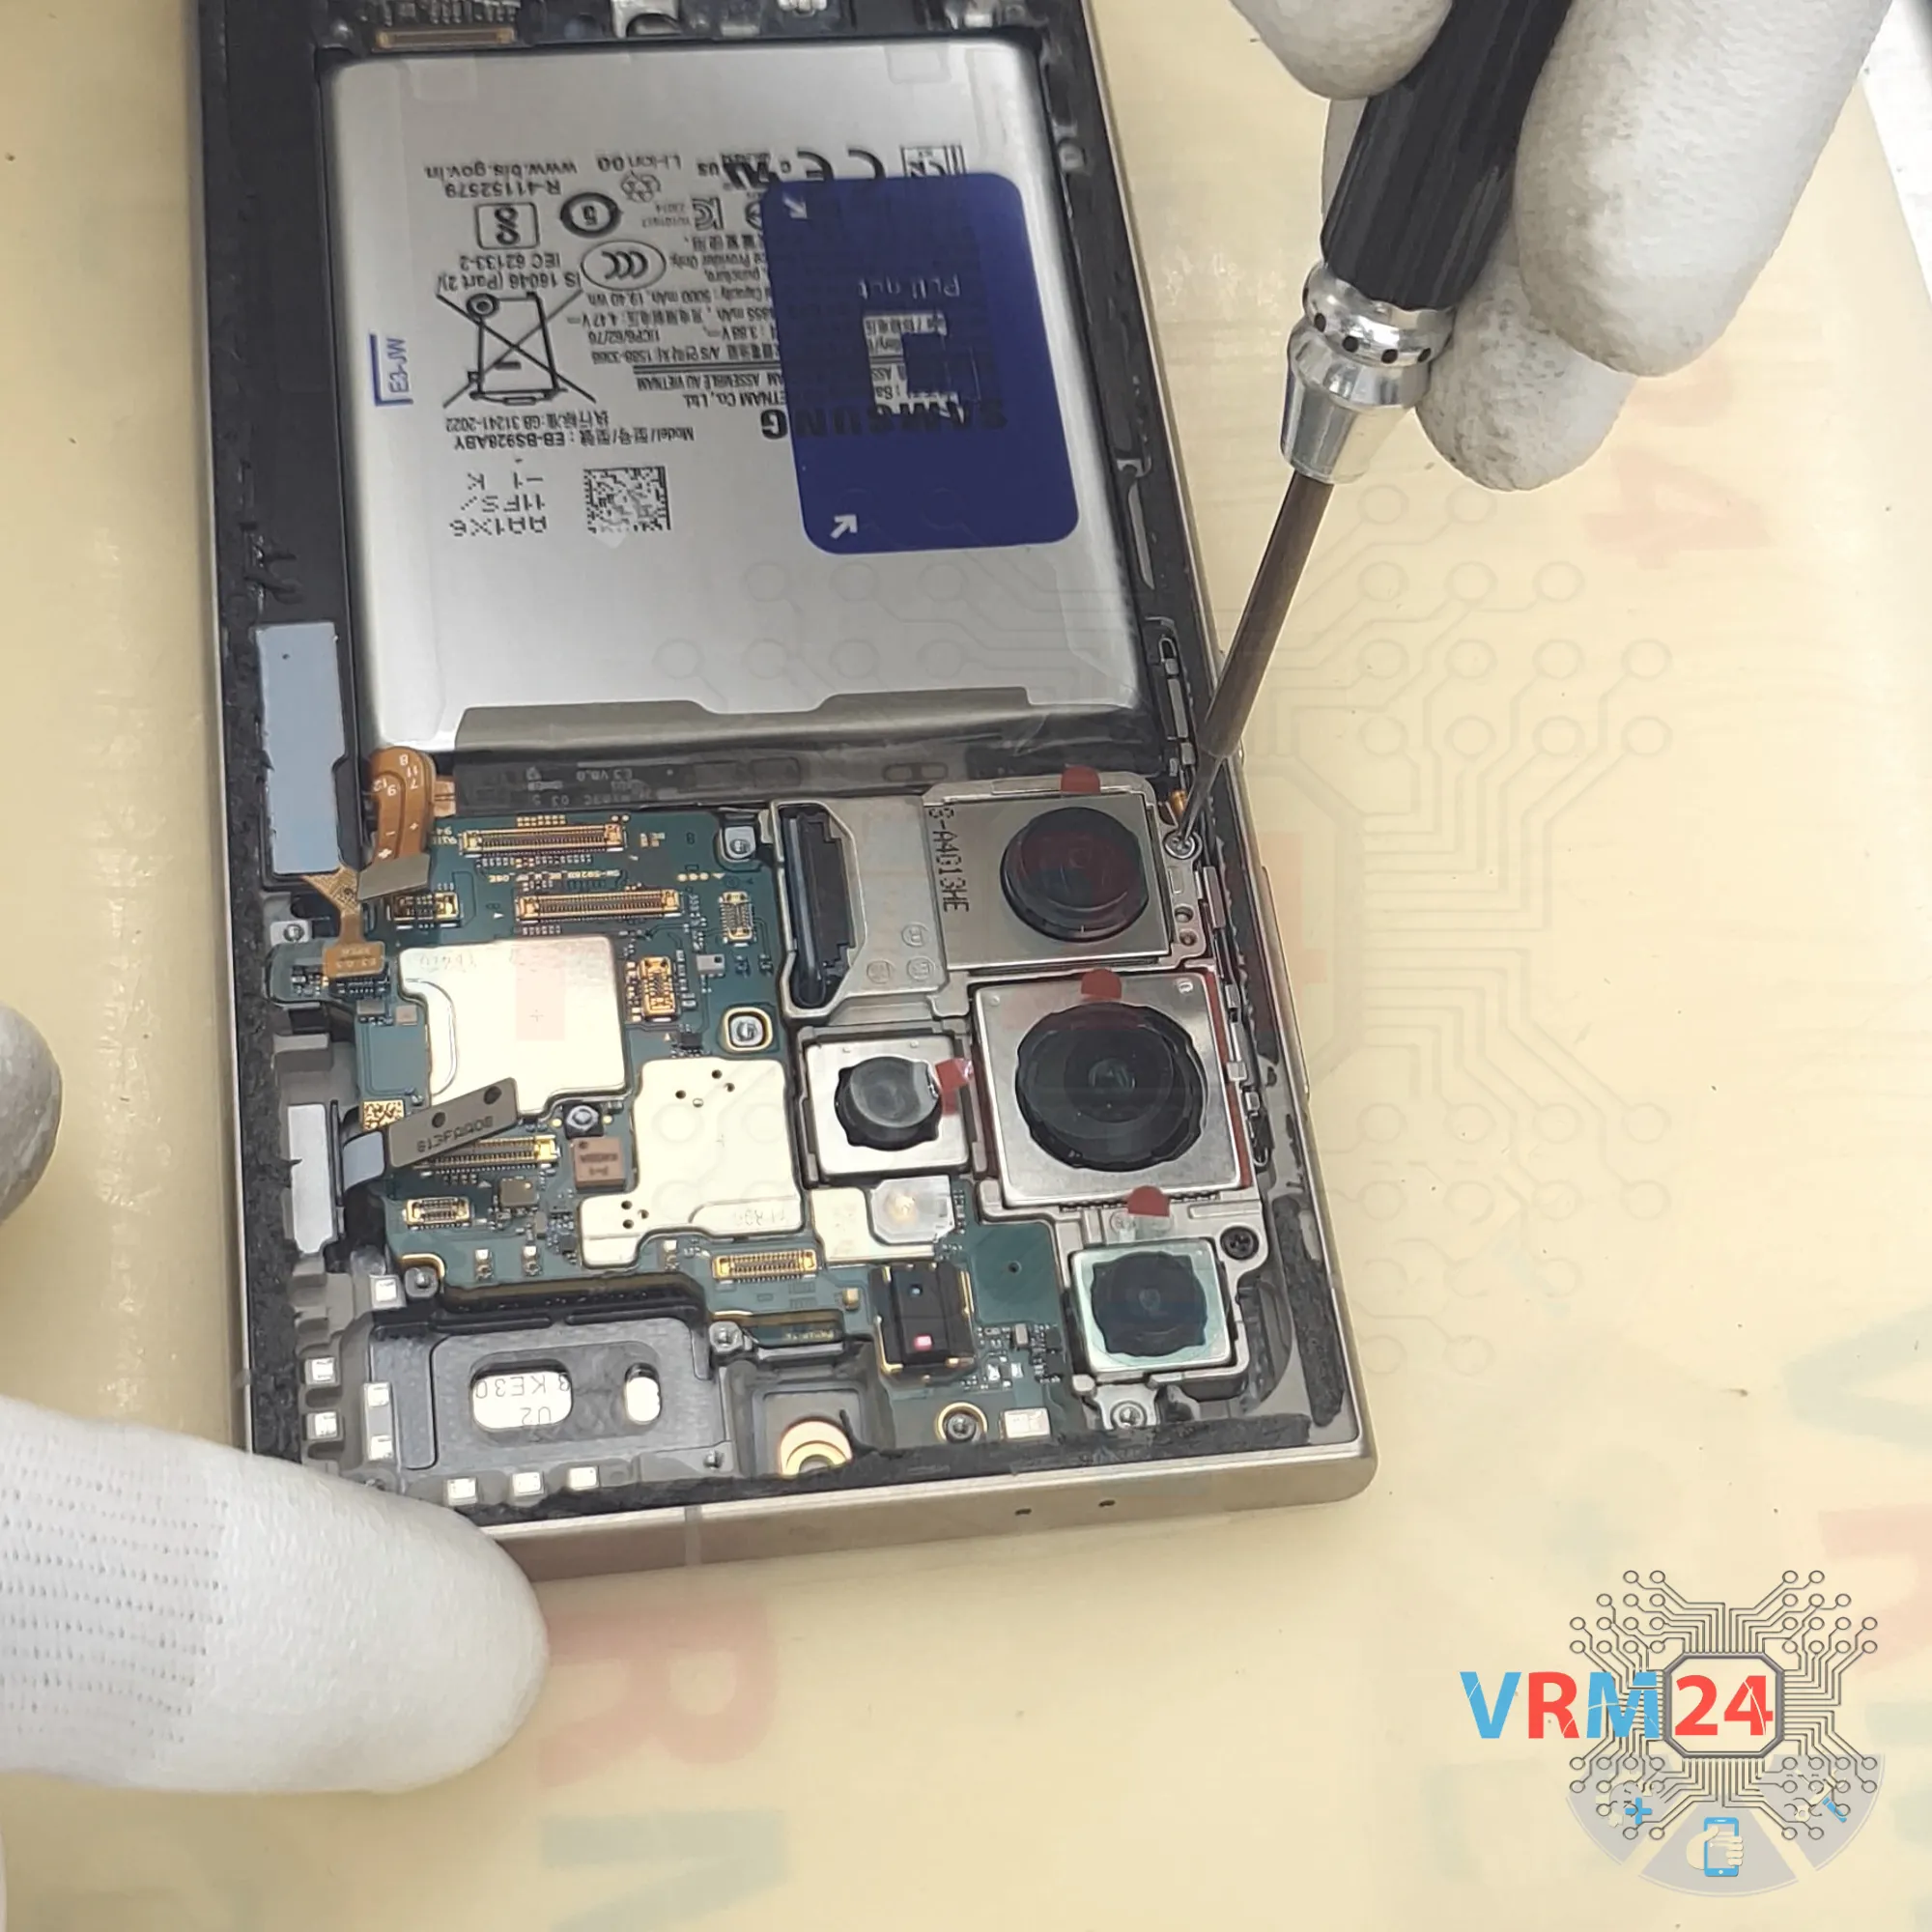
Step 17. Unscrew the screws
Now we can unscrew two screws securing the camera module.
Again, use a 1.5mm Phillips #000 screwdriver for it.
Keep in mind that these screws are different.
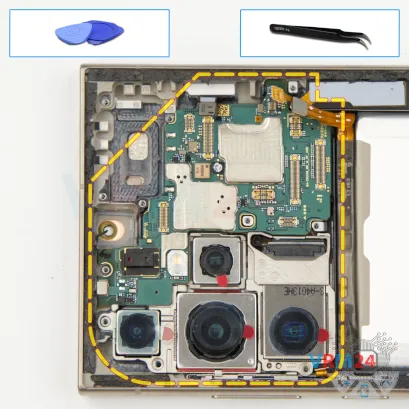
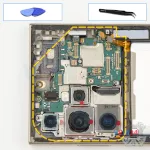
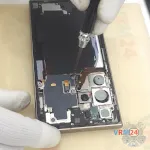
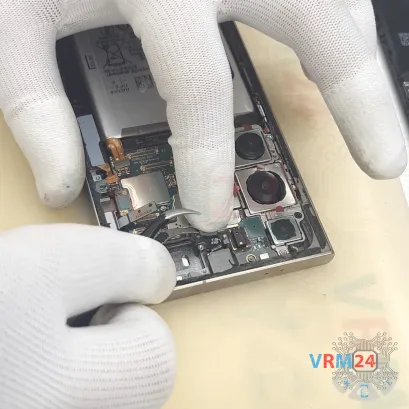
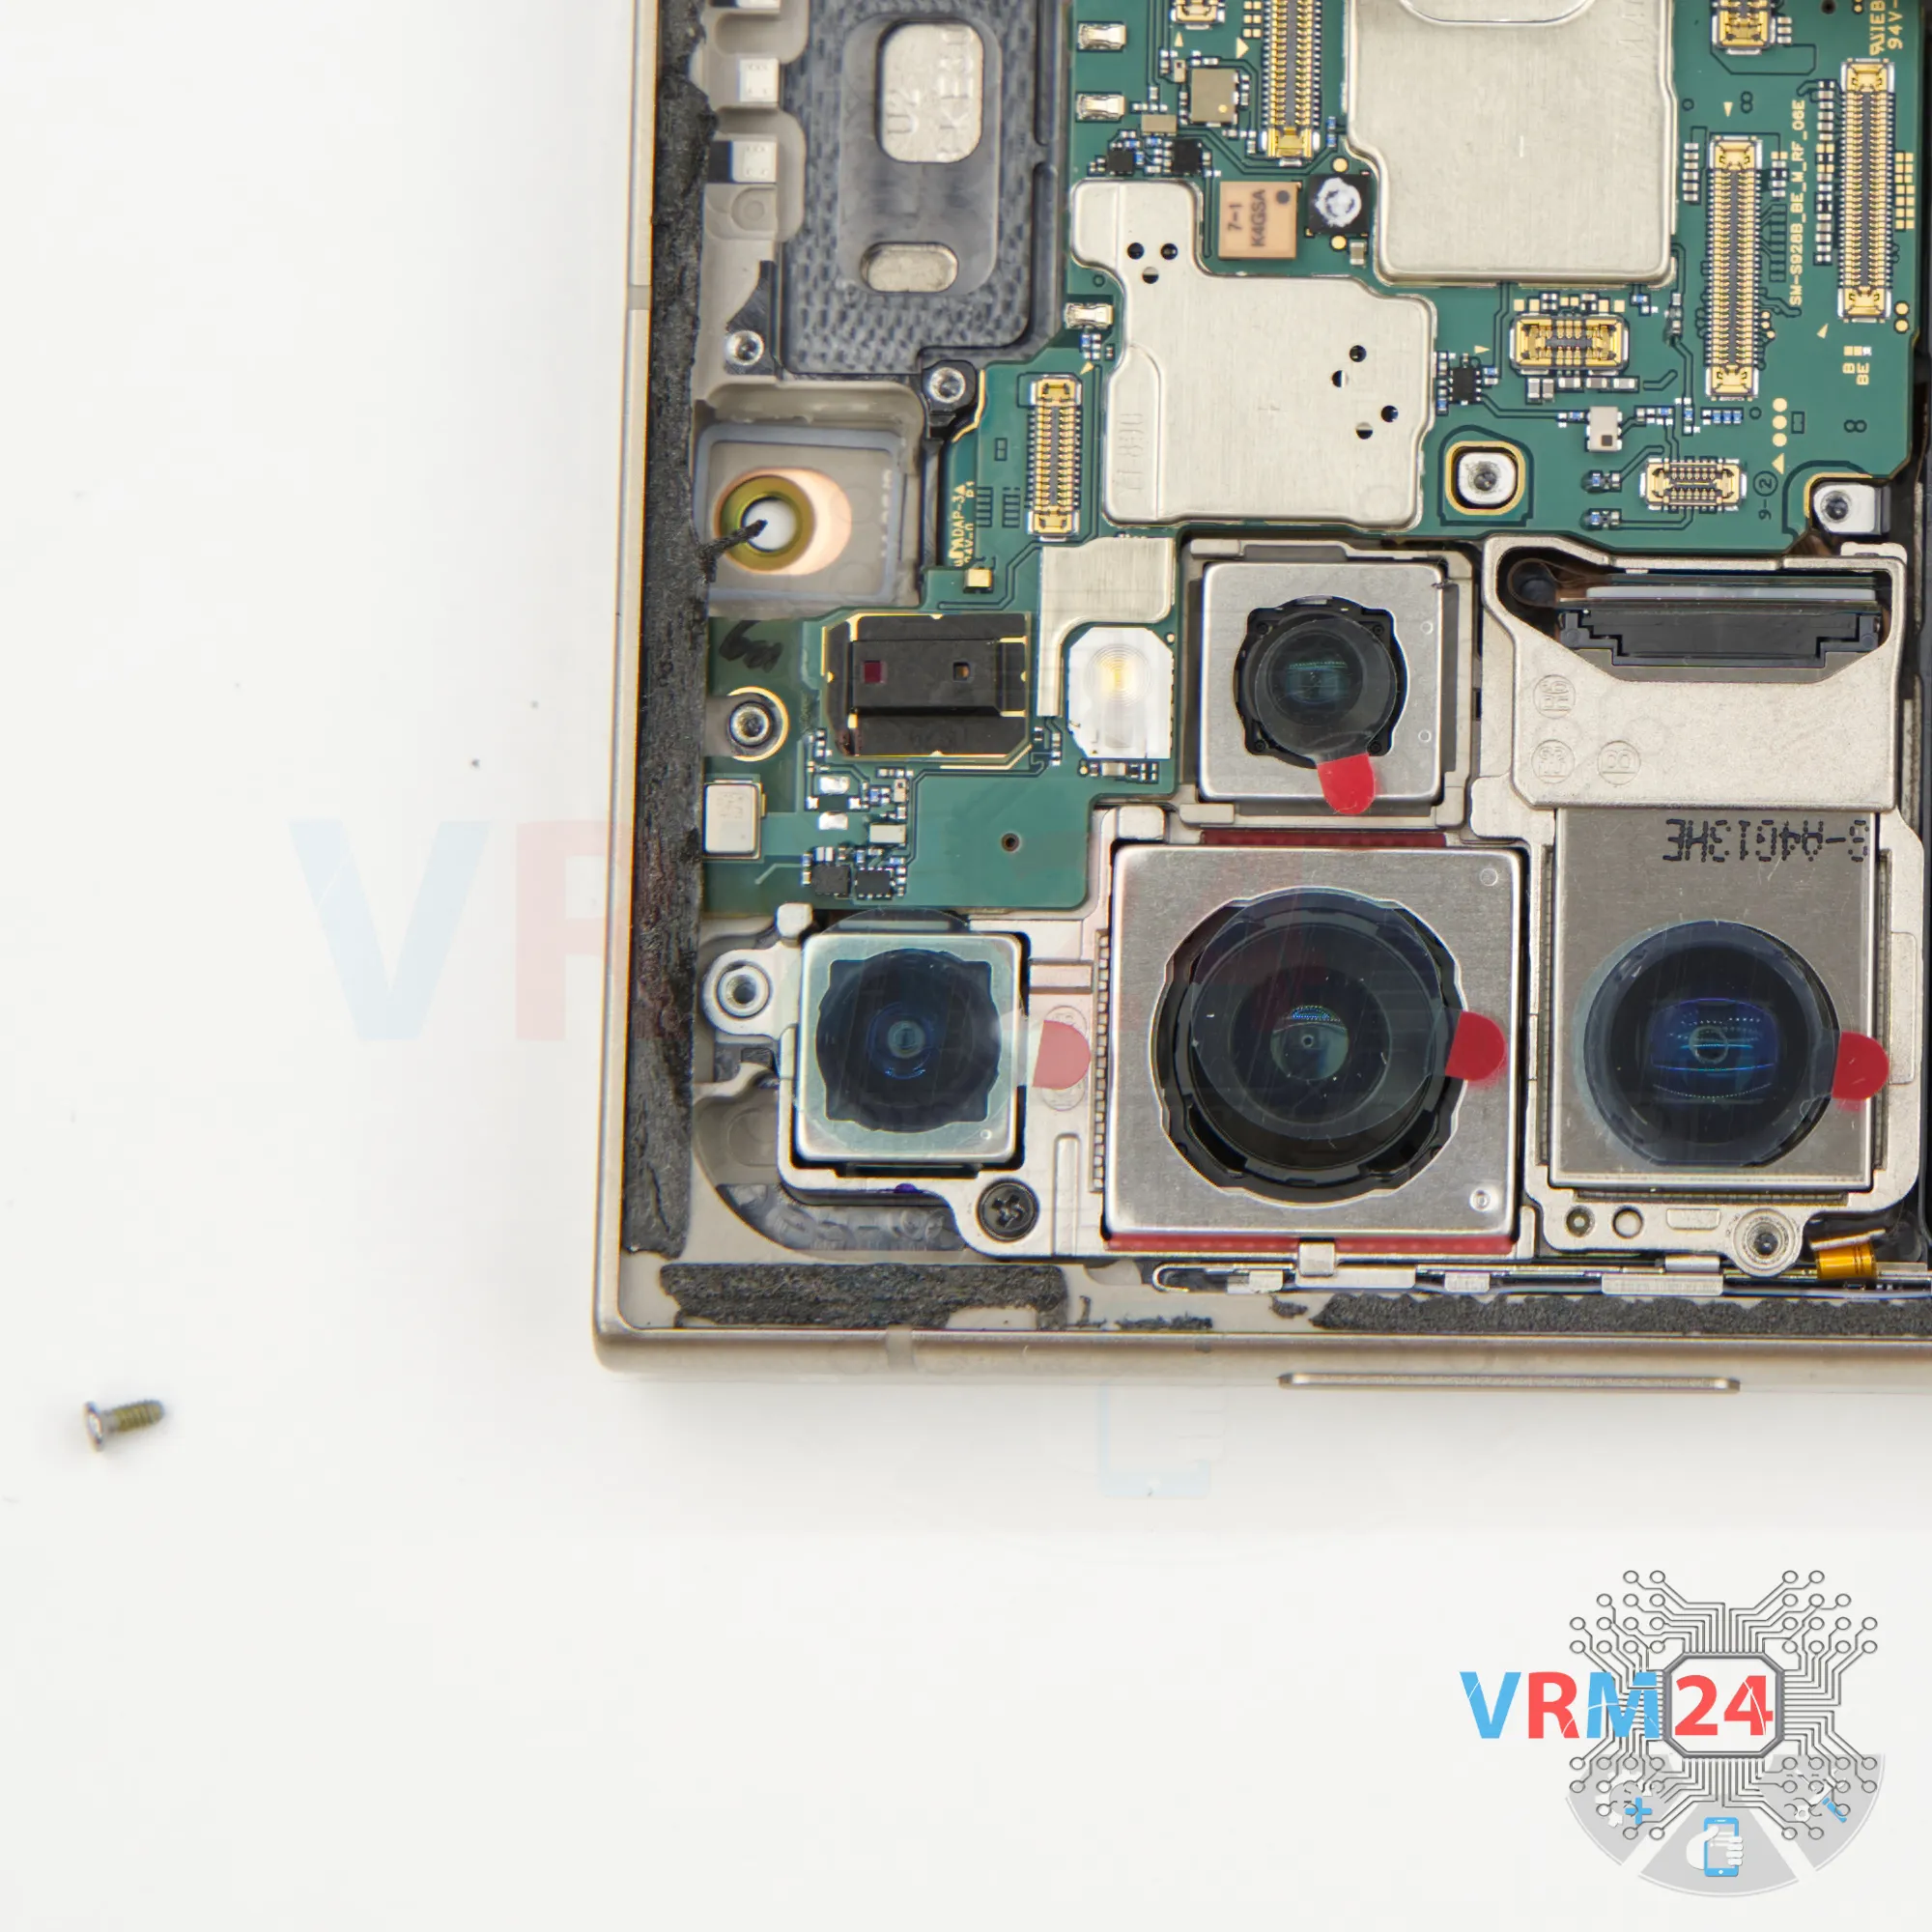
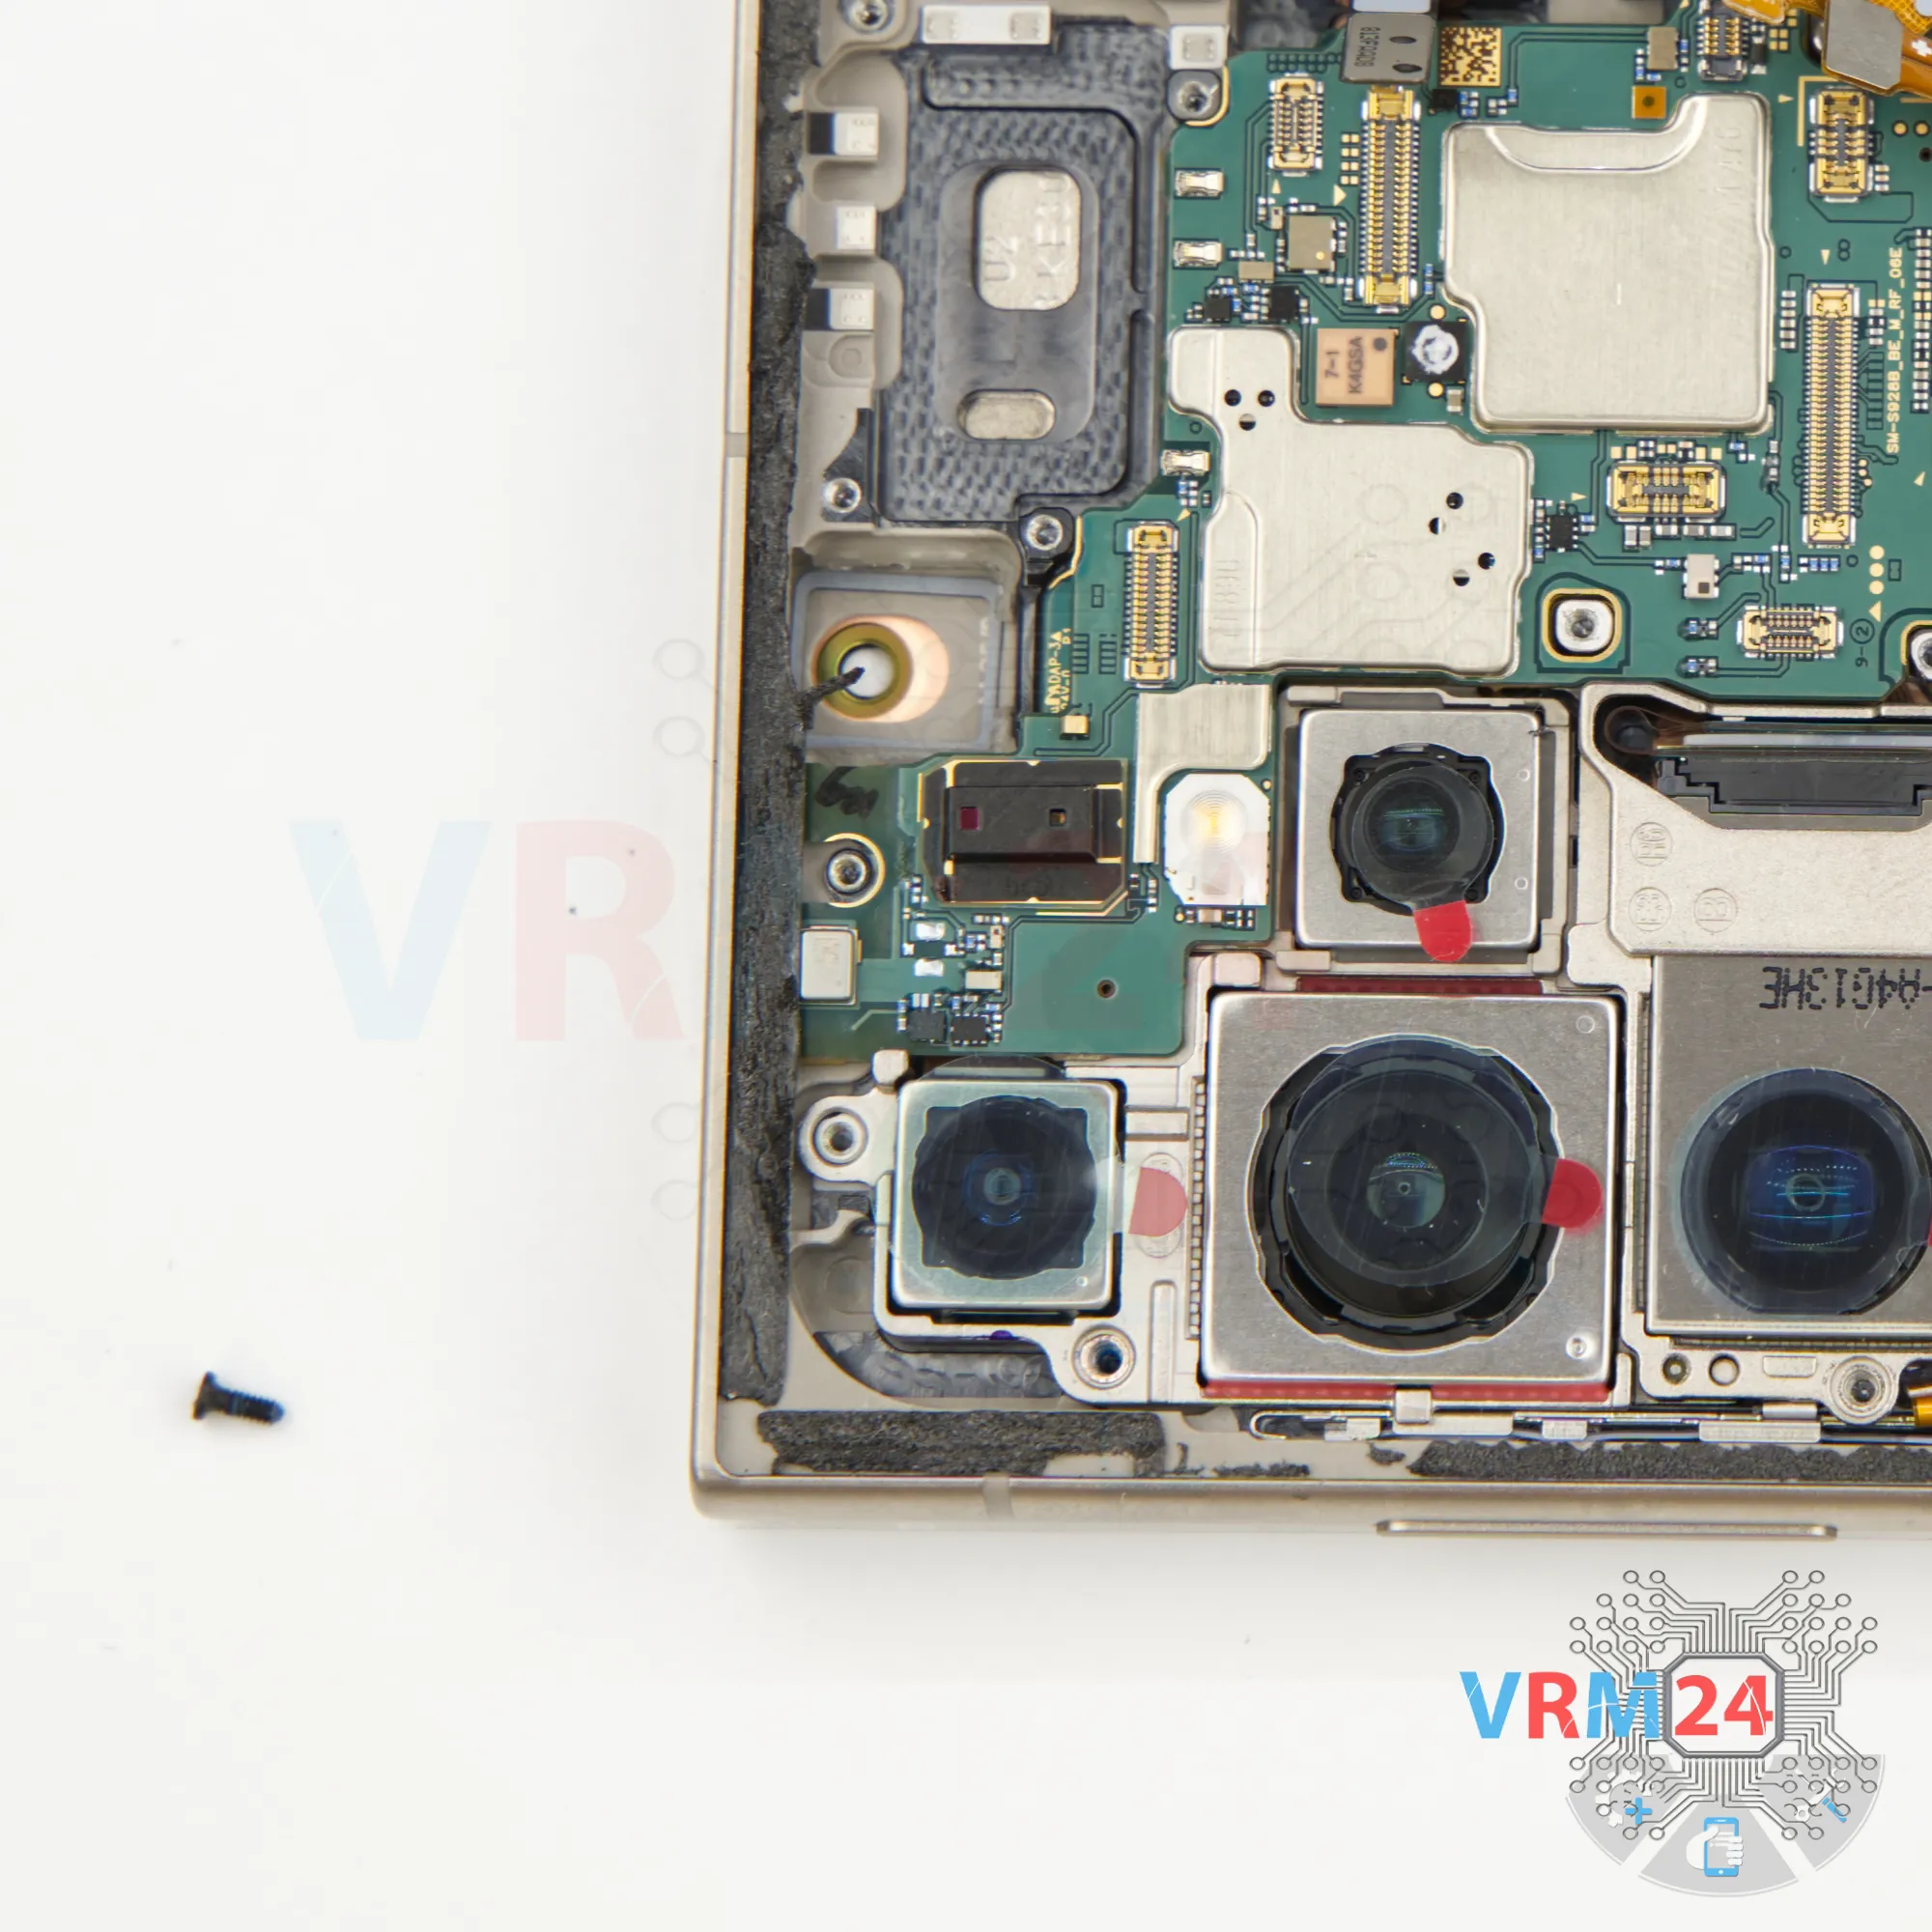
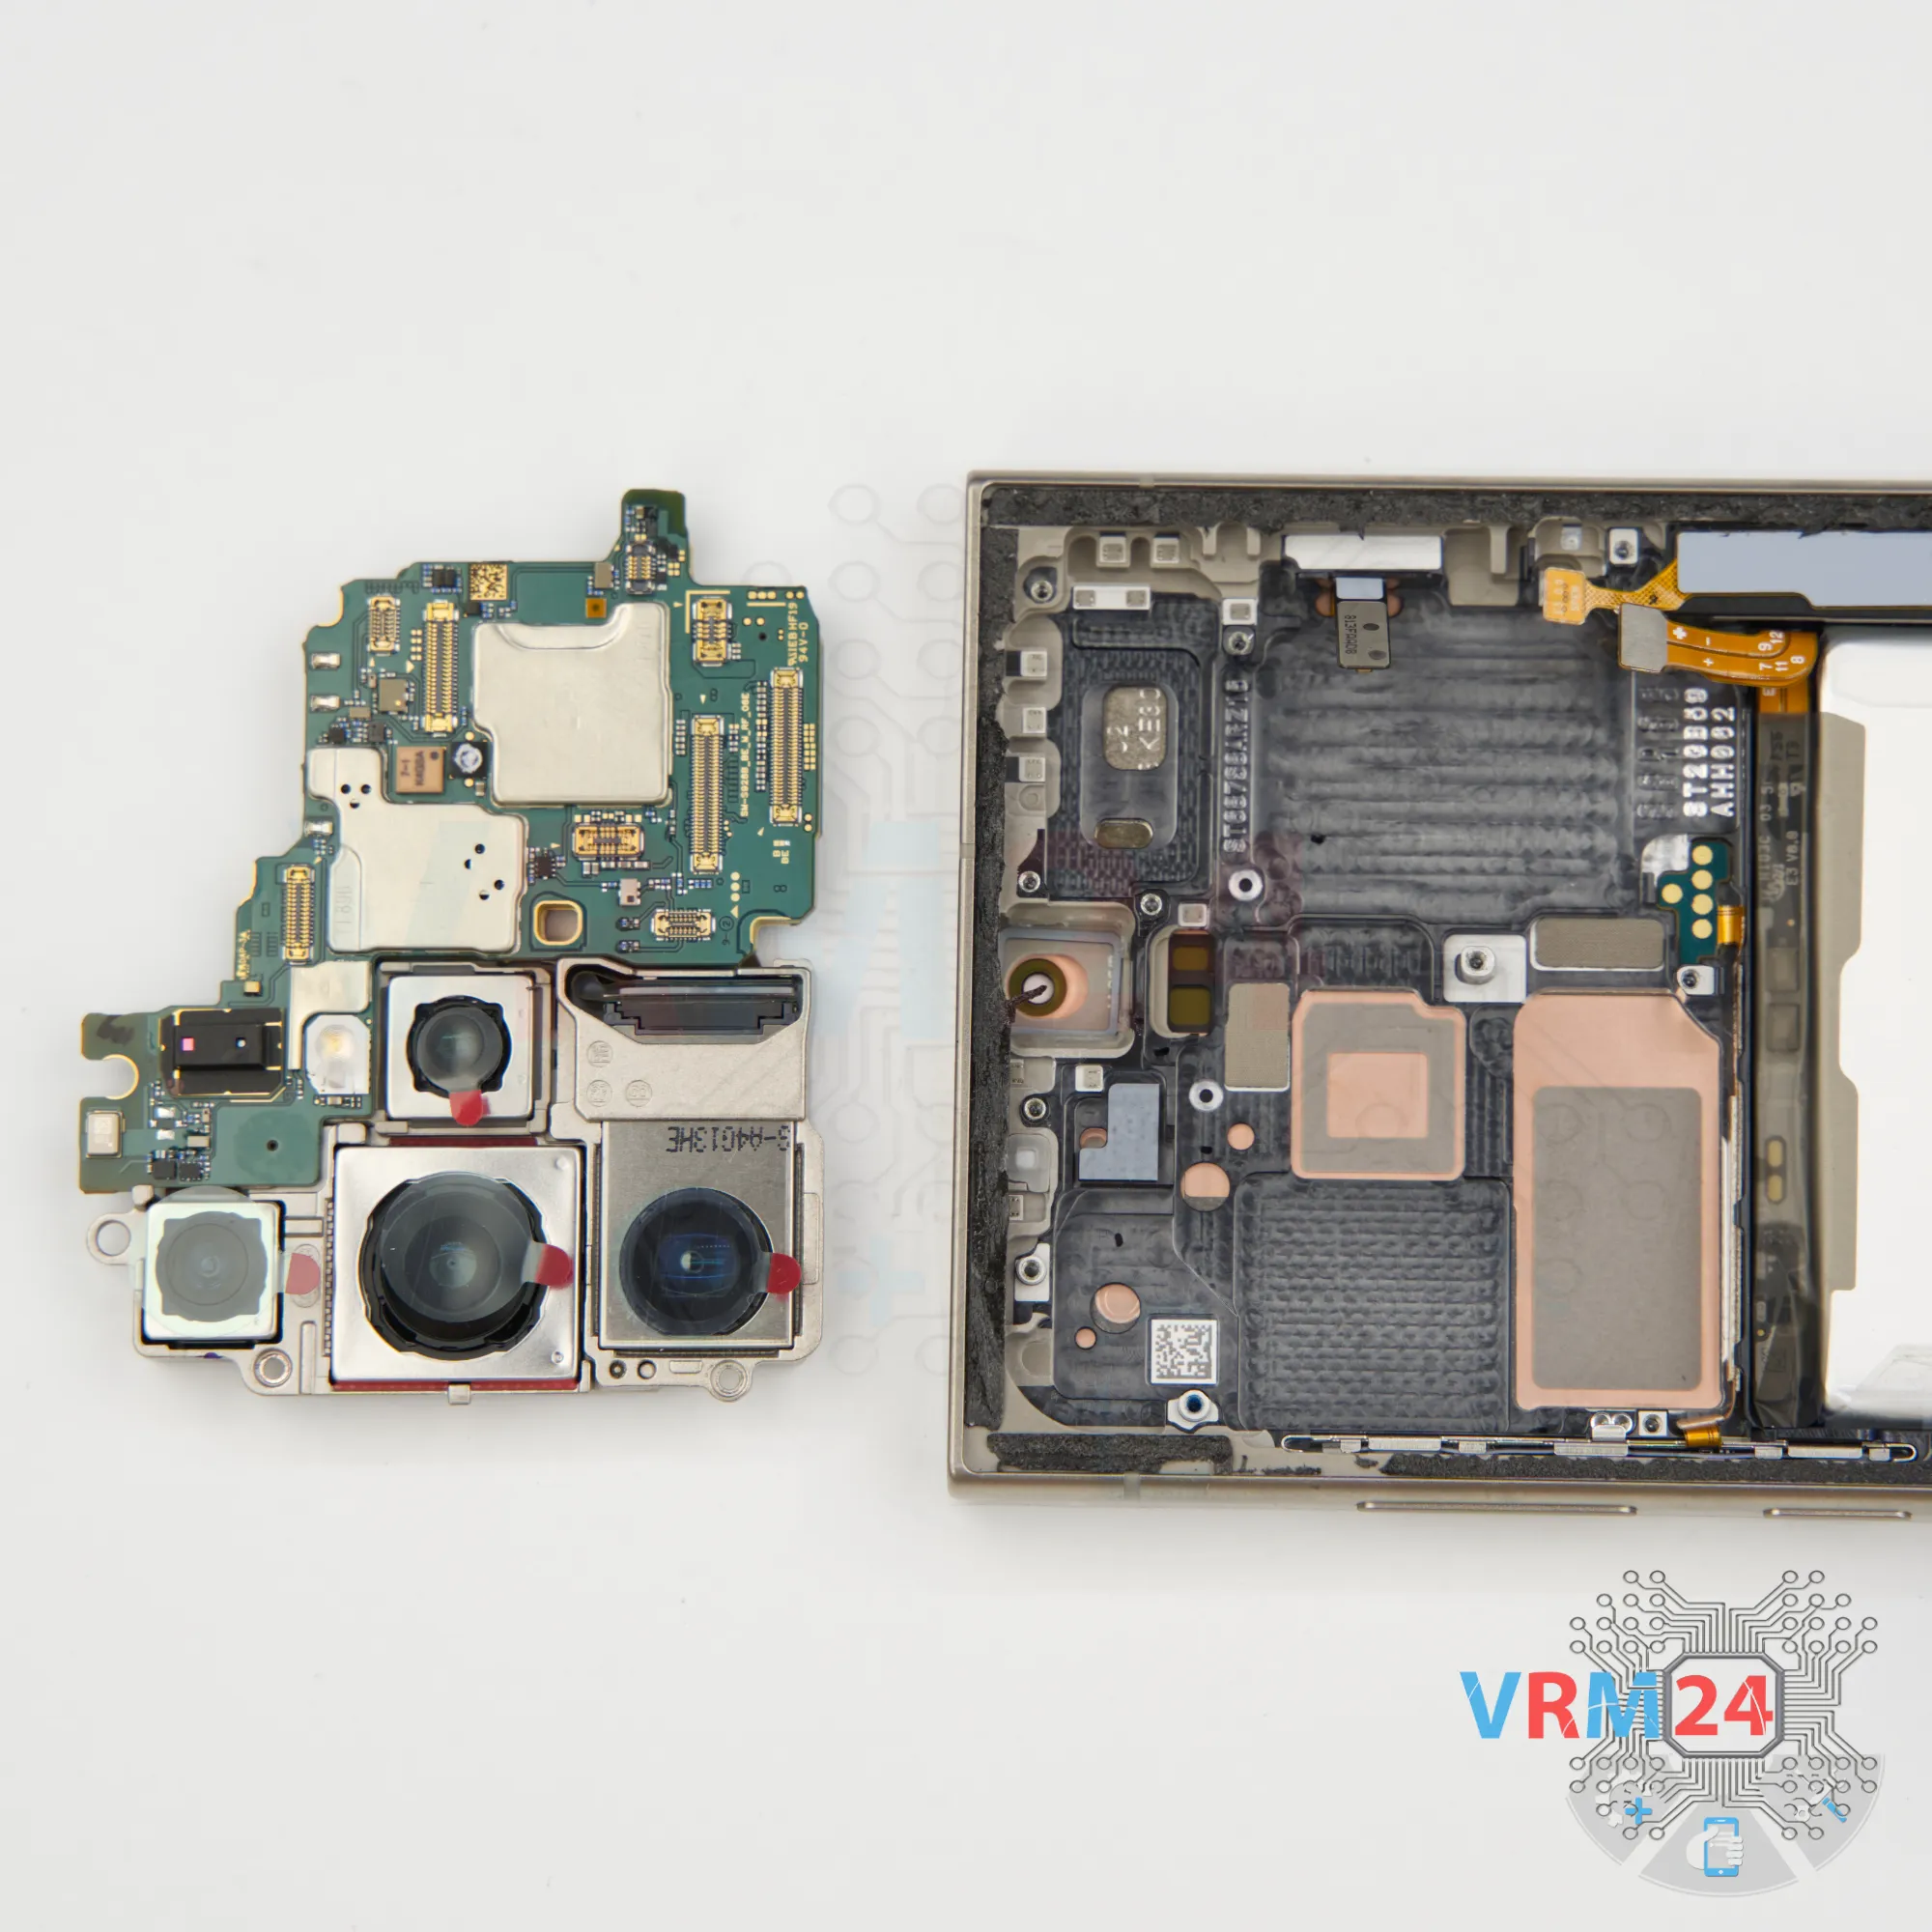
Step 18. Remove the motherboard
Once screws are out, we can gently lift the motherboard—it should come out smoothly.

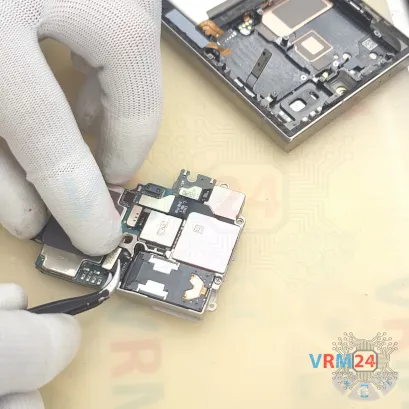
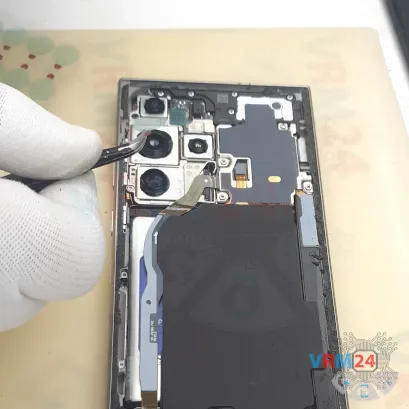
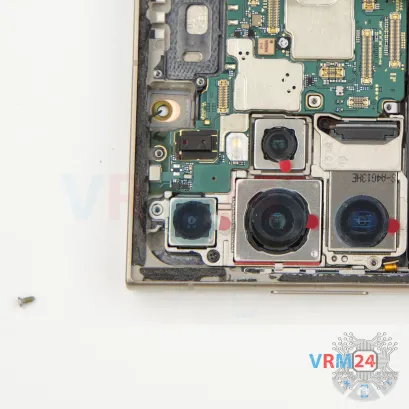
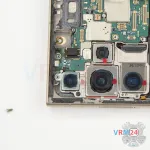
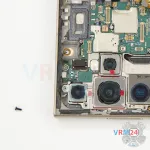
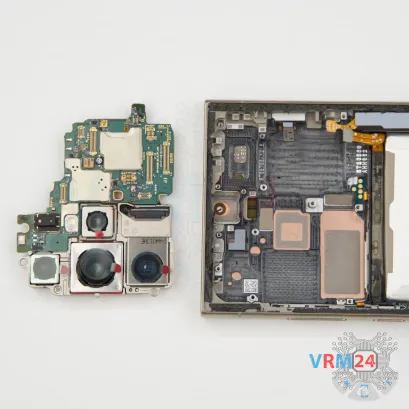
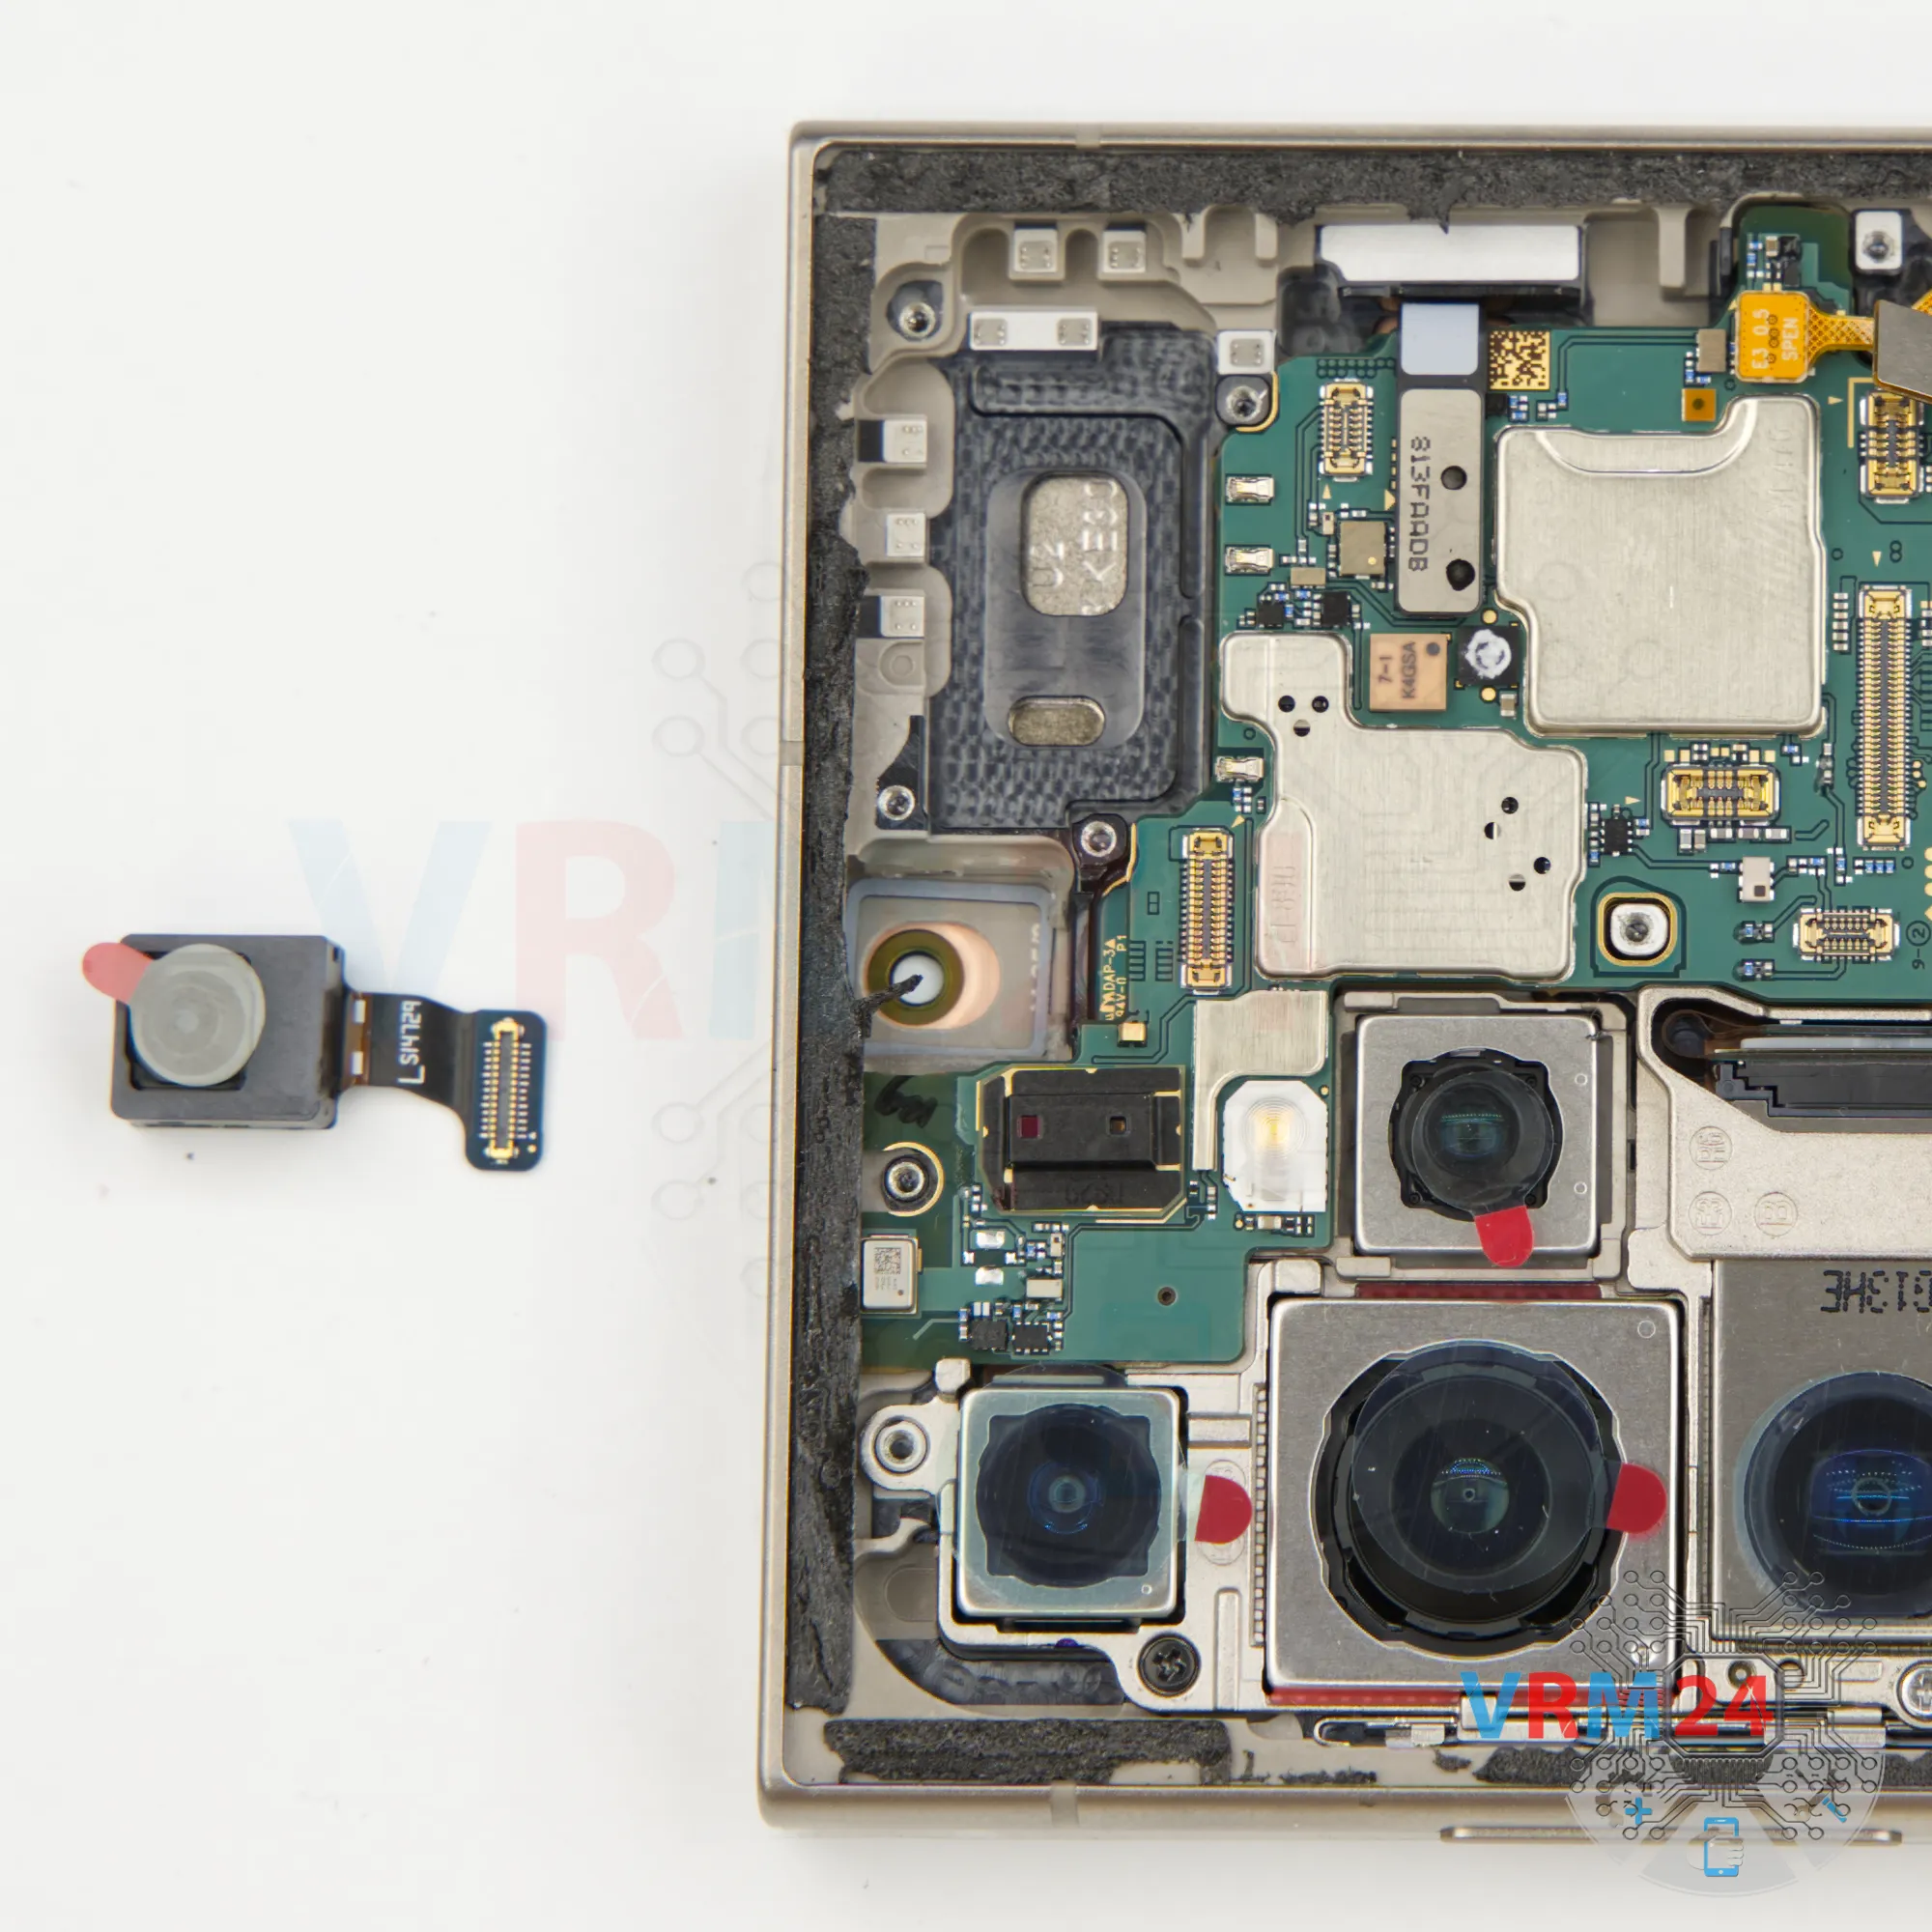
Step 19. Remove the cameras
Now flip the motherboard over and disconnect the rear camera module.
Unplug the connectors and set both the motherboard and the camera assembly aside.


Detailed disassembly instructions of Samsung Galaxy S24 Ultra SM-S928 in the video, made by our mobile repair & service center:
If you have a question, ask us, and we will try to answer in as much detail as possible. If this article was helpful for you, please rate it.

Disassembling\Repair has medium complexity and takes about minutes in time.
Our manual is suitable for all models Samsung Galaxy S24 Ultra SM-S928 — Samsung Galaxy S24 Ultra 5G SM-S928B, SM-S928B/DS, SM-S928U, SM-S928U1, SM-S928W, SM-S928N, SM-S9280, SM-S928E, SM-S928E/DS released for markets in different countries.
Back to the list