Teardown difficulty:
Easy
Duration:
17 min

Recommended tools

Disassembly/Repair of the mobile device Tronsmart Element T6 Plus with each step description and the required set of tools.


Author, currently - Quality Assurance Specialist


How to disassemble Tronsmart Element T6 Plus, Step 1/1

Step 1. Remove the protective film

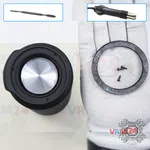
Peel off the protective ring.

⚠️️ Be careful! It is glued.

For careful separation, we recommend using a heat gun. At the same time, it is necessary to heat the surface, carefully, in order, not to damage the surface of the device.
How to disassemble Tronsmart Element T6 Plus, Step 2/1

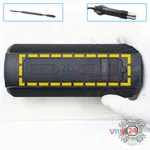
Step 2. Unscrew the screws

Using a screwdriver (Phillips 2.5 mm PH #00), unscrew the three screws.


How to disassemble Tronsmart Element T6 Plus, Step 3/1 How to disassemble Tronsmart Element T6 Plus, Step 3/2

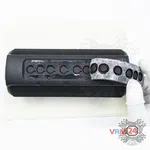
Step 3. Remove the buttons

Unstick / peel off the button keys.

⚠️️ The keys for buttons are glued! For careful separation, we recommend using a heat gun. At the same time, it is necessary to heat it carefully in order, not to damage anything.
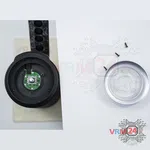
How to disassemble Tronsmart Element T6 Plus, Step 4/1 How to disassemble Tronsmart Element T6 Plus, Step 4/2

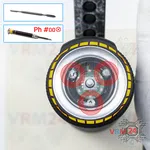
Step 4. Unscrew the screws

Using a screwdriver (Phillips 2.5 mm PH #00), unscrew the four screws.


How to disassemble Tronsmart Element T6 Plus, Step 5/1 How to disassemble Tronsmart Element T6 Plus, Step 5/2

Step 5. Open the cover

Pry over the edges carefully to open the upper cover.


How to disassemble Tronsmart Element T6 Plus, Step 6/1 How to disassemble Tronsmart Element T6 Plus, Step 6/2

Step 6. Open the cover

Remove the retaining rings.


How to disassemble Tronsmart Element T6 Plus, Step 7/1 How to disassemble Tronsmart Element T6 Plus, Step 7/2

Step 7. Unscrew the screws

Cut the holes for the screwdriver and with a screwdriver (Phillips 2.5 mm PH #00), unscrew the three screws, and detach the cover.
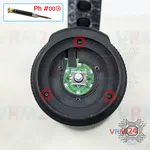
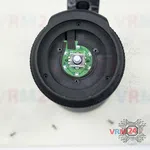
How to disassemble Tronsmart Element T6 Plus, Step 8/1 How to disassemble Tronsmart Element T6 Plus, Step 8/2

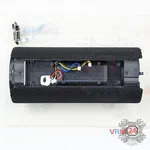
Step 8. Unscrew the screws

Using a screwdriver (Phillips 2.5 mm PH #00), unscrew the screws.

If the screws are different: ℹ️️ Be sure to note the location of the screws before disassembling. When assembling the device, screwing the screw in the wrong place may damage the device or its parts. To avoid damage, the removed screws and individual pieces (as gaskets or brackets) must be laid out in the appropriate order, or the screws and their holes in the phone must be marked with colored markers.
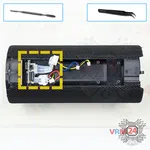
How to disassemble Tronsmart Element T6 Plus, Step 9/1 How to disassemble Tronsmart Element T6 Plus, Step 9/2

Step 9. Open the cover

Pry over the edges and detach the cover.


How to disassemble Tronsmart Element T6 Plus, Step 10/1 How to disassemble Tronsmart Element T6 Plus, Step 10/2

Step 10. Turn over the PCB

Carefully turn over the small circuit board.


How to disassemble Tronsmart Element T6 Plus, Step 11/1 How to disassemble Tronsmart Element T6 Plus, Step 11/2

Step 11. Disconnect the connector

Disconnect the connector and remove the small board.


How to disassemble Tronsmart Element T6 Plus, Step 12/1 How to disassemble Tronsmart Element T6 Plus, Step 12/2

Step 12. Unscrew the screws

Using a screwdriver (Phillips 2.5 mm PH #00), unscrew the two screws.


How to disassemble Tronsmart Element T6 Plus, Step 13/1 How to disassemble Tronsmart Element T6 Plus, Step 13/2

Step 13. Unscrew the screws

Using a screwdriver (Phillips 2.5 mm PH #00), unscrew the four screws.


How to disassemble Tronsmart Element T6 Plus, Step 14/1 How to disassemble Tronsmart Element T6 Plus, Step 14/2

Step 14. Turn over the PCB

Carefully turn the motherboard over.


How to disassemble Tronsmart Element T6 Plus, Step 15/1 How to disassemble Tronsmart Element T6 Plus, Step 15/2

Step 15. Disconnect the connectors

Pry up the connectors and remove the motherboard.


How to disassemble Tronsmart Element T6 Plus, Step 16/1 How to disassemble Tronsmart Element T6 Plus, Step 16/2

Step 16. Remove the daughterboard

Carefully remove the sub-board. On the sub-board are located head jack socket, charging port, usb port.


How to disassemble Tronsmart Element T6 Plus, Step 17/1 How to disassemble Tronsmart Element T6 Plus, Step 17/2 How to disassemble Tronsmart Element T6 Plus, Step 17/3

Step 17. In the housing remained

In the housing remains:

Detailed disassembly instructions of Tronsmart Element T6 Plus in the video, made by our mobile repair & service center:

If you have a question, ask us, and we will try to answer in as much detail as possible. If this article was helpful for you, please rate it.


Disassembling\Repair has easy complexity and takes about 17 minutes in time. Our manual is suitable for all models Tronsmart Element T6 Plus released for markets in different countries.


Back to the list
arrow_upward
arrow_upwardarrow_downward
arrow_forwardarrow_back